Table of Contents
Nothing derails a woodworking project faster than that moment of dread—you finish a cut, flip the board over, and see splintered, ragged edges marring what should have been a pristine surface. Tear-out doesn’t just waste expensive materials; it steals confidence and adds hours of sanding, filling, or even re-cutting to your workflow. Whether you’re crafting fine furniture or ripping plywood for built-ins, those frayed fibers are the enemy of professional results.
The good news? You don’t need to invest in a pricey track saw to achieve glass-smooth cuts. Today’s circular saw guides have evolved from simple straightedges into sophisticated systems engineered specifically to eliminate tear-out. But not all guides are created equal, and understanding what features actually prevent splintering—versus what just looks impressive in marketing photos—can save you from costly trial and error. Let’s dive deep into the mechanics of tear-out prevention and explore what makes a circular saw guide truly effective.
Top 10 Circular Saw Guide
Detailed Product Reviews
1. Kreg KMA2400 Rip-Cut Circular Saw Guide - Cutting Tool - Guide is Best for Regular (Side-Blade) Circular Saw - Ensure Compatibility Before Use - Woodworking Tools for Home Improvement

Overview: The Kreg KMA2400 Rip-Cut Circular Saw Guide transforms ordinary circular saws into precision cutting instruments. Designed for side-blade models, this system uses a universal sled that clamps to your saw’s base, enabling straight, accurate rip cuts up to 24 inches wide without measuring and marking each cut.
What Makes It Stand Out: Its ambidextrous design accommodates both left- and right-bladed saws, making it versatile for any user. Unlike many competitors, it explicitly supports worm drive saws and even jig saws, significantly expanding its utility. The large, ergonomic handle on the edge guide ensures consistent material contact and user comfort during extended use. The portable sled design means you can easily transfer it between job sites.
Value for Money: Positioned in the premium tier ($40-50), the KMA2400 justifies its cost through exceptional versatility and build quality. Comparable systems often cost more while offering less compatibility. For woodworkers needing one solution for multiple saws, it eliminates the need for separate guides.
Strengths and Weaknesses: Strengths include broad compatibility, easy setup, durable construction, and Kreg’s reputation for accuracy. Weaknesses involve potential interference with plastic upper blade guards and bulky guard designs that prevent flat sled mounting. Users with unconventional saw bases should verify fitment before purchasing.
Bottom Line: The KMA2400 is an excellent investment for DIY enthusiasts and professionals seeking a universal, portable cutting guide. Just confirm your saw’s guard design compatibility to avoid frustration.
2. Kreg KMA2685 Rip-Cut Circular Saw Guide - Cutting Tool - Guide is Best for Regular (Side-Blade) Circular Saw - Ensure Compatibility Before Use - Woodworking Tools for Home Improvement

Overview: The Kreg KMA2685 Rip-Cut Circular Saw Guide offers similar precision to its sibling KMA2400, converting standard circular saws into edge-guided cutting systems. This model focuses on traditional sidewinder saws, providing straight, repeatable cuts up to 24 inches without tedious measuring.
What Makes It Stand Out: Like the KMA2400, it features a universal sled for portability and ambidextrous operation for left/right-bladed saws. The large handle ensures stability and comfort. However, the critical distinction is its incompatibility with worm drive saws—a deliberate design choice that streamlines the sled for standard circular saws.
Value for Money: Priced similarly to the KMA2400 ($40-50), its value depends entirely on your saw type. For users with conventional sidewinder saws, it offers the same premium experience. Worm drive owners should avoid this model and choose the KMA2400 instead, making this slightly less versatile for multi-saw workshops.
Strengths and Weaknesses: Strengths include Kreg’s proven accuracy, quick setup, durable materials, and comfortable operation. The universal sled remains a standout feature. Weaknesses mirror the KMA2400: potential issues with plastic upper guards and oddly-shaped bases, plus the notable limitation of worm drive incompatibility.
Bottom Line: Choose the KMA2685 only if you exclusively use standard sidewinder circular saws. For workshops with multiple saw types or worm drive users, the KMA2400 remains the better, more flexible option despite identical pricing.
3. 164095-8 Circular Saw Guide Rip Fence Metal Rip Cut Circular Saw Guide Kit Fits for Circular Saws 5005BA, 5007NB, 5057KB, 5046DwB, 5621DWA Tool Parts(2pcs)

Overview: The 164095-8 is a no-nonsense metal rip fence designed primarily for specific Makita circular saw models. This straightforward accessory attaches directly to your saw’s base, providing a simple yet effective solution for making consistent parallel cuts without complex jigs.
What Makes It Stand Out: Its durable metal construction stands out in a market flooded with plastic alternatives, promising longevity under job site abuse. The 2-pack packaging offers exceptional value, providing a backup or allowing use across two saws. While marketed for Makita, it reportedly fits select DeWalt, Hitachi, and Metabo models, broadening its appeal.
Value for Money: Extremely affordable at under $20 for two units, this represents tremendous value for dedicated Makita users. OEM rip fences often cost twice as much for a single unit, making this an economical choice for replacing lost or damaged factory fences.
Strengths and Weaknesses: Strengths include robust metal durability, easy installation, precise adjustments, and excellent multi-pack value. It’s perfect for simple rip cutting tasks. Weaknesses involve limited model compatibility—despite some cross-brand claims, it works best only with specified Makita models. It lacks the versatility of full guide rail systems and offers no dust collection or anti-chip features.
Bottom Line: For Makita circular saw owners needing basic, reliable rip cuts, the 164095-8 is a cost-effective, durable solution. Those requiring more advanced guiding features should look at universal systems like Kreg’s offerings instead.
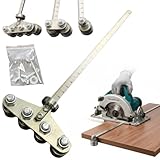
4. Adjustable Cutting Machine Base Guide, Innovative Clamp Circular Saw Guide Electric Circular Saw Milling Positioning Clamp Precision Wood Cutting Guide Pros & Hobbyists

Overview: This generic Adjustable Cutting Machine Base Guide targets budget-conscious buyers seeking precision cutting capabilities. Marketed with impressive technical jargon, it promises to convert circular saws and marble cutters into precision instruments through a clamping system accommodating 145-208mm blade diameters. The product description includes oddly-placed gift suggestions, signaling potential marketing manipulation.
What Makes It Stand Out: The bidirectional anti-shift buckle with self-adjusting mechanism is an innovative feature rarely seen in this price class. Ergonomic handles and flexible side-distance adjustments provide customization for various cutting scenarios. Its compatibility range spans from 4-inch to 8-inch saws, including dusty cutting machines and marble saws, making it theoretically versatile.
Value for Money: Priced in the $25-35 range, it undercuts premium brands significantly. However, the value proposition is questionable due to its unbranded nature and vague quality assurances. While feature-rich on paper, the lack of established manufacturer support raises concerns about long-term reliability and warranty support.
Strengths and Weaknesses: Strengths include wide size compatibility, ergonomic design, innovative clamping mechanism, and lightweight portability. Weaknesses center on unknown build quality, questionable durability of plastic-metal hybrid construction, compatibility ambiguities with specific saw models, and marketing hyperbole that oversells capabilities.
Bottom Line: This guide might suit hobbyists on strict budgets, but professionals should avoid it. The risk of misalignment and premature failure outweighs the initial savings. Invest in proven brands like Kreg or OEM accessories for critical applications where precision and reliability are non-negotiable.
5. 381091-00 circular saw guide Fits DW DC390K, DW936, DC300, DC310, DCS391B, DCS393, DC390B edge guide Cordless Circular Saw

Overview: The 381091-00 is an OEM-style replacement rip fence engineered specifically for DeWalt cordless circular saws. This genuine accessory restores factory functionality to compatible models, ensuring straight, consistent rip cuts without the complexity of third-party guide systems. It measures approximately 11.8 x 3 x 0.43 inches, matching original specifications precisely.
What Makes It Stand Out: Its exhaustive compatibility list covering dozens of DeWalt models (DW936, DC390 series, DCS391B, DCS393, and more) ensures a perfect fit where universal guides might falter. As a direct replacement, it maintains your saw’s original design integrity and doesn’t interfere with existing safety features or base geometry, preserving warranty compliance.
Value for Money: Typically priced $15-25, it offers reasonable value for an OEM-grade component. While more expensive than generic alternatives, the precise fit eliminates adjustment headaches and potential accuracy issues. For professionals who’ve lost original fences, it restores full functionality at a fraction of new saw cost.
Strengths and Weaknesses: Strengths include perfect model-specific fit, durable metal construction, straightforward installation, and preservation of factory specifications. It integrates seamlessly without modifications. Weaknesses involve limited application—it’s purely a rip fence, not a comprehensive guide system. It only fits listed DeWalt models, offering no cross-brand versatility.
Bottom Line: For DeWalt circular saw owners missing their factory rip fence, the 381091-00 is the definitive solution. It delivers exact-fit reliability that universal systems cannot match. However, those needing advanced cutting capabilities should consider supplementing it with a full guide rail system for more complex projects.
6. Edge Rip Guide for Ryobi P508 Circular Saw 204585001

Overview: The Edge Rip Guide for Ryobi P508 is an OEM replacement part designed specifically for Ryobi’s popular cordless circular saw. This straightforward accessory attaches directly to the saw’s base, providing a simple yet effective solution for achieving consistent rip cuts without repeated measuring and marking. As an official replacement component bearing part number 204585001, it promises perfect compatibility and integration with your existing tool, restoring factory functionality for precision woodworking and general construction tasks.
What Makes It Stand Out: Unlike universal guides that require adapters and compromise on fit, this dedicated Ryobi component offers seamless integration with zero guesswork. The installation process is remarkably straightforward—simply slide it into the existing mounting slots and secure. Its design eliminates the frustrating trial-and-error setup that plagues third-party accessories, making it particularly valuable for Ryobi loyalists who prioritize workflow efficiency. The guide provides stable, consistent width settings that lock securely, ensuring repeatable cuts throughout your project.
Value for Money: Priced as an OEM accessory, this guide typically costs less than universal systems while delivering superior integration. For Ryobi P508 owners, it represents excellent value—why spend more on complicated aftermarket solutions when you can have a perfect factory fit? However, its single-tool compatibility limits its value proposition if you own multiple saw brands.
Strengths and Weaknesses: Strengths include perfect Ryobi P508 compatibility, tool-free installation, reliable width adjustment, and durable construction. Weaknesses are its exclusivity to one saw model, lack of included clamps for workpiece stabilization, and basic functionality compared to full-length guide rails. The guide also lacks anti-splintering features found in premium systems.
Bottom Line: This is an essential purchase for Ryobi P508 owners needing to replace a lost or damaged rip guide, offering factory-perfect performance at a reasonable price. For those seeking versatility across multiple tools, however, a universal guide rail system would be a wiser investment.
7. Circular Saw Guide Rail Fits 12"& 7.5"Saw Base, Adjustable Cutting Guide for Precision Woodworking, Electric Circular Guide Specially Designed for Precision Cutting and Milling Tasks

Overview: This universal circular saw guide rail system is engineered for versatility across a wide range of saws, accommodating blade sizes from 7.5 to 12 inches. Constructed from lightweight yet robust aluminum alloy, it features an adjustable track design that adapts to various project lengths. The system aims to deliver professional-grade precision for both intricate DIY tasks and larger-scale woodworking projects, making it a flexible solution for craftsmen who use multiple cutting tools.
What Makes It Stand Out: The dual-latch secure locking system distinguishes this guide from competitors, providing exceptional stability by eliminating unwanted movement during operation. This engineering choice ensures repeatable, accurate cuts even under demanding conditions. Its scalable track length is another standout feature, allowing users to customize the guide for everything from short precision cuts to continuous rips on sheet goods, a flexibility rarely found in fixed-length systems at this price point.
Value for Money: Positioned in the mid-range price bracket, this guide offers features typically reserved for premium brands. The universal compatibility alone adds significant value, eliminating the need to purchase separate guides for different saws. While no-name brands sometimes compromise on quality, the aluminum alloy construction and thoughtful locking mechanism suggest durability that justifies the investment, particularly for serious hobbyists or professionals.
Strengths and Weaknesses: Strengths include versatile saw compatibility, stable dual-latch system, adjustable length, durable aluminum construction, and good portability. Weaknesses involve potentially complex initial setup, unknown brand reliability, possible alignment issues with extreme extensions, and the likelihood that clamps must be purchased separately. The guide may also lack anti-splinter features.
Bottom Line: An excellent choice for woodworkers seeking a versatile, expandable guide rail system without breaking the bank. The dual-latch stability and wide compatibility make it particularly attractive, though users should verify clamping solutions before purchasing. Ideal for those who prioritize adaptability across multiple tools.
8. Swanson Tool Co CG100 Anodized Aluminum 100 inch Cutting Guide with joiner bar, (2) C-clamps and (4) thumb screws

Overview: The Swanson CG100 is a professional-grade cutting guide system that combines two 50-inch anodized aluminum extrusions to create an impressive 100-inch cutting capacity. This comprehensive kit includes essential accessories—two C-clamps and four thumb screws—providing everything needed for immediate deployment. Designed to guide circular saws, sabre saws, routers, and utility knives, its low-profile architecture ensures minimal interference while maintaining exceptional rigidity for precision applications.
What Makes It Stand Out: Swanson’s reputation for precision measuring tools extends beautifully to this cutting guide, offering reliability that generic brands cannot match. The included joiner bar creates a seamless 100-inch span without the flex common in single-piece extrusions of this length. The anodized aluminum construction resists corrosion and wear while maintaining a lightweight profile. Most notably, the complete package includes quality C-clamps, eliminating the hidden costs often associated with guide rail systems.
Value for Money: While priced higher than basic guides, the CG100 delivers exceptional value through its premium materials, trusted brand name, and comprehensive accessory package. The ability to break down into two 50-inch sections enhances storage convenience and transportability—features professionals will appreciate. When compared to purchasing clamps and joiners separately, this all-in-one kit represents significant savings.
Strengths and Weaknesses: Strengths include impressive 100-inch capacity, durable anodized aluminum, included clamps and hardware, low-profile design, and Swanson brand reliability. Weaknesses are the two-piece design requiring careful alignment, higher price point than entry-level options, and potential for slight deflection at the joint if not properly secured. The system lacks integrated anti-splinter strips.
Bottom Line: A top-tier solution for professionals and serious woodworkers requiring long, accurate cuts. The Swanson CG100’s quality construction, generous length, and complete accessory package justify its premium price. Perfect for those who value brand reliability and comprehensive kits over budget alternatives.
9. Milescraft 1409 Track Saw Guide - Universal for 7-1/4" Circular Saws, 50" Cutting Range, 2" Depth, Aluminum

Overview: The Milescraft 1409 transforms standard 7-1/4-inch circular saws into track saw-like precision tools. This universal guide features robust all-metal construction with a 50-inch cutting range and an impressive 2-inch cutting depth capacity. The system includes a red cutting strip designed to minimize splintering and chipping, addressing a common complaint with basic guides. Engineered for universal compatibility, it accommodates most circular saws on the market, making it an accessible upgrade for DIY enthusiasts and professionals alike.
What Makes It Stand Out: The 2-inch depth capacity is exceptional, allowing users to cut through standard interior doors and thick stock—capabilities beyond most competitors. Milescraft’s red anti-splinter strip demonstrates thoughtful engineering, significantly improving cut quality on veneered and laminated materials. The all-metal construction dramatically reduces flex compared to plastic-based systems, ensuring straight cuts even under pressure. Its low-profile design maintains saw stability while maximizing cutting depth.
Value for Money: Milescraft delivers premium features at a mid-range price point. The universal design eliminates the need for brand-specific accessories, while the included splinter guard adds value typically requiring aftermarket purchase. For users of 7-1/4-inch saws, this represents one of the best price-to-performance ratios in the guide rail market, especially considering its durability and precision enhancements.
Strengths and Weaknesses: Strengths include universal 7-1/4-inch compatibility, exceptional 2-inch depth capacity, anti-splinter strip, rigid all-metal construction, and low-profile design. Weaknesses are the fixed 50-inch length (extensions sold separately), limitation to smaller saws, and potentially complex initial setup for some saw models. The guide may be heavier than plastic alternatives.
Bottom Line: The Milescraft 1409 is the best universal track saw guide for 7-1/4-inch circular saws, offering professional-grade features at a reasonable price. Its depth capacity and splinter control make it ideal for door installations and fine woodworking. Highly recommended for users seeking track saw precision without the track saw investment.
10. Positioning Calipers for Precise Measurements & Easy Wood Cutting, Stainless Steel Precision Cutting Guide for Circular Saws, Adjustable Guide Rail, Positioning Calipers for Circular Skill Hand Saw
Overview: This stainless steel positioning guide, oddly marketed as “calipers,” serves as a robust cutting rail for circular saws. Designed for precision and durability, it features adjustable length settings and promises accurate straight cuts across wood, plastic, and metal. The stainless steel construction suggests workshop-grade durability, while its universal design aims to accommodate various circular saw models. This tool targets woodworkers and DIYers seeking a simple, reliable cutting guide without complex features.
What Makes It Stand Out: The stainless steel construction differentiates this from aluminum and plastic competitors, offering superior rigidity and resistance to bending or wear. Its emphasis on multi-material capability suggests versatility beyond typical woodworking applications. The product’s straightforward adjustment mechanism appears designed for quick setup, appealing to users who value simplicity over elaborate features. The “positioning caliper” concept, while confusingly named, implies precision measurement integration.
Value for Money: Likely positioned as a budget-friendly alternative to brand-name guides, the stainless steel build offers durability that exceeds its price class. However, the vague product description and unknown brand raise questions about quality control and support. While the material choice is excellent, missing details about included hardware (clamps, connectors) suggest potential hidden costs that diminish its apparent value proposition.
Strengths and Weaknesses: Strengths include durable stainless steel construction, multi-material versatility, simple operation, and probable affordability. Weaknesses are ambiguous product naming, unclear specifications, unknown brand reputation, potentially incomplete accessory package, and questionable stability compared to full rail systems. The lack of anti-splinter features and integrated clamping solutions are notable omissions.
Bottom Line: This stainless steel guide shows promise for budget-conscious users prioritizing material durability, but its vague description and unclear inclusions make it a risky purchase. Recommended only for those willing to gamble on unknown brands or who can verify specifications before buying. Established alternatives offer more certainty for critical applications.
Understanding Tear-Out: The Enemy of Clean Cuts
What Causes Tear-Out in Woodworking?
Tear-out occurs when wood fibers are torn rather than cleanly severed, typically happening as the blade exits the material. The cutting action of a saw blade is essentially a series of tiny chisels (the teeth) scooping material away. When these teeth push against the wood grain’s natural structure, especially on the bottom face of your workpiece where there’s no support, fibers splinter away from the surface instead of cutting cleanly. The problem intensifies with cross-grain cuts, figured wood, and brittle materials like veneer-core plywood.
Why Circular Saws Are Particularly Prone to Tear-Out
Unlike table saws where the workpiece is fully supported by a stable tabletop, circular saws operate as handheld tools with a base plate that can flex, tilt, or vibrate microscopically during cutting. The blade’s rotation pulls upward on the wood fibers at the top of the cut and pushes downward at the bottom, creating unsupported stress. Add in the typical 24-tooth framing blade most users keep installed—designed for speed, not finesse—and you’ve got a perfect recipe for splintering. Even slight wobble in the cut line amplifies tear-out exponentially.
How Circular Saw Guides Eliminate Tear-Out
The Physics Behind Guide-Assisted Cutting
Quality guides transform your circular saw into a precision cutting system by eliminating three tear-out culprits: lateral movement, vertical instability, and unsupported fibers. The guide rail provides a zero-clearance pathway that prevents the blade from wandering, while integrated anti-chip features support wood fibers right up to the cut line. This support system acts like a surgical assistant, holding material in place until the blade has completely passed through.
Guide Features That Directly Combat Tear-Out
Effective guides employ multiple strategies simultaneously. Rigid rails prevent micro-deflections that cause blade chatter. Splinter guards or anti-chip strips provide downward pressure directly adjacent to the blade path. Zero-clearance strips eliminate the gap between the blade and guide edge, leaving no room for fibers to lift. Combined, these features create a controlled cutting environment where each tooth shears fibers cleanly rather than ripping them.
Key Features to Look for in Anti-Tear-Out Saw Guides
Guide Rail Material and Stability
The rail’s material composition determines its vibration-dampening capabilities. Extruded aluminum offers an excellent strength-to-weight ratio, but look for profiles with internal ribbing or reinforcement channels that resist flexing. Some premium systems use magnesium alloys for even greater rigidity. The rail’s base should feature non-slip strips that grip the material without adhesive, preventing micro-shifts during cutting. Avoid plastic rails—they may be lightweight but they transmit vibration and can deflect under pressure.
Clamping Mechanisms That Prevent Movement
Even microscopic rail movement during a cut can cause tear-out. Quick-action cam clamps provide consistent downward pressure without overtightening, which can actually bow the rail slightly. Some systems use vacuum suction bases for sheet goods, creating a temporary bond that eliminates clamping entirely. For manual clamps, look for designs that apply pressure directly over the rail’s support ribs rather than at the edges, ensuring even force distribution.
Zero-Clearance Strip Integration
The most critical anti-tear-out feature is a replaceable zero-clearance strip that fits snugly against the blade. This strip should be easily replaceable without tools and made from a material slightly softer than your workpiece—UHMW plastic or hardwood work well. The strip must be precisely positioned to match your specific saw’s blade offset, creating a custom-fit channel that supports fibers until the last possible moment. Some systems allow you to “kerf” the strip with your own saw, ensuring perfect alignment.
Splinter Guards and Anti-Chip Inserts
Look for dual-layer splinter guards: a rigid backing strip that maintains alignment and a flexible leading edge that presses firmly against the workpiece surface. The best designs use transparent material so you can see your cut line. Anti-chip inserts should run the full length of the cut and be reversible or replaceable. Some advanced systems feature spring-loaded inserts that automatically adjust to material thickness.
Length and Extension Options
Tear-out risk increases when you stop mid-cut to reposition a guide. Modular systems with seamless connectors let you extend rails for full-length cuts without creating bump points. Check that connection points don’t create gaps in the splinter guard or anti-chip strip. For 8-foot sheet goods, a 100-inch rail is ideal. For cabinetry work, consider a system offering both long and short rail options that use the same anti-tear-out components.
Types of Circular Saw Guides and Their Tear-Out Performance
Universal Track Saw Guides
These third-party systems work with any circular saw via an adapter plate or shoe. The best models feature adjustable cams that eliminate play between your saw’s base and the rail. Look for universal guides with tear-out protection on both sides of the blade—essential for making consecutive cuts without flipping the rail. The trade-off is setup time; you’ll need to verify blade alignment each time you mount the saw.
Manufacturer-Specific Guide Systems
When a tool company designs a guide for their own saws, integration is seamless. The saw’s base often includes tabs or grooves that mate precisely with the rail, eliminating the need for adjustment. These systems typically offer superior anti-chip features because they’re engineered around the exact blade location and rotation direction. However, you’re locked into that brand’s ecosystem, and replacement parts may be proprietary and expensive.
DIY and Custom-Built Guides
A well-built shop-made guide can outperform commercial options if you prioritize tear-out prevention. The key is using stable material like Baltic birch plywood or MDF with laminate faces. Integrate a replaceable hardwood edge that you can run your saw against to create a custom zero-clearance fit. Add self-adhesive UHMW tape along the cutting edge and use toggle clamps positioned to avoid flexing the guide. The downside? No quick-adjust features and you’ll need to rebuild the anti-chip components periodically.
Edge Guides vs. Track Guides
Edge guides clamp to your workpiece and provide a straight reference for the saw’s base to ride against. While better than freehand cutting, they don’t support fibers near the blade. Track guides, where the saw attaches to the rail, provide superior tear-out control because they eliminate the gap between the blade and guide edge. For anti-tear-out performance, track guides are the clear winner.
Material-Specific Considerations for Tear-Out Prevention
Plywood and Veneered Panels
These materials are tear-out magnets due to thin face veneers. Use a guide with a fresh splinter guard for every major project. Set your blade depth to extend just 1/8-inch below the material—any more increases tear-out risk. Consider making a shallow scoring cut (1/16-inch deep) first, then completing the cut on a second pass. This technique severs surface fibers before the full-depth cut stresses them.
Solid Hardwoods
Hardwood tear-out often follows the grain pattern, so guide alignment relative to grain direction matters. For cross-grain cuts on species like oak or maple, use a slower feed rate and ensure your splinter guard applies firm downward pressure. Some woodworkers add a strip of blue painter’s tape along the cut line for extra fiber support, though a quality guide should make this unnecessary. The guide’s anti-chip strip should be replaced more frequently when cutting hardwoods, as the blade dulls it faster.
Laminated and Coated Materials
Melamine and HPL-coated panels require pristine edges for professional results. The rigid coating cracks and chips easily, so blade sharpness is critical. Use a guide with a rigid, non-flexing anti-chip insert that won’t lift away from the surface. Some pros apply a thin bead of CA glue along the cut line on the show face, letting it cure for 30 seconds before cutting—this reinforces the coating. Your guide must provide absolutely zero movement, as even a slight shift cracks the laminate.
MDF and Engineered Wood Products
While MDF doesn’t have grain to tear, its dense, fibrous structure can crumble at the edge. Use a guide with a wide, stable base that prevents the saw from rocking, which compresses the MDF unevenly. A carbide-tipped blade with triple-chip grind works best, and your guide’s zero-clearance strip should be particularly snug—MDF dust can pack into gaps and cause binding. Consider cutting with the good face down, as the guide’s splinter guard better supports the top surface.
Setup Techniques for Maximum Tear-Out Prevention
Proper Guide Alignment and Registration
Always position your guide so the saw cuts on the waste side of your line, but minimize this offset. Use a single, reliable measuring point on your saw’s base—never assume the edge of the base plate is perfectly parallel to the blade. Before committing to the cut, run the saw along the guide (powered off) to check for any binding or deviation. For critical cuts, clamp a scrap piece and make a test cut first, checking both faces for tear-out.
Blade Selection and Height Adjustment
Install a blade with 40-60 teeth for finish work, and ensure it’s sharp. A dull blade pushes fibers rather than cutting them. Set blade height so the lowest tooth extends only 1/4-inch below the material—this reduces the exit angle where tear-out occurs. Some guides include built-in blade depth gauges that reference off the rail height, ensuring consistent setup. Never use a blade with missing or damaged teeth, as this creates uneven cutting forces that guides can’t compensate for.
Cutting Speed and Feed Rate Optimization
Even the best guide can’t prevent tear-out if you force the cut. Let the blade do the work at its designed speed—typically moving at a pace where the motor maintains its full RPM without laboring. Listen to the motor; if it bogs down, you’re feeding too fast. For the first inch and last inch of a cut, reduce feed rate by half—this is where tear-out most commonly occurs as the blade enters and exits the material.
Scoring Cuts: When and How to Use Them
For ultra-critical veneered work, make a scoring cut first: set your blade depth to 1/16-inch and run the cut with your guide. This severs surface fibers cleanly. Then reset blade depth and make the full cut. The second pass follows the kerf of the first, eliminating tear-out. Some advanced guides include a scoring cut setting or dual-blade capability. While time-consuming, this technique produces edges that need zero sanding.
Advanced Tips for Professional Results
Backing Boards and Sacrificial Surfaces
Place a sacrificial sheet of 1/4-inch MDF underneath your workpiece when cutting. This supports the bottom face fibers completely, preventing blow-out as the blade exits. The guide clamps through both layers, and the zero-clearance strip presses firmly against the sacrificial board. This technique is especially valuable when cutting expensive hardwoods or pre-finished materials. The sacrificial board can be reused until its surface becomes too chewed up.
Cutting Direction and Grain Orientation
Always cut with the good face down when using a standard circular saw—the guide’s splinter guard protects the top surface. However, if your guide has a bottom-mounted anti-chip strip, experiment with orientation. For plywood, orient the sheet so the blade cuts across the top veneer layer’s grain direction first; the bottom veneer, supported by the guide, will tear less. On solid wood, cut across the grain from the edge with the tightest grain lines toward the more open grain.
Maintaining Your Guide System for Consistent Performance
Replace zero-clearance strips after every major project or when you switch blade kerf widths. Clean anti-chip inserts with a soft brush and mild solvent to remove resin buildup. Check rail straightness monthly by laying it on a known-flat surface and looking for gaps—aluminum rails can bend if dropped. Lubricate any sliding adjustment mechanisms with dry PTFE spray, never oil-based lubricants that attract dust. Store rails vertically to prevent sagging, and protect the splinter guard edge from impacts.
Common Mistakes That Cause Tear-Out Even With Guides
Incorrect Clamping Pressure
Overtightening clamps bows the rail upward in the center, creating a gap between the anti-chip strip and workpiece. This allows fibers to lift. Use just enough pressure to prevent sliding—test by trying to shift the rail with moderate hand force. For vacuum-based systems, ensure the seal is clean and the surface is dust-free; a weak seal allows micro-movement that causes tear-out.
Worn or Damaged Splinter Guards
A splinter guard that’s been nicked by the blade or compressed from repeated use loses its effectiveness. The leading edge should be crisp and make full contact with the material. If you can slide a business card under the guard anywhere along its length, it’s time to replace it. Some woodworkers try to flip or rotate the guard, but this rarely works—the compression set is permanent.
Misaligned Saws and Incompatible Bases
Using a saw with a worn or warped base plate defeats the guide’s precision. Check your saw’s base for flatness on a granite surface plate or known-flat cast iron top. Even 0.010-inch of warp creates a gap. When using universal guide systems, ensure the adapter plate is perfectly parallel to the blade. A misaligned saw cuts at a slight angle, causing the blade to exit the material unevenly and tear fibers even with a perfect guide setup.
Investment vs. Value: What to Expect at Different Price Points
Budget-Friendly Options That Still Deliver
Entry-level guides ($30-$75) can prevent tear-out if they include a basic zero-clearance strip and stable rail. Expect aluminum construction with simple clamping systems. The compromise is usually in the anti-chip strip material, which may compress faster, and rail straightness over longer lengths. For occasional use and softer materials, these provide good value. Look for models with replaceable strips available as affordable consumables.
Professional-Grade Features Worth the Premium
High-end systems ($150-$300) justify their cost through superior materials and engineering. Expect extruded rails with internal damping channels, carbide-reinforced anti-chip inserts, and tool-free adjustment mechanisms. These guides maintain consistent pressure across 8-foot cuts without sagging. The splinter guard materials are more durable and often self-healing to minor nicks. For daily use, premium materials, or client-facing work, the time savings and material waste reduction quickly offset the higher price.
Integrating Guides Into Your Workflow
Storage and Transport Solutions
Protect your guide’s precision by storing rails in vertical racks with padded cradles, never leaning against a wall where they can bend. For job sites, invest in a hard case with custom foam inserts—impacts can knock rails out of straightness. Keep spare zero-clearance strips and splinter guards in airtight containers to prevent moisture absorption and warping. A dedicated tool bag for clamps, adapters, and accessories prevents setup delays.
Quick-Setup Strategies for Job Sites
Pre-mark your most common cut widths on the rail itself with a permanent marker—this speeds positioning without measuring. Keep a dedicated circular saw permanently mounted to a universal guide adapter plate, so it’s always ready. Use quick-release clamps with preset pressure settings; count the number of pump handles needed for optimal pressure and remember that number. For repetitive cuts, create a stop block system that registers off the rail’s end, ensuring identical lengths without measuring each piece.
Combining Guides with Other Tools
Your circular saw guide can serve double duty for routers by adding a compatible base plate. Many systems offer adapter kits. For dados, run your guide, then use it to position a straightedge for a router. Some woodworkers use their guide rail as a reference fence for biscuit joiners or domino machines. The key is ensuring the rail doesn’t shift between operations—use permanent mounting tape or register against fixed bench dogs for multi-step processes.
Frequently Asked Questions
What makes a circular saw guide better than a simple straightedge for preventing tear-out?
A quality guide integrates zero-clearance support and downward pressure directly adjacent to the blade, which a straightedge cannot provide. The guide’s anti-chip strip supports wood fibers until the blade completely severs them, while a straightedge only references the saw’s base, leaving the cut edge unsupported and vulnerable to splintering.
Can I use any circular saw with a universal guide system and still get tear-out-free cuts?
Yes, but success depends on your saw’s condition. The base plate must be perfectly flat and the blade must run parallel to the base edge. Worn bearings or a bent arbor will cause blade wobble that guides can’t fix. Test your saw’s runout with a dial indicator before investing in a premium guide system.
How often should I replace the zero-clearance strip on my guide?
Replace it when you notice any gap between the strip and your workpiece, or when the strip becomes compressed more than 1/32-inch. For professional users, this might be monthly; for hobbyists, annually. Always replace it when switching to a blade with a different kerf width, as an improper fit defeats the tear-out protection.
Will a guide eliminate tear-out on both sides of my workpiece?
Most guides primarily protect the top surface where the splinter guard applies pressure. To protect the bottom face, use a sacrificial backing board underneath your workpiece. Some premium guides offer bottom-mounted anti-chip strips, but backing boards remain the most reliable method for critical work.
Is it worth buying a manufacturer-specific guide or should I go universal?
If you own a recent-model saw from a major brand and plan to keep it long-term, the manufacturer-specific guide offers superior integration and faster setup. For those with multiple saws or who upgrade tools frequently, a quality universal system provides flexibility with minimal compromise in tear-out performance.
Can I build my own anti-tear-out guide that performs as well as commercial versions?
Absolutely. A shop-made guide from 3/4-inch Baltic birch with a replaceable hardwood edge can outperform budget commercial guides. The key is using stable materials, creating a true zero-clearance fit by running your saw against the edge to “kerf” it, and adding firm clamping. The trade-off is lack of quick-adjust features and the time investment in building and maintaining it.
What tooth count should my blade have for minimal tear-out with a guide?
Use a 40-tooth ATB (alternate top bevel) blade for general finish work, or a 60-tooth for veneered materials. The guide allows you to use higher tooth counts without burning, since it ensures consistent feed rate. Avoid 24-tooth framing blades entirely for finished surfaces—they’re designed for speed and will tear out even with perfect guide setup.
How do I prevent tear-out at the beginning and end of my cuts?
Reduce feed rate by 50% for the first and last two inches of the cut. Some woodworkers start the cut 1/2-inch before the workpiece edge on a sacrificial board, then slide onto the actual workpiece. Ensure your guide’s anti-chip strip extends at least 2 inches beyond both ends of your cut line to support fibers at entry and exit.
Can I use a circular saw guide for bevel cuts without increasing tear-out?
Yes, but setup is critical. The guide must maintain full contact with the workpiece even as the saw tilts. Some guides have angled anti-chip strips for bevel cuts. Set blade depth more conservatively—extend only 1/16-inch below the material at the lowest tooth position. The bevel angle increases the blade’s exit angle, making proper support even more crucial.
Why am I still getting tear-out even with an expensive guide and new blade?
Check three things: First, verify the guide is perfectly straight and not bowed from improper storage. Second, ensure you’re not forcing the cut—let the blade cut at its own pace. Third, inspect your workpiece for internal stresses or voids; some lower-grade plywood has gaps in the core that will cause tear-out regardless of guide quality. Also, check that your saw’s blade is parallel to the base—misalignment as small as 0.5 degrees can cause tear-out.
See Also
- How to Eliminate Tear-Out with the 10 Best Circular Saw Guides in 2026
- Stop Tear-Out with the 10 Ultimate Circular Saw Blades for Laminate Flooring in 2026
- How to Eliminate Tear-Out with the Right Circular-Saw Blade Hook Angle
- Stop Splintering with the 10 Best Fine-Finish Circular Saw Blades This Year
- 10 Affordable Circular Saw Guides That Deliver Pro Cuts in 2026