Table of Contents
Nothing derails a woodworking project faster than a joint that slips mid-glue-up. You’ve carefully cut your dovetails, perfected your mortise and tenon, or squared up that edge-to-edge panel, only to watch everything shift the moment you tighten down your clamps. That heart-sinking moment when you realize your perfectly aligned pieces are now offset by a fraction of an inch—it’s a rite of passage for woodworkers, but one you shouldn’t have to repeat. Edge clamps are the unsung heroes that eliminate this frustration entirely, applying targeted pressure exactly where your joints need it most while keeping everything square and true.
This year has brought remarkable innovations to clamping technology, making it easier than ever to achieve professional-grade results regardless of your skill level. Whether you’re assembling cabinet carcasses, building tabletops, or crafting intricate boxes, understanding what separates a mediocre edge clamp from an exceptional one will transform both your workflow and your finished pieces. Let’s dive deep into the mechanics, features, and selection criteria that matter most.
Top 10 Edge Clamps


Detailed Product Reviews
6. Rockler Small Spring Clamps (Pair) – Easy Squeeze Bandy Clamps Woodworking for Thinner Stock, & Delicate Moldings – One-Handed Operation – Easy to Grip Nylon Hand Clamps

Overview: These Rockler Small Spring Clamps represent an innovative approach to securing delicate moldings and thin stock during glue-ups. Designed specifically for contoured edge work, these band-style clamps combine the convenience of one-handed spring clamp operation with the gentle, even pressure distribution of a rubber band. The pair comes equipped with high-strength nylon bodies reinforced with fiberglass, promising durability without the weight of metal clamps.
What Makes It Stand Out: The clever band design adapts to virtually any edging profile, making these clamps uniquely suited for complex moldings that traditional clamps would crush or mar. The over-molded rubber handles provide exceptional comfort and control, allowing for extended use without hand fatigue. Their versatility extends beyond woodworking—these clamps excel at organizing cables and pneumatic lines in busy workshops, adding unexpected utility value.
Value for Money: Priced as a specialty pair, these clamps justify their cost through targeted functionality. While standard spring clamps cost less, they can’t match the contour-following capability and non-marring pressure distribution. For woodworkers regularly working with delicate trim, the time saved and quality improvement offset the premium price point.
Strengths and Weaknesses: Strengths include true one-handed operation, excellent contour adaptation, comfortable ergonomic grips, and impressive versatility for non-woodworking tasks. The nylon/fiberglass construction resists glue and moisture. Weaknesses are the limited 2-pack quantity for larger projects, restricted opening capacity for thicker stock, and pressure that may prove insufficient for heavy-duty applications.
Bottom Line: These Rockler clamps are essential for finish carpenters and furniture makers who regularly install delicate edge profiles. While not a replacement for heavy-duty bar clamps, they excel at their intended purpose and deserve a spot in any serious woodworker’s arsenal.
7. VMTW Band Clamp 6 pack for edge clamping, banding on shelving, cabinet edges, plywood edging, laminations

Overview: The VMTW Band Clamp 6-pack delivers a no-nonsense solution for high-volume edge banding operations. These utilitarian clamps focus on practical functionality for cabinetry and plywood edging projects. Constructed from rugged engineered plastic with robust springs, each clamp opens to 2-1/8 inches with a 2-1/2-inch depth capacity, making them suitable for standard 3/4-inch plywood edging and similar applications.
What Makes It Stand Out: The six-pack quantity immediately distinguishes this offering, providing enough clamps for continuous edge banding without constant repositioning. The engineered plastic construction resists glue adhesion, a critical feature that saves cleanup time and extends tool life. Their straightforward design prioritizes function over frills, delivering reliable pressure distribution across straight edging applications.
Value for Money: This bulk pack represents exceptional value for production-oriented woodworkers. Purchasing six individual clamps from premium brands would cost significantly more. For shop owners and serious hobbyists tackling multiple projects simultaneously, the per-unit price makes these an economical choice that doesn’t sacrifice essential performance.
Strengths and Weaknesses: Strengths include the generous six-pack quantity, strong spring pressure, glue-resistant material, and adequate depth for most cabinetry work. They’re lightweight and easy to deploy quickly. Weaknesses involve the basic plastic construction that may feel less premium than nylon composites, lack of contour-following capability for complex moldings, and no ergonomic grip enhancements for comfort during extended use.
Bottom Line: For woodworkers focused on production cabinetry and straight-edge banding, this 6-pack offers unbeatable quantity and functional performance. While lacking refinement, they deliver where it matters: holding power and glue resistance at an attractive price point.
8. Kreg Edge Band Spring Clamp - One-Handed Edge Banding Clamp with Stretch Band - Non-Marring with Pivoting Jaws for Uniform Pressure Glue-Ups - For Cabinetry, Trim & More - Set of 4
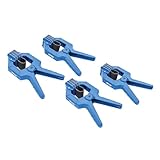
Overview: Kreg’s Edge Band Spring Clamps bring premium engineering to the edge banding category. This set of four clamps features innovative pivoting jaws paired with a stretchable band system that accommodates edging up to one inch thick. Designed for discerning woodworkers, these clamps promise uniform pressure distribution while protecting delicate surfaces through Kreg’s proprietary GripMaxx non-marring pads.
What Makes It Stand Out: The pivoting jaw mechanism is the star feature, automatically adjusting to maintain full contact across varying material thicknesses—a game-changer for consistent glue lines. The stretchable band adapts to profiles while the GripMaxx pads prevent surface damage on pre-finished materials. True one-handed operation streamlines workflow, allowing the other hand to position workpieces precisely.
Value for Money: While commanding a premium price typical of Kreg tools, these clamps justify the investment through superior design and durability. The set of four provides adequate capacity for most cabinet doors or shelving units. Compared to replacing damaged veneer from inferior clamps, the upfront cost proves economical for serious woodworkers.
Strengths and Weaknesses: Strengths include exceptional pressure uniformity, outstanding surface protection, impressive capacity range, and the trusted Kreg brand reputation. The clamps handle both straight and moderately contoured edges effectively. Weaknesses center on the premium pricing that may deter casual users, potential band wear over extensive use, and limited opening width for stock thicker than one inch.
Bottom Line: These Kreg clamps represent the premium choice for woodworkers demanding flawless results on visible trim and cabinetry. The innovative jaw design and superior material protection make them worth every penny for finish-critical applications.
9. ProGrip Straight Edge Clamp Ideal for Cutting Large Sheets of Plywood and Dado Slots

Overview: The ProGrip Straight Edge Clamp serves a fundamentally different purpose than band clamps, functioning primarily as a cutting guide for sheet goods. Its lightweight 2-3/16-inch tube rail construction provides rigid guidance for circular saws and routers while maintaining portability. This tool eliminates the need for cumbersome C-clamps when establishing straight cut lines on large plywood panels.
What Makes It Stand Out: The integrated clamping mechanism allows single-handed securing to workpieces, dramatically speeding up setup compared to traditional straight edges. The low-profile rail design accommodates various power tools, making it versatile for both rip cuts and dado slots. The adjustable jaw compensates for material variations, ensuring stable registration against the workpiece edge.
Value for Money: As a dual-purpose tool—both clamp and cutting guide—it replaces multiple shop accessories. The pricing aligns with mid-range saw guides while adding clamping functionality, representing solid value. For woodworkers lacking a table saw, this tool enables accurate breakdown of sheet goods that would otherwise require imprecise freehand cutting.
Strengths and Weaknesses: Strengths include rapid setup, excellent rigidity-to-weight ratio, versatile power tool compatibility, and elimination of separate clamps. It excels at breaking down plywood and cutting dados. Weaknesses involve limited clamping pressure for heavy-duty glue-ups, a learning curve for perfect alignment, and the need for multiple units when processing very long panels beyond the tool’s length.
Bottom Line: This ProGrip clamp is an essential tool for woodworkers working primarily with sheet goods. While not designed for edge banding, its cutting guidance capabilities make it invaluable for accurate plywood processing in small shops or job sites.
10. Rockler Medium Spring Clamps (Pair) – Easy Squeeze Bandy Clamps Woodworking for Thinner Stock, & Delicate Moldings – One-Handed Operation Medium Clamps – Easy to Grip Nylon Hand Clamps w/Fiberglass

Overview: Rockler’s Medium Spring Clamps scale up their innovative bandy clamp design for slightly thicker stock while retaining the features that make the small version successful. This pair of medium-sized clamps targets woodworkers needing more capacity for delicate moldings and edge banding applications. The same high-strength nylon with fiberglass fill construction ensures durability, while the rubber-overmolded handles maintain comfort during repetitive use.
What Makes It Stand Out: The increased opening capacity expands versatility without sacrificing the contour-following capability that defines the bandy clamp concept. These medium clamps handle a broader range of edging thicknesses while maintaining the gentle, even pressure that prevents damaging delicate profiles. The one-handed operation remains effortless, and the clamps continue to serve double-duty for cable management in busy workshops.
Value for Money: Priced similarly to the small version, the medium clamps offer better overall value through enhanced versatility. The marginal price increase for greater capacity makes these a smarter single purchase for woodworkers unsure of their typical stock thickness. They effectively bridge the gap between small detail clamps and larger bar clamps.
Strengths and Weaknesses: Strengths include expanded capacity, maintained contour adaptation, comfortable ergonomics, durable composite construction, and multi-purpose utility. The pair handles most standard edging tasks effectively. Weaknesses mirror the small version: limited two-pack quantity and pressure insufficient for structural glue-ups. The medium size may prove overkill for extremely delicate, thin veneer work.
Bottom Line: These medium clamps represent the sweet spot in Rockler’s bandy clamp lineup, offering enhanced versatility while preserving the specialized features that make them indispensable for trim work. They’re the ideal choice for woodworkers wanting maximum utility from a single pair.
Why Edge Clamps Are Essential for Modern Woodworking
The Problem with Traditional Clamping Methods
Standard bar clamps and pipe clamps excel at applying pressure across a joint, but they do nothing to prevent lateral movement. When glue acts as a lubricant during those critical first minutes of curing, even slight vibrations or the natural tension in your wood can cause pieces to slide out of alignment. Traditional solutions like clamping cauls and elaborate jig setups add complexity and time to what should be a straightforward process. Edge clamps solve this fundamental problem by applying perpendicular pressure that locks your workpieces in place while simultaneously drawing them together.
How Edge Clamps Revolutionize Joint Alignment
The genius of edge clamps lies in their dual-action design. They grip the edges of your workpieces while applying inward pressure, creating a mechanical lock that resists both rotational and lateral forces. This means your boards stay flat, flush, and square throughout the entire curing process. For edge-gluing panels, this eliminates the dreaded “board walk” where planks shift slightly, leaving you with a uneven surface that requires aggressive planing or sanding to correct. The time savings in both setup and finishing work make these tools indispensable for serious woodworkers.
Understanding the Mechanics of Edge Clamps
The Science of Pressure Distribution
Premium edge clamps distribute force through carefully engineered contact points that maximize grip while minimizing wood deformation. The most effective designs use a three-point pressure system: two fixed points on one jaw and a floating pressure point on the opposite jaw that adapts to slight variations in your workpiece thickness. This prevents the clamping pressure from concentrating in a single spot, which can dent softwoods or mar figured grain. Understanding PSI distribution helps you select clamps that apply enough force for strong joints without damaging your material.
Clamp Geometry and Its Impact on Performance
The throat depth and jaw angle significantly influence how effectively an edge clamp performs on different project types. Deeper throats allow you to clamp further from the edge, which is crucial for wide panels or when you need to avoid interfering with other clamps. The angle of the clamping faces should be slightly offset to create a camming action that increases pressure as you tighten, automatically compensating for wood compression during glue-up. This geometric advantage separates professional-grade clamps from hobbyist tools that require constant readjustment.
Key Features That Define Premium Edge Clamps
Jaw Capacity and Reach Considerations
Maximum jaw opening determines what thickness of material you can clamp, but minimum jaw capacity is equally important for thin stock and veneer work. Look for clamps that open at least 4-6 inches for general woodworking, with deeper capacities available for specialized applications. Reach—the distance from the jaw edge to the screw mechanism—affects how far into a panel you can apply pressure. For cabinet work, 3-4 inches of reach provides versatility without making the clamp unwieldy.
Material Quality and Durability Factors
Forged steel bodies with powder-coated finishes resist rust and withstand decades of workshop abuse. Cast iron offers exceptional stability and vibration dampening but adds considerable weight. Aluminum alloys provide a middle ground, offering decent strength with reduced fatigue during extended use. Pay attention to the quality of the threads on the adjustment screw—Acme threads or square threads transfer more force with less effort and resist wear far better than standard V-threads found on budget options.
Ergonomic Handle Designs for Extended Use
Butterfly handles might look classic, but they chew up your palms during prolonged clamping sessions. Modern ergonomic handles with padded grips allow you to generate more torque with less hand fatigue. Some designs incorporate ratcheting mechanisms that let you quickly position the clamp and then fine-tune pressure with minimal rotation. Quick-release triggers save precious seconds when you’re working against glue setup times, letting you reposition clamps without spinning the handle dozens of times.
Types of Edge Clamps for Different Applications
Standard Edge Clamps for Basic Joinery
These workhorse clamps feature fixed 90-degree jaws and provide reliable performance for edge-gluing, box assembly, and basic carcass work. They typically offer the best value for woodworkers who primarily work with square joints and standard thicknesses. The simplicity of their design means fewer moving parts to fail, making them exceptionally reliable for daily shop use.
Adjustable Angle Edge Clamps for Complex Projects
When you’re building angled cabinets, hexagonal boxes, or custom furniture with non-standard joinery, adjustable clamps become essential. These feature pivoting jaws that lock at specific angles, often with positive detents at common settings like 45, 60, and 90 degrees. The best designs maintain consistent pressure regardless of the angle setting, preventing joint creep even on challenging glue-ups.
Pneumatic vs. Manual Edge Clamps
Professional shops handling high-volume production work increasingly turn to pneumatic edge clamps that deliver consistent, repeatable pressure at the push of a button. While the initial investment is substantial, the time savings and reduced operator fatigue justify the cost for commercial operations. Manual clamps remain the choice for most hobbyists and small professional shops, offering portability, lower cost, and the tactile feedback that experienced woodworkers prefer for delicate work.
Pressure Ratings: What You Need to Know
PSI Requirements for Various Wood Types
Softwoods like pine and cedar require only 100-150 PSI for strong edge joints, while dense hardwoods like maple and oak benefit from 200-250 PSI. Exceeding these recommendations doesn’t create stronger joints—it simply increases the risk of starved joints from excessive glue squeeze-out or wood damage. Premium clamps include pressure-limiting features or visual indicators that help you apply optimal force without guesswork.
Over-Clamping: Risks and Prevention
The most common mistake woodworkers make is applying too much pressure, which forces out most of the glue and creates a starved joint that’s weaker than one made with moderate pressure. Over-clamping also causes panel cupping and can force joints out of square if the pressure isn’t perfectly balanced. Learning to feel for the point of optimal pressure—when you see consistent, small beads of squeeze-out along the entire joint line—takes practice but is essential for professional results.
Material Compatibility and Protective Features
Non-Marring Pads: A Must-Have Feature
Bare metal jaws will inevitably damage your workpiece, especially on softwoods or finished surfaces. Look for clamps with removable, replaceable pads made from urethane or hardened rubber that grip securely without leaving impressions. The best designs allow you to swap pads for different applications—soft pads for delicate work, aggressive textured pads for high-pressure situations where slip is the primary concern.
Working with Delicate Veneers and Softwoods
When clamping veneers or softwoods like basswood, even padded jaws can cause dimpling if the pressure is too concentrated. Clamps designed for delicate work feature extra-wide jaw faces that spread force over a larger area. Some include adjustable pressure distribution plates that conform to slight irregularities in your workpiece, ensuring even pressure without telegraphing clamp marks through to your finished surface.
Precision Features for Professional Results
Integrated Measurement Scales
Top-tier edge clamps now include laser-etched scales on the bar that let you quickly set multiple clamps to identical openings, ensuring even pressure distribution across long glue-ups. This eliminates the tedious process of measuring each clamp individually and helps maintain consistent joint alignment when you’re working with many boards simultaneously.
Self-Squaring Mechanisms
Some advanced clamps incorporate small alignment pins or reference edges that automatically square the clamp to your workpiece edge. This feature proves invaluable when you’re working alone and need to position clamps quickly without constantly checking for square. The mechanism typically uses a spring-loaded plunger that references off the front edge, ensuring the clamp sits at exactly 90 degrees every time.
Workshop Integration and Storage Solutions
Bench-Mounting Options
Many professional-grade edge clamps include mounting holes that let you permanently attach them to your workbench, creating dedicated stations for repetitive tasks like drawer assembly or door panel glue-ups. This transforms your clamps into versatile workholding devices that free up both hands for positioning workpieces. The most useful designs allow quick removal when you need the clamps for portable work.
Space-Saving Storage Ideas
Edge clamps with stacking features or hanging slots keep your workshop organized and protect the precision mechanisms from damage. Wall-mounted racks designed specifically for edge clamps keep them within easy reach while preventing the bars from bending under their own weight. Consider storage solutions that separate clamps by size and capacity, making it easy to grab exactly what you need without rummaging through a cluttered pile.
Budget Considerations: Value vs. Performance
Entry-Level Options for Hobbyists
Budget-friendly clamps in the $20-40 range provide adequate performance for occasional use and lighter-duty applications. These typically use simpler thread designs and basic materials but can still deliver good results if you work within their limitations. The key is recognizing when you’re pushing them beyond their design parameters, which leads to stripped threads, bent bars, or inconsistent pressure.
Professional-Grade Investments
Clamps priced above $60-80 per unit offer features that pay dividends for daily use: replaceable jaw pads, precision-machined components, and ergonomic enhancements that reduce fatigue. For professional woodworkers, the cost is quickly offset by time savings, reduced rework, and the confidence that your clamps won’t fail during a critical glue-up. These tools often come with lifetime warranties, making them true lifetime investments.
Long-Term Cost of Ownership
The cheapest clamp isn’t the most economical if you need to replace it every few years. Calculate the total cost of ownership by factoring in warranty coverage, availability of replacement parts, and the clamp’s versatility across different project types. A $90 clamp that handles 90% of your needs for decades ultimately costs less than three $30 clamps that each handle only 30% of applications and fail after a few years of heavy use.
Safety Best Practices with Edge Clamps
Proper Setup Techniques
Always position edge clamps so the force vector points toward the center of your glue joint, not at an angle that could induce twist. For wide panels, alternate clamp direction on opposite faces to counteract any slight angular error in individual clamps. Before applying glue, do a dry run to ensure all clamps reach your workpieces without excessive extension, which reduces their effective strength and stability.
Common Mistakes to Avoid
Never use cheater bars or extend handles to gain more pressure—this is the fastest way to strip threads or snap clamp bodies. Avoid clamping across significant thickness variations without using cauls or shims to distribute pressure evenly. Most importantly, don’t rush the process; a methodical glue-up with properly adjusted clamps always beats a frantic assembly with misaligned tools.
Maintenance and Care for Longevity
Cleaning and Lubrication Schedules
Glue residue buildup on jaw faces reduces their effectiveness and can transfer to your next project. Wipe down clamps with a damp cloth immediately after use, and periodically clean threads with a wire brush to remove dried glue and wood dust. Apply a light machine oil to threads every few months to prevent rust and ensure smooth operation. For clamps used infrequently, consider a protective wax coating on bare metal surfaces.
Storage Tips to Prevent Rust
Even powder-coated clamps can rust where the coating is chipped or on exposed threads. Store clamps in a climate-controlled environment when possible, and use silica gel packs in your tool chest to absorb moisture. Hanging clamps rather than stacking them prevents contact points where rust can develop unnoticed. If you live in a humid climate, consider periodic application of rust inhibitor spray on vulnerable areas.
Troubleshooting Common Clamping Issues
Dealing with Joint Slip During Cure
If you notice movement after clamping, resist the urge to immediately tighten everything further. Instead, check that your clamps are applying pressure perpendicular to the joint face. Adding a light-duty edge clamp near the slipping area often solves the problem without disturbing the overall setup. For persistent issues, reevaluate your glue application—too little glue can cause joints to shift as the wood absorbs moisture and swells slightly.
When Clamps Lose Their Grip
Worn jaw pads are the most common culprit when clamps start slipping. Replace pads at the first sign of hardening, cracking, or smooth spots that reduce friction. Check that the clamping faces remain parallel; dropped clamps can bend slightly, creating a gap that prevents full contact. For threaded mechanisms that feel loose or wobbly, disassemble and inspect for cracked components before the clamp fails completely during use.
Advanced Techniques for Master Craftsmen
Multi-Clamp Setups for Large Panels
When edge-gluing panels wider than 24 inches, use a hybrid approach: bar clamps across the top and bottom faces for primary pressure, with edge clamps every 12-18 inches to prevent lateral movement. Stagger the edge clamps on alternating faces to create a balanced pressure system that counteracts any slight bow in individual boards. This technique produces flatter panels with less post-glue-up flattening required.
Combining Edge Clamps with Other Clamping Systems
Edge clamps work synergistically with other workholding methods. Use them in conjunction with bench dogs and hold-downs to create immovable assemblies for hand-planing or routing operations after glue-up. For complex angled joints, pair adjustable edge clamps with traditional corner clamps to achieve perfect alignment in multiple planes simultaneously. This multi-system approach gives you the benefits of each tool while compensating for their individual limitations.
The Future of Edge Clamp Innovation
Smart Clamping Technology Trends
The next generation of edge clamps incorporates digital pressure sensors that display real-time PSI readings, ensuring you apply exactly the right amount of force every time. Some prototypes even include Bluetooth connectivity that alerts your phone if clamp pressure drops during cure—a game-changer for critical glue-ups where you can’t afford to babysit the assembly for hours.
Sustainable Materials in Clamp Manufacturing
Forward-thinking manufacturers are exploring recycled aluminum alloys and bio-based composite handles that reduce environmental impact without sacrificing performance. These materials often provide better vibration dampening than traditional metals while being lighter and more comfortable to use. As sustainability becomes a priority for woodworkers, expect to see more clamps that align with eco-conscious workshop practices.
Making Your Final Decision: A Buyer’s Framework
Assessing Your Project Needs
Start by inventorying your typical work: What thicknesses do you most often clamp? Do you build primarily square boxes or angled furniture? How many clamps do you need for your largest glue-up? Answering these questions helps you prioritize capacity over features, or versatility over specialization. A furniture maker building dining tables needs different clamps than a box maker crafting intricate jewelry cases.
Creating a Prioritized Feature List
Rank features by importance to your work style. If you have arthritis, ergonomic handles might top your list. For production work, quick-release mechanisms could save hours monthly. Those working with expensive figured woods should prioritize non-marring pads and pressure control. This prioritized list becomes your decision matrix when evaluating options, preventing you from paying for features you’ll never use while ensuring you don’t overlook capabilities that would transform your workflow.
Frequently Asked Questions
How many edge clamps do I need for a typical panel glue-up?
For most panels, plan on one edge clamp every 12-18 inches along the joint length. A 36-inch panel typically requires three edge clamps positioned at roughly one-quarter, one-half, and three-quarters of the length. Always use at least two bar clamps or pipe clamps across the top and bottom faces in addition to your edge clamps for proper pressure distribution.
Can edge clamps replace traditional bar clamps entirely?
No, edge clamps and bar clamps serve complementary purposes. Edge clamps prevent lateral movement and keep joints aligned, while bar clamps provide the primary inward pressure that draws joint faces together. For most glue-ups, you’ll need both types working in concert. Think of edge clamps as the alignment specialists and bar clamps as the pressure providers.
What’s the difference between edge clamps and corner clamps?
Edge clamps grip the edges of workpieces along the length of a joint, preventing boards from sliding past each other. Corner clamps hold two pieces at a specific angle (usually 90 degrees) at the corner intersection. Use edge clamps for edge-gluing panels and keeping board faces flush; use corner clamps for assembling boxes, frames, and carcasses where you need to maintain a precise angle at the joint.
How do I prevent edge clamps from marring my workpiece?
Always use clamps with removable non-marring pads and ensure they’re clean and free of embedded grit. For extremely delicate work, add a layer of wax paper or thin cardboard between the pad and your workpiece. Apply pressure gradually and check for pad movement that could cause scuffing. Replace hard or damaged pads immediately before they leave permanent marks.
Are expensive edge clamps really worth the investment for hobbyists?
If you build more than a few projects per year, quality clamps pay for themselves in reduced frustration and better results. Mid-priced clamps ($40-60) offer the best value, providing most professional features without the premium cost. The key is buying fewer high-quality clamps rather than many cheap ones that will need replacement and can ruin projects with their inconsistency.
What’s the best way to clean dried glue from edge clamp mechanisms?
For metal surfaces, use a plastic scraper to remove bulk glue, then apply warm water with a drop of dish soap. Avoid harsh solvents that can degrade protective coatings. For threaded rods, wrap a damp cloth around the threads and rotate the handle to work out residue. Never use metal tools on threads, as this damages the precision surfaces and leads to premature wear.
Can I use edge clamps for non-90-degree joints?
Standard edge clamps are designed for square joints, but adjustable-angle edge clamps handle various angles effectively. For one-off angled projects, you can modify standard clamps with angled cauls or use wedge blocks to create the desired angle. However, for frequent angled work, investing in adjustable-angle clamps specifically designed for the purpose yields far better results.
How do I store edge clamps to prevent the bars from bending?
Store clamps vertically hanging from the fixed jaw end, which places no stress on the bar. If wall space is limited, store them horizontally on a rack that supports the entire length of the bar, not just the ends. Never pile heavy clamps on top of each other, as the weight can cause permanent bowing that affects their accuracy and clamping power.
What pressure should I apply when using edge clamps?
Edge clamps typically require less pressure than you might think—just enough to prevent lateral movement, usually 50-100 PSI. The primary clamping pressure comes from your bar clamps. With edge clamps, you’re aiming for firm contact that holds alignment, not crushing force. Look for small, consistent beads of glue squeeze-out along the joint line as your indicator of proper pressure.
How long should I leave edge clamps on during glue-up?
Leave edge clamps in place for the full duration recommended by your glue manufacturer, typically 30-60 minutes for PVA glues. While the primary bond forms quickly, removing edge clamps too early allows slight movement as the glue continues to cure and shrink slightly. For critical alignment, consider leaving them on for the full cure time, though this ties up your clamps longer and is usually unnecessary for most applications.
See Also
- Stop Slipping with the 10 Best Edge Clamps This Year
- Stop Slipping with the 10 Best Pipe Clamps for Round Workpieces This Year
- Stop Slipping with the 10 Best Toggle Clamps for Jigs This Year
- Stop Bowing with the 10 Best Edge Clamps for Thin Panels This Year
- 10 Revolutionary Corner Clamps for Perfect 90° Joints This Year