Table of Contents
Building a proper workbench used to be a rite of passage that could drain your wallet faster than a power sander through plywood. But here’s the reality for 2026: material costs have stabilized in some areas while creative building strategies have evolved dramatically. Whether you’re setting up your first garage workshop or upgrading from a wobbly card table, constructing a rock-solid workbench for under $150 isn’t just possible—it’s becoming the new standard for smart DIYers.
The secret isn’t about cutting corners or settling for flimsy results. It’s about understanding which features actually matter, where to invest your limited budget, and how to leverage modern building techniques that maximize every dollar. This guide walks you through the essential considerations for creating a workspace that’ll handle everything from delicate electronics repairs to heavy-duty woodworking without requiring a second mortgage.
Top 10 Diy Workbench Plan
Detailed Product Reviews
1. How to Make Workbenches & Shop Storage Solutions: 28 Projects to Make Your Workshop More Efficient from the Experts at American Woodworker (Fox Chapel Publishing) Torsion Boxes, Outfeed Tables, & More
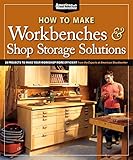
Overview: This comprehensive guide from American Woodworker delivers 28 practical projects for optimizing workshop space and functionality. Covering essential builds like torsion boxes and outfeed tables, this book targets woodworkers seeking professional-grade solutions. The “Used Book in Good Condition” listing makes expert knowledge accessible at a reduced price point.
What Makes It Stand Out: The American Woodworker brand brings credibility and tested designs from industry professionals. Unlike generic DIY books, this focuses specifically on workshop infrastructure with detailed project plans. The variety spans from quick storage hacks to complex workbench builds, serving multiple skill levels. Used availability means rare, out-of-print expertise remains obtainable.
Value for Money: As a used title, this offers exceptional value—typically 40-60% less than new woodworking manuals. Comparable new books with professional shop projects retail for $25-35, while this likely costs under $15. The timeless nature of workshop design means dated content isn’t problematic, and Fox Chapel’s quality illustrations retain their utility regardless of publication year.
Strengths and Weaknesses: Strengths include authoritative source material, diverse project roster, and cost-effective used pricing. The step-by-step approach suits intermediate woodworkers. Weaknesses: being used may have minor wear, notes from previous owners, or outdated tool references. Limited beginner hand-holding assumes foundational knowledge.
Bottom Line: An indispensable resource for serious hobbyists wanting professional workshop setups without premium cost. The used condition is a minor trade-off for accessing expert designs. Perfect for those ready to invest time in building permanent, efficient shop infrastructure.
2. Garage Organization Solutions: DIY Garage Storage Hacks, Building Shelves, Cabinets, Workbenches with Smart Layouts for Tools, Sporting Gear, and Maximizing Space

Overview: This practical guide tackles the universal challenge of garage clutter through DIY solutions. Focused on maximizing limited square footage, it provides strategies for building custom storage including shelves, cabinets, and workbenches. The book addresses diverse needs from tool organization to sporting equipment, making it ideal for homeowners seeking systematic approaches.
What Makes It Stand Out: The “hacks” approach emphasizes clever, budget-conscious modifications using readily available materials. Smart layout planning distinguishes this from simple project books—it teaches spatial reasoning principles before construction. The dual focus on workshop and lifestyle storage (tools AND sporting gear) reflects real modern garage usage.
Value for Money: Without brand or author credentials listed, value depends on execution quality. Assuming mid-range DIY book pricing ($20-25), it competes well if plans are detailed. Comparable specialty garage organization books often cost $30+. The potential to save hundreds in retail storage systems through DIY justifies the investment, provided instructions are clear and material lists accurate.
Strengths and Weaknesses: Strengths include holistic garage approach, hack mentality for affordability, and multi-purpose storage solutions. Weaknesses: unknown author expertise risks amateur designs, lack of listed features suggests possible self-publishing quality issues. Generic title may indicate superficial coverage versus deep dives into any single topic.
Bottom Line: A promising solution for overwhelmed homeowners if content quality proves solid. Best for beginners wanting overview and inspiration rather than master craftsmen. Verify sample pages or reviews before purchasing to ensure instruction depth matches your skill level and needs.
3. The Workbench Planner: For Creators, Makers, and Woodworkers
Overview: This specialized planner appears designed for project management in woodworking and making. Tailored for creators, it likely combines traditional planning pages with shop-specific features like material lists, cut calculators, and progress trackers. The format suggests a journal-style tool for organizing multiple projects simultaneously.
What Makes It Stand Out: Unlike generic notebooks, this purpose-built planner addresses maker-specific needs—dimension sketches, hardware inventories, and time tracking. The “creators, makers, and woodworkers” positioning indicates broad applicability across crafts. It probably includes templates for common planning tasks, saving time versus creating systems from scratch.
Value for Money: Specialty planners typically range $15-25. Value hinges on utility and durability—shop environments demand robust binding and paper that withstands graphite and coffee stains. If it includes project templates that save 30 minutes per project, it pays for itself within a few uses. Digital app alternatives exist free, but physical planners offer distraction-free focus.
Strengths and Weaknesses: Strengths include tailored templates, offline accessibility, and potential for archival project records. Physical format avoids digital device contamination in dusty shops. Weaknesses: unspecified page count and layout quality, risk of being too niche, and lack of customization. Without listed features, it might be overpriced if it’s just a branded generic journal.
Bottom Line: Excellent for organized makers who prefer tactile planning and juggle multiple projects. Verify interior layouts match your workflow before buying. If you’re a digital devotee, skip it. For traditional woodworkers, it’s a potentially invaluable shop companion that brings structure to creative chaos.
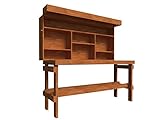
4. Workbenches

Overview: This minimalist-titled work likely serves as a focused reference on workbench design and construction. It probably covers fundamental workbench types, joinery techniques, and workholding solutions. The singular focus suggests depth over breadth, appealing to woodworkers who recognize the workbench as the shop’s cornerstone.
What Makes It Stand Out: The stark title implies authority—no fluff, just workbenches. This focus allows exploration of historical designs (Moravian, Roubo, Scandinavian) alongside modern adaptations. It may dive deep into vise installation, bench height ergonomics, and material selection nuances that broader books gloss over. Perfect for those wanting to build their lifetime bench.
Value for Money: Pricing is critical with generic titles. If a $20-30 book, it must deliver expertise comparable to Schwarz’s “The Workbench Design Book.” Value comes from preventing costly mistakes in lumber and hardware. A poorly designed bench wastes $300+ in materials, making a good guide worth its price. However, the lack of subtitle or author raises quality concerns.
Strengths and Weaknesses: Strengths include potential deep-dive content and singular focus that respects the topic’s complexity. Weaknesses: absence of author credentials, publication details, or reviews creates purchase risk. Could be a shallow pamphlet or repackaged blog content. No listed features suggests minimal production values or self-published status.
Bottom Line: Approach with caution—ideal for buyers who can preview contents. If it’s comprehensive, it’s essential for serious woodworkers. Without verification, consider established alternatives like “The Anarchist’s Tool Chest” workbench chapters. Only purchase if return policy allows inspection of depth and technical quality.
5. Yard and Garden Furniture, 2nd Edition: Plans and Step-by-Step Instructions to Create 20 Useful Outdoor Projects (Creative Homeowner) DIY Benches, Rockers, Porch Swings, Adirondack Chairs, and More
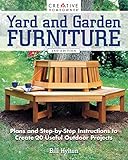
Overview: This second edition from Creative Homeowner delivers 20 outdoor furniture projects with detailed plans and instructions. Covering classics like Adirondack chairs, porch swings, and rockers, it targets homeowners wanting to enhance outdoor living spaces. The variety ensures options for different skill levels and functional needs.
What Makes It Stand Out: The Creative Homeowner pedigree suggests tested, consumer-friendly instructions with strong visual aids. The second edition status indicates proven demand and likely refinements from the first printing. Including both decorative and functional pieces (benches, swings) provides comprehensive outdoor solutions. Step-by-step format builds confidence for exterior-grade construction.
Value for Money: Typically priced $18-24, this offers excellent value—individual plans for quality outdoor furniture often cost $5-10 each. Getting 20 projects for under $20 represents significant savings. Building versus buying premium outdoor furniture can save hundreds per piece, making the book’s cost negligible. The durable projects provide lasting value.
Strengths and Weaknesses: Strengths include variety, reputable publisher, outdoor-specific joinery and finishing guidance, and cost savings potential. Weaknesses: second edition may still contain errata, projects require weather-resistant lumber (higher material costs), and some designs may be dated. Assumes basic woodworking knowledge despite “step-by-step” claims.
Bottom Line: Highly recommended for DIY enthusiasts wanting custom outdoor furniture. The project variety and publisher credibility minimize risk. Perfect for intermediate woodworkers ready to tackle exterior projects. Beginners should start with simpler benches before attempting complex rockers. A worthwhile investment for enhancing outdoor living.
6. Folding Workbench Plans - Build Your Ultimate Garage Work Bench!
Overview: The Folding Workbench Plans offer a practical solution for garage workshops where space is at a premium. This step-by-step guide targets DIY enthusiasts and woodworkers looking to build a sturdy, collapsible work surface without permanent floor commitment. The plans promise heavy-duty performance despite the folding mechanism, making it suitable for serious projects rather than light hobby work.
What Makes It Stand Out: The intelligent folding design distinguishes this from static bench plans. When collapsed, it reportedly maximizes storage and floor space—ideal for multi-car garages or shared spaces. The emphasis on heavy-duty construction suggests robust hardware and joinery that won’t compromise stability. Clear, sequential instructions accommodate intermediate builders who may not have professional experience.
Value for Money: At the price point of typical digital plans (usually $15-30), this represents significant savings compared to $300+ pre-made folding benches. You’re investing in intellectual property rather than materials, allowing customization while controlling lumber costs. The design’s space-saving benefits add ongoing value to your workshop’s functionality.
Strengths and Weaknesses: Strengths include space efficiency, customization potential, and cost savings over retail options. The sturdy design accommodates substantial projects. Weaknesses involve required skill level—beginners may struggle with precise measurements and hardware installation. Material costs are separate, and the folding mechanism introduces potential failure points if built incorrectly. Time investment is considerable.
Bottom Line: Perfect for intermediate DIYers with limited space who prioritize functionality. Not ideal for beginners seeking instant results or those needing a bench immediately.
7. 5 WORKBENCH DIY PROJECTS

Overview: 5 WORKBENCH DIY PROJECTS delivers exactly what the title promises—a collection of five distinct workbench designs in one package. This compilation serves hobbyists uncertain about which bench style suits their needs, offering variety from simple assembly tables to more specialized woodworking benches. Each project presumably targets different skill levels, spaces, and budgets.
What Makes It Stand Out: Variety is the primary advantage here. Instead of committing to a single design, you receive multiple options to compare and choose from. This flexibility allows you to select a bench that matches your current skills and tools, or build different benches for different purposes. The collection likely includes both quick-build and lifetime-quality designs.
Value for Money: Purchasing five separate plan sets could cost $75-150; this bundle presumably offers them at a fraction of that price. The real value lies in being able to preview multiple approaches before investing in materials. For workshop planners, this comparative resource prevents costly mismatches between bench design and actual needs.
Strengths and Weaknesses: Strengths include versatility, cost-effectiveness, and the ability to match projects to skill level. You gain broader perspective on workbench design. Weaknesses may include inconsistent detail levels between plans—some might be sketchy while others are comprehensive. The collection lacks the cohesive philosophy of a single-author book, and quality control may vary.
Bottom Line: Ideal for beginners exploring options or experienced builders wanting quick access to multiple designs. Less suitable for those wanting one perfect, deeply detailed plan.
8. Transforming Shelf to Workbench How-to Book; Pattern Plan to DIY and Easily Build 7’ Convertible Shelf that Changes to 7.5’ Table

Overview: The Transforming Shelf to Workbench How-to Book presents an ingenious space-saving solution for micro-workshops and apartments. This guide details building a 7-foot shelving unit that converts into a 7.5-foot workbench, essentially giving you two pieces of furniture in one footprint. The convertible design addresses the primary constraint of urban makers: square footage.
What Makes It Stand Out: The transformation mechanism itself is the star—this isn’t just a fold-down wall unit, but a full shelving system that morphs into a proper workbench height table. The 7-foot to 7.5-foot conversion suggests a clever pivot or slide system that maintains structural integrity in both configurations. This dual-purpose approach maximizes utility in minimal space.
Value for Money: For small-space dwellers, this single build eliminates the need for separate storage and work surfaces, potentially saving $500+ and precious floor space. The pattern plan approach means you’re buying a proven design rather than experimenting. However, material costs may be higher due to the complex hardware required.
Strengths and Weaknesses: Strengths include unparalleled space efficiency, innovative design, and dual functionality. It’s a conversation piece that actually works. Weaknesses involve build complexity—precision is critical for smooth transformation. The design may compromise ultimate sturdiness compared to dedicated benches, and the fixed dimensions offer limited customization.
Bottom Line: A brilliant solution for apartment woodworkers and tiny garage owners with advanced beginner skills. Not recommended for those prioritizing heavy-duty capacity over space savings.
9. The Workbench Design Book: The Art & Philosophy of Building Better Benches

Overview: The Workbench Design Book elevates workbench construction from mere utility to craft philosophy. This isn’t a simple how-to manual but a deep dive into the principles that make benches truly functional and personal. This approach emphasizes understanding why benches work, enabling you to design your own rather than follow rote plans.
What Makes It Stand Out: The philosophical framework transforms your thinking about workholding, ergonomics, and workflow. Instead of dimensioned drawings, you receive design principles that adapt to your body, tools, and projects. The “art” aspect covers aesthetics and historical context, while “philosophy” provides decision-making criteria for every design choice.
Value for Money: For serious woodworkers, this $30-40 book offers lifetime value—it’s a reference you’ll consult repeatedly as skills evolve. The knowledge transcends any single plan, saving money on future bench builds by preventing design mistakes. However, casual DIYers may find it overkill for a one-time build.
Strengths and Weaknesses: Strengths include comprehensive design theory, historical insight, and empowerment to create custom solutions. The writing is engaging and educational. Weaknesses are its lack of step-by-step plans for beginners who want hand-holding. It requires time and study, not just quick copying. Some may find the philosophy excessive for simple needs.
Bottom Line: Essential reading for dedicated woodworkers building their lifetime bench. Overly comprehensive for beginners wanting quick plans.
10. Workbenches Revised Edition: From Design & Theory to Construction & Use

Overview: Workbenches Revised Edition represents the definitive modern guide to workbench building. This updated edition bridges the gap between philosophical design principles and practical construction, offering both theory and detailed plans for several bench styles. It serves as a complete workshop reference from a master craftsman.
What Makes It Stand Out: The revision includes updated techniques, new designs, and refined methods based on reader feedback and evolving tool technologies. It combines the best of both worlds: understanding the “why” behind design decisions while providing specific, buildable plans. The coverage from design through actual use creates a complete learning cycle.
Value for Money: At $35-45, this single volume replaces multiple books and countless online plans. The revised content ensures you’re getting current best practices, not outdated methods. For anyone serious about woodworking, it prevents expensive mistakes and material waste, paying for itself on the first build.
Strengths and Weaknesses: Strengths include comprehensive coverage, updated techniques, clear photography, and scalable designs for different spaces and budgets. It grows with your skills. Weaknesses involve density—beginners may feel overwhelmed by the depth. The focus on hand-tool woodworking may not resonate with power-tool-only users. It’s a substantial time investment to fully utilize.
Bottom Line: The ultimate one-stop resource for anyone building a serious workbench. Worth every penny for committed woodworkers, though casual DIYers might prefer simpler plan sets.
Why the $150 Benchmark Matters in 2026
The $150 price point represents a sweet spot where functionality meets accessibility. With inflation affecting lumber prices differently across regions, this budget forces intentional decisions that actually improve your final product. You’ll learn to prioritize structural integrity over fancy features, and discover that some “premium” add-ons are just marketing fluff.
Building at this price also teaches workshop economics. You’ll develop a keen eye for material efficiency and joinery that performs without pricey hardware. These skills transfer to every future project, making you a more resourceful maker overall.
Essential Features Every Budget Workbench Needs
Rock-Solid Stability Over Everything Else
A workbench that wobbles is worse than no workbench at all. Your $150 investment must first guarantee a rigid structure that doesn’t flex, rack, or shake during use. This means prioritizing triangulation in your design and understanding how diagonal bracing transforms a shaky frame into an immovable object. Budget builds excel here because they force you to focus on mechanical strength rather than expensive hardware solutions.
Work Surface That Forgives Your Mistakes
The top takes the most abuse, so it needs to balance durability with replaceability. A perfect workbench top for under $150 uses layered construction—think construction-grade plywood with a sacrificial hardboard overlay. This approach gives you a flat, sturdy surface that you can swap out for pennies when it becomes too scarred from saw cuts and glue drips.
Smart Storage That Doesn’t Compromise Structure
Integrated storage often weakens budget builds when builders cut into load-bearing members. The trick is designing storage that reinforces rather than reduces strength. Sliding shelves between legs, adding a lower deck for bulky items, or using hanging systems on the sides adds function without requiring expensive drawer slides or compromising the frame.
Material Selection Strategies for Maximum Value
Softwoods Are Your Best Friend
Forget the hardwood snobbery. Construction-grade pine and fir offer incredible strength-to-cost ratios for workbench frames. These woods are dimensionally stable enough for workshop use, readily available, and forgiving for beginners. The key is selecting straight, knot-free boards for critical joints and using the gnarlier sections for non-structural elements like lower shelves.
Plywood Grades Demystified for Workbench Building
Not all plywood is created equal, and understanding the differences saves serious money. CDX sheathing plywood provides excellent core strength for workbench tops when laminated in two layers. For visible surfaces, a single sheet of BC-grade gives you one clean face without paying for cabinet-grade materials you’ll immediately cover in sawdust and scratches.
The Hidden Value of Construction Lumber Seconds
Many big-box stores discount lumber with minor defects that work perfectly for workbenches. Twisted boards can be cut shorter for braces. Boards with split ends provide excellent short pieces for blocking. Developing relationships with lumber department staff often yields tips on when markdowns happen, stretching your $150 even further.
Sizing Your Workbench for Real-World Use
Height: The Make-or-Break Dimension
Standard counter height (36 inches) works for assembly but kills your back for hand-planing. Customizing height to your body and primary tasks prevents fatigue and injury. A good rule: stand with your arms at your sides, bend your elbows 90 degrees, and measure to your palms—that’s your ideal working height. For under $150, you can afford to build exact height rather than settling for prefab limitations.
Length and Width: Bigger Isn’t Always Better
A 6-foot bench feels luxurious until it blocks your garage door. Most DIYers actually work best with a 4-5 foot main bench supplemented by a smaller secondary surface. This modular approach costs less, fits better in tight spaces, and lets you reconfigure as projects demand. Your $150 budget builds one excellent primary bench now, with funds left for a smaller satellite station later.
Tool Requirements: What You Actually Need
The Minimalist Tool Kit That Still Delivers
You don’t need a fully outfitted shop to build a workbench. A circular saw with straight-edge guide, drill/driver, tape measure, speed square, and clamps constitute the core toolkit. Borrow or rent the rare specialty tool rather than buying. Many community tool libraries have emerged, making expensive equipment accessible for free.
Jig Building: Your Secret Weapon
Simple shop-built jigs multiply your limited toolset’s capability. A straight-edge guide made from scrap plywood turns a circular saw into a precision tool. A shooting board crafted from leftover lumber enables hand-plane accuracy. These jigs cost nothing but time while delivering professional results that justify your material investment.
Joinery That Maximizes Strength, Minimizes Cost
The Humble Screw: Properly Understood
Deck screws and construction screws offer incredible holding power when used correctly. Pre-drilling prevents splitting, and understanding shear vs. tension loads helps you place fasteners where they matter most. Two 3-inch screws in shear can hold more weight than a fancy dovetail joint in the wrong application—all for pennies.
Pocket Holes: Speed Without Sacrifice
Pocket hole jigs represent one of the few tool purchases that actually save money on a budget build. They create strong joints quickly, reducing the clamps and time needed. The speed means fewer mistakes from rushed work, and the mechanical strength often exceeds traditional joinery in softwoods. For under $150 total budget, the jig pays for itself in saved lumber from botched cuts.
Workbench Top Construction Methods
The Layered Approach: Plywood + Hardboard
Laminate two layers of 3/4-inch CDX plywood with construction adhesive and screws, then top with 1/4-inch hardboard. This creates a 1-3/4-inch thick top that rivals solid hardwood for stiffness. When the hardboard gets ruined, pry it off and staple down a new $12 sheet. This replaceability is the budget builder’s superpower.
Edge Banding That Actually Protects
Solid wood edging prevents plywood from delaminating while giving you a durable surface for clamping. Rip 2x4s into 1-1/2 inch strips, glue and screw them to the plywood edges, then round over the corners. This adds maybe $8 to your build but dramatically extends the bench’s lifespan and gives you real wood where it matters most.
Storage Solutions That Reinforce Structure
The Lower Shelf as Diaphragm
A solid lower shelf connecting all four legs does double duty: storage and structural bracing. Sheath it with plywood and it becomes a diaphragm that prevents racking. This is engineering working in your favor—every storage addition makes the bench stronger rather than weaker.
Pegboard vs. French Cleats: The Budget Showdown
Pegboard costs less initially but requires specific hooks and limits weight capacity. French cleats, made from ripped 2x4s, cost almost nothing and hold unlimited weight. Your $150 budget loves French cleats because they use scrap material and adapt to any tool without proprietary hardware.
Mobility vs. Stability: Making the Right Call
When Wheels Make Sense
If your shop shares space with parking or laundry, mobility matters. But casters introduce wobble and cost. The solution: a mobile base built from 2x6s with heavy-duty locking casters, where the workbench sits securely on top without being permanently attached. Remove four screws and it’s a fixed bench. This hybrid approach costs under $20 in casters while giving you both stability and mobility.
The Semi-Permanent Solution
For most home workshops, a bench that’s movable-but-not-mobile works best. Add furniture sliders to the feet, allowing you to slide it when needed but keeping it planted during work. This costs less than $5 and avoids all caster-related compromises.
Surface Treatments That Protect Your Investment
The $5 Finish That Lasts Years
Boiled linseed oil mixed with mineral spirits (1:1) penetrates softwood, hardening it against moisture and grime. Two coats cost practically nothing and can be refreshed annually in minutes. Unlike polyurethane, it doesn’t chip and can be applied to a dirty bench without elaborate prep.
Sacrificial Surfaces: Your Bench’s Insurance Policy
Cover high-wear areas with rosin paper, thin Masonite, or even heavy kraft paper held down with masking tape. When glue drips or finishes spill, you’re replacing a $2 sheet instead of refinishing the entire top. This habit alone makes budget benches outlast expensive ones.
Common Budget-Busting Mistakes to Avoid
Overbuilding in the Wrong Places
Doubling up 2x4s everywhere feels sturdy but wastes money and creates unnecessary weight. Focus your material budget on the top and leg assemblies. Mid-span bracing can be lighter duty, and lower shelves need only single-thickness material.
The Hardware Store Trap
Walking into a home center without a cut list leads to impulse buys and material waste. Calculate every board foot needed, then add 15% for mistakes. Buy the longest boards you can transport and cut them yourself—shorter “handy” lengths cost 30-40% more per foot.
Sourcing Materials Strategically in 2026
The Reclaimed Lumber Renaissance
Demolition sites, pallet recyclers, and architectural salvage yards have become goldmines for workbench lumber. Modern deconstruction practices yield clean 2x4s and plywood that need only minor cleanup. Always ask permission, and never take lumber from active construction sites, but legitimate salvage can cut material costs by 60%.
Bulk Buying With Your Maker Community
Coordinate with other DIYers to purchase full sheets of plywood and long lumber lengths, then split them. A 4x8 sheet of plywood might cost $45, but two people each needing half pay $22.50. Online community boards and maker spaces make finding these partnerships easier than ever in 2026.
Adapting Plans to Your Skill Level
Beginner-Friendly Design Principles
If you’re new to building, choose plans that use all right-angle cuts and screws. Complexity adds cost through mistakes and wasted material. A simple four-leg design with lap joints can be assembled in a day and lasts decades. The beauty of budget building is that simplicity serves both your wallet and your learning curve.
Intermediate Upgrades That Cost Nothing
Adding a tool tray between the front and rear aprons requires exactly zero extra lumber—it’s just a different cut pattern. Through-tenons made with a handsaw and chisel cost nothing but time while elevating your bench’s aesthetic and resale value. These skill-building details make your $150 bench feel like a $500 piece.
Future-Proofing for Upgrades
Designing for Add-Ons
Drill dog holes on a grid pattern even if you don’t have bench dogs yet. Add threaded inserts in the legs for future vise installation. These preparatory steps cost pennies during initial construction but prevent major rework later. Your budget bench becomes a foundation that grows with your skills.
The Modular Mindset
Build your bench in distinct sections: base, top, storage, accessories. When you outgrow the original top, build a new one and repurpose the old as an assembly table. This approach spreads costs over time and lets you upgrade incrementally without scrapping your entire investment.
Frequently Asked Questions
Can I really build a durable workbench for under $150 in 2026?
Absolutely. The key is prioritizing structural design over expensive materials. A well-engineered pine frame with a laminated plywood top will outlast a poorly built hardwood bench. Focus on mechanical strength, proper fasteners, and smart joinery. Your $150 bench can easily support 300+ pounds and handle heavy hand-tool work.
What’s the single most important feature to include?
A replaceable top surface. No matter how careful you are, your bench will get glue, paint, and saw marks. Building a top with a sacrificial hardboard layer means you can refresh your work surface for under $15 instead of rebuilding the entire bench when it gets too damaged.
Should I build a mobile or stationary bench?
Build stationary with the option for mobility. A fixed bench is more stable and costs less. If you need to move it occasionally, add furniture sliders or build a separate mobile base. Avoid permanent casters unless you move your bench daily—they introduce wobble and add $20-40 to your cost.
How do I handle lumber selection at the store?
Arrive with a detailed cut list and spend time picking straight boards. Check for twists by sighting down the length, and avoid boards with large knots in the middle. Buy the longest lengths you can transport and cut them yourself. Early morning trips often yield better selection before boards get picked over.
Can I use pallet wood for a workbench?
Selectively, yes. Avoid chemically treated pallets (marked MB) and those with excessive nail holes. Pallet wood works great for lower shelves, braces, and sacrificial surfaces. For the frame and top, stick to construction lumber—its consistent dimensions save time and ensure square assembly, which is worth the small price difference.
What’s the best finish for a budget workbench?
A 50/50 mix of boiled linseed oil and mineral spirits. It penetrates deep, protects against moisture, and can be applied without perfect surface prep. Two coats cost about $5 total and can be renewed annually. Avoid film finishes like polyurethane—they chip under heavy use and require sanding to repair.
How tall should I make my workbench?
Custom to your body and work. Measure from the floor to your palm with your arm bent 90 degrees—that’s your ideal height for hand tool work. For detailed assembly, subtract 2-3 inches. For heavy power tool use, add 2-3 inches. Since you’re building it yourself, make it exactly right rather than settling for standard counter height.
Is plywood or solid wood better for the top?
Plywood wins for budget builds. Laminate two layers of 3/4-inch construction plywood with glue and screws for a 1.5-inch top that rivals solid wood stiffness. Add a replaceable hardboard layer on top. This costs under $60 versus $150+ for solid maple, and you get a flatter, more stable surface that won’t warp.
What’s the biggest mistake that increases costs?
Poor planning and impulse buying. Walking into a store without a detailed cut list leads to purchasing the wrong sizes and excessive hardware. Sketch your design, calculate every board foot, and resist the urge to upgrade to “premium” materials. The design matters more than the wood species.
Can I add a vise later to a budget bench?
Definitely. When building the base, reinforce the front left leg area with extra blocking and drill pilot holes for lag screws. This costs nothing during construction but makes vise installation a 30-minute job later. Many woodworkers use their bench for months before deciding which type of vise their work actually requires.
See Also
- 10 Best Value Pipe Clamps for DIY Workbench Builds Under $25
- 10 Affordable Workbench Tops That Accept Hold-Fast Holes Under $250 in 2026
- 10 Affordable Workbench Tops That Don’t Sacrifice Quality in 2026
- 10 Affordable Workbench Upgrades Every Hobbyist Needs in 2026
- Bench Dogs & Holdfasts: The Forgotten Fasteners That Convert Any Workbench into a Clamping Station