Table of Contents
Ever stared at a beautifully curved chair rail or sculptural furniture component, only to notice hairline fractures snaking along the glue lines like chalk marks? That’s the heartbreak of chalk-line breaks—microscopic failures that betray hours of meticulous work in bent lamination projects. These aren’t just cosmetic flaws; they’re structural time bombs that can compromise the integrity of your entire piece. The culprit? Using rigid adhesives in applications that demand flexibility.
This year, woodworking chemistry has evolved dramatically, offering PVA-based solutions that combine the user-friendliness of traditional wood glue with the elasticity previously found only in specialized epoxies or hide glues. Understanding what separates a reliable flexible PVA from standard yellow glue can mean the difference between heirloom-quality work and frustrating do-overs. Let’s dive deep into the science, selection criteria, and application techniques that will eliminate chalk-line breaks from your vocabulary forever.
Top 10 Pva Wood Glue Flexible

Detailed Product Reviews
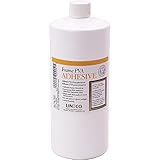
1. LINECO PVA Adhesive, Picture Frame Glue, Adhere Wood or MDF, Dries Clear Flexible, 4 oz, Ideal for Paper Board Framing Collage Crafts Bookbinding

Overview: LINECO’s 4-ounce PVA adhesive represents the gold standard for archival-quality crafting and framing applications. Manufactured in the USA, this professional-grade glue delivers museum-quality results for wood, MDF, paper, and board projects. Its fast-setting formula creates bonds stronger than the wood itself, making it ideal for custom picture frames, furniture assembly, and detailed craft work where precision matters.
What Makes It Stand Out: This adhesive excels with extremely high solids content, enabling it to tackle hard-to-stick or high-moisture wood that defeats lesser glues. The 30-minute press time dramatically accelerates project completion compared to traditional wood glues requiring hours of clamping. Its exceptional lay-flat properties prevent warping in paper and board applications, while the clear, flexible finish ensures invisible repairs and professional presentation.
Value for Money: At the 4-ounce size, this offers an accessible entry point for hobbyists and occasional framers. While the per-ounce cost runs higher than bulk options, you’re investing in genuine archival quality that preserves heirlooms indefinitely. For small to medium projects, this size eliminates waste while delivering professional results that justify the premium over craft-store alternatives.
Strengths and Weaknesses: Strengths include true archival certification, rapid setting time, superior wood bonding, and versatile application across materials. The USA manufacturing ensures consistent quality control. Weaknesses involve the small volume limiting large projects, potential thickening over time, and the need for proper storage (60-80°F) to maintain optimal performance. The nozzle could be more precise for delicate paper work.
Bottom Line: For discerning crafters and framers prioritizing archival integrity, LINECO’s 4-ounce PVA delivers unmatched quality. It’s the smart choice for projects where failure isn’t an option, from repairing rare books to assembling custom frames. The investment pays dividends in lasting results.
2. DRLPSN PVA Glue Book Binding, PH Neutral PVA Adhesive, Professional-Grade Strength Acid-Free Book Glue, Dries Clear & Remains Flexible, Used for Book Repair, Framing & Crafts | Safe for Paper (4 oz)

Overview: DRLPSN’s professional-grade PVA bookbinding glue positions itself as a conservation-standard adhesive for archival projects. This 4-ounce bottle targets serious bookbinders, scrapbookers, and restoration specialists who demand pH-neutral, acid-free performance. The formula promises to preserve photos, rare books, and heirloom artwork without the yellowing or brittleness that plagues inferior adhesives, making it a go-to for generational preservation.
What Makes It Stand Out: The standout feature is the comprehensive satisfaction guarantee—one-year replacement plus 30-day no-questions-asked refund—demonstrating exceptional manufacturer confidence. Its crystal-clear drying maintains transparency even on delicate papers, while the flexible bond prevents cracking on curved surfaces like leather-bound volumes. The water-soluble nature allows precise thinning for extended working time on intricate details.
Value for Money: Mid-range pricing combined with robust guarantee coverage creates compelling value. While not the cheapest option, the risk-free purchase protection and professional-grade formulation justify the cost for conservation work. For beginners, this safety net proves invaluable, while experts appreciate the consistent performance.
Strengths and Weaknesses: Strengths include true pH neutrality, flexible clear finish, versatile substrate compatibility, and outstanding customer protection. The smooth application and easy water cleanup enhance usability. Weaknesses center on the lesser-known brand reputation compared to archival giants, strict storage requirements (avoid freezing/sunlight), and the 4-ounce size limiting large restoration projects. Some users may prefer a more established name for museum work.
Bottom Line: DRLPSN delivers professional conservation quality with consumer-friendly protection. Ideal for bookbinders and archivists seeking reliable performance without brand-name markup. The guarantee makes it particularly attractive for those new to archival adhesives or tackling precious family heirlooms.
3. LINECO PVA Adhesive, Picture Frame Glue, Adhere Wood or MDF, Dries Clear Flexible, 1 Quart, Ideal for Paper Board Framing Collage Crafts Bookbinding
Overview: LINECO’s 1-quart PVA adhesive scales up their renowned archival formula for serious framers, furniture makers, and high-volume craft studios. This bulk offering delivers the same USA-made, museum-quality performance as their smaller bottles but in a quantity designed for production environments. The fast-setting, high-solids formula excels across wood, MDF, paper, and board applications where both speed and permanence matter.
What Makes It Stand Out: The sheer volume combined with uncompromising archival standards distinguishes this from contractor-grade adhesives. It maintains the impressive 30-minute press time and wood-stronger-than-wood bonding even at scale. For professional frame shops or restoration studios, this eliminates frequent reordering while ensuring batch-to-batch consistency critical for client work.
Value for Money: The quart size delivers exceptional per-ounce savings, typically cutting costs by 40-50% compared to 4-ounce bottles. For professionals consuming glue regularly, the ROI becomes evident within months. The investment pays for itself through reduced downtime, consistent results, and the elimination of small-bottle premium pricing.
Strengths and Weaknesses: Strengths include dramatic cost savings, archival certification, rapid setting, and versatile material compatibility. The large quantity ensures you’re never mid-project without glue. Weaknesses involve substantial upfront cost, risk of drying out before use by hobbyists, and storage challenges—the quart container requires careful sealing and climate control (60-80°F). The wide mouth can make precise application difficult without transferring to smaller bottles.
Bottom Line: This quart container serves professional framers and serious woodworkers exclusively. Hobbyists should avoid due to shelf-life concerns. For those running a business or undertaking major restoration projects, it’s the economical, high-performance choice that professional shops depend on daily.
4. LINECO PVA Adhesive, Picture Frame Glue, Adhere Wood or MDF, Dries Clear Flexible, 8 oz, Ideal for Paper Board Framing Collage Crafts Bookbinding
Overview: LINECO’s 8-ounce PVA adhesive hits the sweet spot between their hobbyist 4-ounce and professional quart sizes. This USA-made archival glue serves serious DIYers, active framers, and small studio operations requiring more volume without bulk commitment. It maintains the same high-solids, fast-setting formulation that creates bonds exceeding wood strength across frames, furniture, and craft applications.
What Makes It Stand Out: The 8-ounce size offers practical compromise—substantially more product than the 4-ounce while remaining manageable before expiration. It retains LINECO’s signature 30-minute press time and exceptional lay-flat properties for paper and board work. This size particularly suits those who frame regularly but don’t operate a full production shop.
Value for Money: Per-ounce pricing typically runs 20-30% less than the 4-ounce bottle, making it economically smarter for consistent users. You avoid the quart’s hefty upfront cost while reducing per-project expense. For semi-professional framers or enthusiastic hobbyists completing monthly projects, this size optimizes both budget and freshness.
Strengths and Weaknesses: Strengths include better value than smaller sizes, true archival quality, rapid curing, and versatile substrate bonding. The quantity remains reasonable for storage and handling. Weaknesses involve still needing proper climate control, potential waste if not used within 12-18 months, and the same application precision limitations as other LINECO bottles. The mid-range size may tempt over-purchasing for casual users.
Bottom Line: The 8-ounce LINECO PVA serves as the ideal choice for dedicated hobbyists and part-time professionals. It balances cost-effectiveness with practical usability, ensuring you have quality adhesive on hand without excessive inventory. If you frame more than occasionally, this size delivers professional results economically.
5. Books By Hand, PH Neutral PVA Adhesive, Bookbinding Glue, Dries Clear, Remains Flexible - 4 Ounce

Overview: Books By Hand’s pH-neutral PVA adhesive specifically targets bookbinding and paper conservation with a formulation optimized for archival longevity. This 4-ounce bottle serves bibliophiles, journal makers, and paper artists requiring acid-free performance that preserves materials for centuries. The water-soluble formula allows precise viscosity adjustment while delivering professional-grade bonding.
What Makes It Stand Out: The brand’s focused specialization in bookbinding manifests in superior lay-flat properties that prevent page curling and warping—critical for text blocks and endpapers. Unlike general-purpose PVA glues, this formula prioritizes flexibility and paper compatibility over wood strength, making it ideal for delicate leaf attachment and spine work where movement matters.
Value for Money: Positioned competitively with LINECO’s 4-ounce offering, it delivers comparable archival quality at a similar price point. For pure bookbinding applications, the specialized formulation justifies any minor premium over generic PVA. The 4-ounce size suits individual projects while maintaining freshness.
Strengths and Weaknesses: Strengths include exceptional lay-flat performance, true pH neutrality, easy water thinning, and focused bookbinding optimization. The archival certification ensures longevity. Weaknesses involve limited wood bonding strength compared to LINECO, strict storage requirements (avoid freezing/sunlight), and smaller brand recognition in broader framing markets. The narrow specialization makes it less versatile for mixed-media artists.
Bottom Line: Books By Hand PVA excels exclusively for bookbinding and paper conservation. Choose this over general-purpose glues when working primarily with text blocks, journals, or paper art. For framers needing wood/MDF strength, LINECO remains superior. This is the specialist’s tool, not the all-purpose workhorse.
6. Stanley A 601 PVA Wood Glue - 1x13.5oz. - Water Resistant Adhesive for D3 Bond Strength on Hard and Soft Woods - Ideal for Bookbinding, Crafts, and Woodworking Projects, 1 Pack
Overview: The Stanley A 601 PVA Wood Glue delivers professional-grade bonding performance in a versatile 13.5-ounce package. This D3-certified adhesive meets stringent European standards for water resistance, making it suitable for both interior woodworking and select exterior applications. Its water-based formulation ensures easy cleanup while providing reliable adhesion across hard and soft woods, composite materials, and even paper-based projects.
What Makes It Stand Out: The D3 certification distinguishes this glue from standard PVA adhesives, guaranteeing proven moisture resistance for window frames and external doors. Its remarkable versatility extends beyond typical wood glue applications—effectively bonding chipboard, laminates, cardboard, and textiles. The formulation balances professional performance with DIY-friendly application, making it accessible to hobbyists while meeting craftsman standards.
Value for Money: At 13.5 ounces, this single-pack offering provides sufficient volume for multiple projects without the waste of larger containers. While priced slightly above basic PVA glues, the D3 certification and multi-material compatibility justify the premium. It essentially replaces several specialized adhesives, consolidating your workshop needs into one reliable product.
Strengths and Weaknesses: Strengths include certified water resistance, exceptional versatility, easy water cleanup, and strong initial tack. The water-based formula is non-toxic and user-friendly. Weaknesses involve limited true waterproofing (water-resistant, not waterproof), a moderate open time that requires efficient workflow, and the single-size option may not suit heavy users.
Bottom Line: This Stanley glue excels for woodworkers and crafters needing reliable, moisture-resistant bonds. The D3 certification provides confidence for demanding applications, while its versatility makes it a workshop staple. Recommended for both serious hobbyists and professionals.
7. Nicpro Book Glue, Neutral PH PVA Adhesive 300g/10oz, Acid-Free, Dries Clear & Remains Flexible, All-Purpose Glue for Archival, Bookbinding and Repair, School Collages, Paper Art and Crafts, Wood

Overview: Nicpro Book Glue is a specialized archival adhesive designed for preservation-quality projects. This 10-ounce, pH-neutral PVA formulation ensures long-term stability for bookbinding, paper restoration, and delicate crafts. Its acid-free composition prevents yellowing and deterioration, making it essential for archivists and serious crafters working with valuable materials that must endure for decades.
What Makes It Stand Out: The true archival-grade formulation sets this apart from standard craft glues, meeting museum preservation standards. The included dual brushes and precision applicator nozzle demonstrate thoughtful design for paper applications. Most impressive is its post-drying flexibility, preventing the brittleness that destroys bound materials over time and allowing pages to turn naturally without cracking.
Value for Money: While priced higher than generic PVA, the archival certification and specialized accessories justify the cost for preservation work. The 10-ounce size suits project-based use rather than bulk applications. For bookbinders and archivists, this replaces cheaper alternatives that could damage irreplaceable materials, potentially saving restoration costs later.
Strengths and Weaknesses: Strengths include pH-neutral archival safety, crystal-clear drying, lasting flexibility, and excellent accessories. The non-toxic formula suits educational environments. Weaknesses involve limited wood-bonding strength compared to wood-specific PVA, smaller volume for the price, and slower curing time requiring patience and proper clamping.
Bottom Line: For archival bookbinding and paper conservation, Nicpro is unmatched. The flexibility and acid-free formulation ensure project longevity. Crafters focused on paper arts should invest despite the premium price. Not recommended as a primary wood adhesive.
8. Extra Strong PVA/VAE Craft Glue - Tacky PVA Arts & Crafts Glue, Flexible Strong Bond, Dries Clear - 500ml - Ideal for Home, School, Office, Repairs, and DIY Projects

Overview: Flexibond positions itself as a next-generation PVA/VAE hybrid adhesive, delivering enhanced performance in a generous 500ml volume. This formulation surpasses standard PVA with superior flexibility, strength, and adhesion across diverse materials including paper, wood, glass, and ceramics. Its water-soluble nature maintains easy cleanup while offering permanent bonds that withstand stress and movement.
What Makes It Stand Out: The VAE (vinyl acetate ethylene) copolymer formulation provides exceptional flexibility that standard PVA cannot match, preventing cracked bonds on moving substrates. The rapid drying time accelerates project completion, while acid-free composition ensures safety for archival applications. Its reversibility when wet offers unique restoration possibilities not found in traditional PVAs.
Value for Money: The 500ml size provides excellent volume for active crafters and repair enthusiasts. Competitively priced against premium PVA glues, it offers demonstrably superior performance characteristics. The multi-surface capability eliminates the need for separate specialty adhesives, creating significant cost savings for workshops and classrooms that handle diverse materials.
Strengths and Weaknesses: Strengths include superior bond strength and flexibility, quick setting time, true water solubility for easy tool cleaning, and non-toxic formulation. The large volume suits frequent users. Weaknesses involve potential overkill for simple children’s crafts, limited brand recognition compared to established competitors, and faster drying that may challenge beginners who need longer working time.
Bottom Line: Flexibond is ideal for serious crafters, educators, and DIYers requiring professional-grade performance. The enhanced flexibility and strength justify upgrading from standard PVA. Highly recommended for mixed-media projects and repairs where movement is a concern.
9. Wood Glue, Strongest Heavy-Duty Wood Glue for Furniture, Waterproof Clear PVA Crazy Glue for DIY, Crafts, Furniture, Baseboard, Cabinets, Door(150g)

Overview: This adhesive markets itself as a heavy-duty solution for furniture and cabinetry, promising professional-grade cyanoacrylate-level strength in a clear-drying 150g format. The manufacturer positions
Understanding Bent Laminations and the Chalk-Line Challenge
What Are Bent Laminations?
Bent laminations represent one of woodworking’s most elegant solutions for creating strong, permanent curves without sacrificing wood grain continuity. By resawing solid stock into thin strips—typically 1/16 to 1/8 inch thick—and gluing them together over a form, you’re essentially creating plywood tailored to your specific curvature. The process allows wood fibers to bend without breaking, distributing stress across multiple layers rather than forcing a single piece to accommodate the bend.
The technique dates back centuries but has seen modern refinements in both tooling and adhesive technology. While steam bending relies on plasticizing lignin through heat and moisture, bent laminations work with the wood’s natural flexibility at reduced thicknesses. This method offers superior predictability and eliminates the spring-back issues that plague steam-bent pieces. However, the success of the entire assembly hinges on one critical factor: the glue’s ability to maintain a flexible, unbreakable bond as the wood expands, contracts, and flexes through seasonal humidity changes.
The Dreaded Chalk-Line Break: A Woodworker’s Nightmare
Chalk-line breaks manifest as fine, powdery fractures along glue joints that resemble snapped chalk. They occur when adhesive films become more rigid than the surrounding wood, creating stress concentration points. As the laminated assembly flexes—whether from normal use, environmental moisture fluctuations, or the internal stresses of the curve itself—the brittle glue line succumbs first. The failure typically begins microscopically, invisible to the naked eye, until enough cumulative damage creates visible cracks.
What makes these failures particularly insidious is their delayed onset. A lamination might appear perfect upon demolding, only to develop chalk lines weeks or months later. The problem compounds because each break reduces the assembly’s overall strength, transferring more stress to remaining intact joints and accelerating cascade failure. Traditional PVAs form rigid thermoplastic films that simply can’t accommodate the dynamic stresses in curved applications, especially in species with high dimensional movement like oak or maple.
Why Standard PVA Glue Fails in Curved Applications
Standard polyvinyl acetate adhesives create strong but brittle bonds. Their polymer chains form tight, crystalline structures that resist tensile forces excellently in straight-grain applications but fracture under the complex shear and tension combinations found in bent work. When wood moves—and it always does—the rigid glue line can’t follow, resulting in the characteristic chalky fracture.
Additionally, most conventional PVAs exhibit poor creep resistance under sustained load. In a bent lamination, the inner radius experiences constant compression while the outer radius endures perpetual tension. Rigid adhesives slowly deform under this unrelenting stress, eventually failing. The glue line also becomes the weakest link in the wood’s natural moisture exchange, creating differential swelling that exacerbates stress concentrations at the joint interface.
The Science Behind Flexible PVA Adhesives
How PVA Chemistry Creates Flexibility
Modern flexible PVAs achieve elasticity through controlled polymer branching and plasticizer incorporation. Manufacturers manipulate the molecular weight distribution, creating long-chain polymers with strategic side branches that prevent tight packing. This results in an amorphous, rubbery film rather than a crystalline one. The adhesive can stretch up to 200-300% of its original length before failure, compared to 10-20% for standard PVAs.
Cross-linking agents represent another advancement. Some formulations include latent cross-linkers that activate with moisture or heat, creating a hybrid structure that’s thermosetting yet retains flexibility. This provides the best of both worlds: initial PVA ease of use with cured properties approaching polyurethane or epoxy. The key is that these cross-links are spaced far enough apart to allow polymer chain movement while still providing cohesive strength.
The Role of Elastomers in Modern Wood Glues
Many advanced PVAs incorporate elastomeric additives—typically synthetic rubbers or flexible acrylic monomers—that co-polymerize with the vinyl acetate. These elastomer domains act as tiny shock absorbers within the glue film, dissipating stress through molecular motion rather than transferring it to the wood interface. Think of them as micro-springs embedded in the adhesive matrix.
The concentration and type of elastomer dramatically affect performance. Too little, and flexibility remains marginal; too much, and bond strength to wood fibers decreases. Premium formulations optimize this balance, often using block copolymers that create alternating rigid and flexible segments. This architecture provides high initial tack and strength while maintaining long-term elasticity. The result is a glue line that can absorb the differential movement between lamination layers without transmitting destructive forces.
Open Time vs. Clamp Time: Critical Distinctions
Open time—the period during which glue remains workable—becomes crucial in bent laminations where you’re spreading adhesive on multiple strips before clamping. Flexible PVAs often feature extended open times of 15-30 minutes, compared to 5-10 minutes for standard formulas. This isn’t just about convenience; it’s about ensuring all layers receive adequate adhesive before the first-applied glue skins over.
Clamp time, however, tells a different story. While many woodworkers assume longer open time means longer clamp time, advanced formulations use rapid-tack polymers that develop handling strength quickly despite remaining open. The key is understanding that flexibility additives can accelerate initial grab while slowing full cure. Most quality flexible PVAs achieve workable strength in 30-60 minutes but continue developing full cross-linking over 24 hours. Rushing demolding before the adhesive develops adequate cohesive strength is a primary cause of latent chalk-line failures.
Key Features to Evaluate in Flexible PVA Glues
Flexibility Rating and Modulus of Elasticity
Manufacturers rarely advertise “flexibility ratings” directly, but you can infer performance from technical data sheets. Look for modulus of elasticity values below 300 MPa in the cured film—lower numbers indicate more flexible polymers. Some technical documentation includes elongation-at-break percentages; target values above 150% for serious bent work.
The ASTM D1184 test for flexural strength of adhesives provides standardized comparisons, though not all brands publish results. When available, seek adhesives showing less than 5% strength reduction after cyclic flex testing. Real-world indicators include “Type I” or “waterproof” ratings combined with explicit flexibility claims. Be wary of “Type II” water-resistant glues in bent applications, as their formulations often sacrifice elasticity for moisture resistance.
Moisture Resistance Levels for Indoor vs. Outdoor Projects
Flexibility without moisture resistance creates a different failure mode: glue line swelling and eventual degradation. For interior furniture, a Type II water-resistant rating suffices, but the glue must maintain flexibility across humidity ranges from 30-70% RH. For outdoor or bathroom applications, Type I waterproof rating becomes mandatory, but verify that the waterproofing chemistry doesn’t embrittle the film.
Modern hybrid PVAs achieve water resistance through acrylate monomers or N-methylolacrylamide cross-linkers rather than formaldehyde-based systems. These create water-resistant yet flexible networks. However, there’s always a trade-off: maximum water resistance typically reduces ultimate flexibility by 10-15%. For most bent laminations in climate-controlled environments, prioritize flexibility over absolute waterproofing. The wood movement itself poses greater risk than occasional moisture exposure.
Viscosity Considerations for Thin Veneers
Bent laminations often use veneers as thin as 1/32 inch, requiring glue that spreads thinly without starving the joint. Ideal viscosities range from 3,000 to 6,000 centipoise—thick enough to prevent excessive squeeze-out and run-off vertical surfaces, yet fluid enough for uniform coverage with a roller or brush. Too thin, and you’ll fight gravity; too thick, and you’ll get uneven distribution and potential dry spots.
Temperature significantly affects viscosity. Quality flexible PVAs maintain relatively stable viscosity across 60-80°F shop temperatures. Below 55°F, even premium formulas become sluggish and won’t penetrate wood fibers properly. Above 85°F, they thin excessively, leading to over-penetration and starved joints in porous species like oak. Some formulations include thixotropic agents that make the glue flow under pressure but resist sagging when static—ideal for complex curved forms.
Temperature Performance Parameters
The glass transition temperature (Tg) marks where a polymer shifts from flexible to brittle. For bent laminations, you want Tg well below your shop’s minimum temperature—ideally under 40°F. This ensures the glue remains rubbery even in cool conditions. Standard PVAs often have Tg around 50-60°F, explaining why winter glue-ups fail more frequently.
Heat resistance matters too, especially for furniture near radiators or in sunny windows. Look for heat deflection temperatures above 140°F. Premium flexible PVAs use heat-resistant monomers that prevent softening without sacrificing low-temperature flexibility. The sweet spot is a wide service temperature range, typically -20°F to 180°F for professional-grade formulations. This ensures your bent work survives attic storage and winter shipping without developing stress fractures.
Gap-Filling Capabilities
While bent laminations should theoretically have perfect contact, reality involves slight imperfections, spring-back during clamping, and wood surface irregularities. Flexible PVAs with gap-filling additives—typically cellulose fibers or fumed silica—can accommodate gaps up to 1/16 inch without significant strength loss. However, excessive gap-filling ability often correlates with reduced flexibility, as the fillers themselves are rigid.
The key is “controlled gap-filling” where the adhesive can bridge minor voids while maintaining film elasticity. Avoid glues marketed primarily as gap-fillers for bent work; they’re formulated for joinery, not laminations. Instead, look for “high-solids” content (45-50%) which provides built-in gap-filling without compromising polymer flexibility. The solids create volume to fill microscopic voids while the polymer matrix remains pliable.
Application Techniques for Flawless Bent Laminations
Surface Preparation: Beyond Simple Sanding
Proper surface prep for bent laminations goes far beyond 120-grit sanding. You need pristine, uniform surfaces that maximize mechanical interlock without creating glazing that prevents penetration. Start with 80-grit to flatten any saw marks from resawing, then progress to 120-grit for final smoothing. Always sand with the grain to minimize cross-grain scratches that become stress risers.
Critical yet often overlooked: cleaning the sanding dust. Standard compressed air blows fine particles deeper into wood pores. Instead, use a vacuum with brush attachment followed by a tack cloth barely dampened with denatured alcohol. This removes dust while slightly raising grain for better mechanical bond. For oily species like walnut or exotic hardwoods, wipe with acetone 30 minutes before gluing to temporarily reduce surface oils without affecting deep moisture content.
Glue Spread Rate: The Goldilocks Principle
The optimal spread rate for flexible PVA in bent laminations is 6-8 grams per square foot—roughly the thickness of a business card. Too little glue starves the joint, creating dry spots that manifest as chalk lines. Too much creates hydraulic pressure that prevents full contact and wastes expensive adhesive. Use a foam roller for consistent application, working quickly to maintain wet edge.
Apply glue to both mating surfaces for maximum coverage and extended open time. This “double-spread” technique ensures complete wetting and allows you to work methodically without rushing. For highly figured or curly grain that’s more porous, increase spread rate by 20% on those strips specifically. The extra adhesive compensates for uneven absorption and prevents the figured areas from becoming failure points.
Strategic Clamp Placement and Pressure Distribution
Bent laminations require progressive clamping that follows the curve’s radius. Start at the center and work outward, alternating sides to prevent twisting. Use cauls—stiff boards covered with wax paper—to distribute pressure evenly across the width. Without cauls, individual clamps create pressure points that squeeze glue from localized areas, guaranteeing chalk-line failures at those spots.
Pressure requirements vary by species hardness but generally range from 100-150 psi for hardwoods. This seems high, but remember it’s distributed across many clamps. The real art is applying uniform pressure along the entire curve. For complex shapes, create custom clamping blocks that match your form’s radius. These blocks should be 2-3 inches wide to spread load without creating hard edges. Check for even squeeze-out along the entire glue line; gaps in squeeze-out indicate insufficient pressure or glue starvation.
Managing Squeeze-Out Without Compromising the Joint
Squeeze-out management separates professionals from amateurs. The goal isn’t elimination—it’s controlled, uniform bead that indicates adequate glue without excessive waste. Apply too little pressure to avoid squeeze-out, and you’ll have starved joints. Clamp too aggressively, and you’ll squeeze out all the flexible polymer, leaving a brittle, filler-heavy glue line.
The optimal technique: wait 15-20 minutes after final clamping, then scrape the semi-gelled squeeze-out with a sharp putty knife. At this stage, the glue skins over but remains pliable underneath, allowing clean removal without smearing into wood pores. For tight inside curves where tools won’t reach, use painter’s tape applied before clamping. Remove the tape while the glue is still tacky (30-45 minutes) for crisp lines. Never wipe wet squeeze-out with a damp cloth; water dilutes the glue line and reduces flexibility.
Curing Environments: Temperature and Humidity Control
Flexible PVAs cure through water evaporation and polymer coalescence, processes highly sensitive to environmental conditions. Ideal curing occurs at 65-75°F and 45-55% relative humidity. Below 60°F, cure slows exponentially, and full flexibility may never develop. Above 80°F, the film forms too quickly, trapping water and creating weak, foamy glue lines.
Create a micro-environment for critical pieces. A simple plastic tent with a small humidifier maintains stable conditions, especially in dry winter shops. Avoid direct airflow from fans or heaters, which creates uneven curing and can cause case-hardening of the glue film. For large architectural millwork, consider renting a climate-controlled storage space for the first 48 hours. The investment prevents catastrophic failures in installed pieces that are impossible to repair.
Common Mistakes That Lead to Glue Line Failures
Over-Clamping: The Silent Killer of Flexibility
The most pervasive myth in bent lamination is “more pressure equals stronger bonds.” In reality, excessive pressure squeezes flexible polymers from the joint, leaving behind only rigid fillers and starved contact areas. Flexible PVAs require enough pressure for intimate contact—typically 100 psi—but beyond 150 psi, you’re actively weakening the glue line.
Visual indicators of over-clamping include translucent glue lines (too thin), excessive squeeze-out that’s watery rather than creamy, and wood surfaces that appear “washed” after demolding. The glue film should remain slightly thick, allowing for polymer movement. Use torque-limited clamps or develop a feel for proper pressure by practicing on scrap assemblies. Remember, flexible adhesives work by maintaining a resilient film, not by molecular fusion like epoxies.
Insufficient Drying Time: Patience Pays Dividends
Flexible PVAs develop handling strength quickly but require full 24-hour cure for maximum elasticity. The polymer chains need time to fully entangle and cross-link. Demolding after 4-6 hours is tempting but leaves the glue line vulnerable to stress. The internal stresses locked into a bent lamination are immense; premature release allows these forces to act on a partially-cured, weak polymer network.
For critical pieces, extend clamp time to 36 hours for insurance. The glue won’t be harmed by extra time, but removing clamps too early guarantees eventual chalk-line failures. Temperature matters here too—at 60°F, increase cure time by 50%. Don’t rely on touch-tests; the surface may feel firm while the interior glue line remains soft. Mark your calendar and walk away. The shop will still be there tomorrow.
Wood Moisture Content Mismatches
Laminating strips at different moisture contents creates internal stresses that overwhelm even the most flexible adhesive. A 2% MC difference between strips can generate hundreds of pounds of force per square foot as they equilibrate. The glue line becomes the battleground where these forces release, resulting in chalk-line breaks that appear days after assembly.
Target 6-8% moisture content for all strips, measured with a pinless moisture meter on both faces. After resawing, allow strips to acclimate in stickered piles for at least a week before gluing. For urgent projects, force-equilibrate in a humidity-controlled chamber at 45% RH for 48 hours. Never laminate wood straight from the kiln (too dry) against wood that’s been sitting in a humid shop (too wet). The adhesive can’t compensate for poor material preparation.
Ignoring Wood Grain Orientation
Grain direction dramatically affects stress distribution in bent laminations. For maximum strength and minimum glue line stress, orient all strips with grain running parallel. Mixing grain directions—even slightly—creates shear forces at the glue line as each piece expands and contracts differently across its width.
When resawing from a single board, number strips sequentially and maintain that order during glue-up. This ensures grain continuity and minimizes cumulative error. For figured woods where grain wanders, examine each strip under raking light and mark the dominant grain direction. If grain angles exceed 15 degrees between adjacent strips, expect glue line failures regardless of adhesive quality. In such cases, either re-saw or accept that the piece requires mechanical reinforcement beyond glue.
Comparative Analysis: PVA vs. Other Bent Lamination Adhesives
Epoxy Systems: When to Consider the Alternative
Epoxy offers unmatched gap-filling and structural properties but introduces complications. Its rigidity, despite marketing claims, makes it prone to chalk-line failures in thin laminations. Where epoxy excels is in highly stressed architectural components or laminations involving dissimilar materials (wood to metal, for instance). The key advantage is zero water content, eliminating the moisture-related swelling issues that plague PVAs.
However, epoxy’s long cure times, toxicity concerns, and cost make it impractical for most furniture work. Mixing ratios must be exact, and temperature sensitivity is extreme. For bent laminations under 1/2 inch thick that remain in climate-controlled environments, modern flexible PVAs match epoxy’s strength while providing superior elasticity. Reserve epoxy for marine applications, extreme outdoor exposure, or laminations thicker than 1 inch where its structural bulk becomes advantageous.
Urea Formaldehyde: Traditional but Brittle
Urea formaldehyde (UF) dominated bent lamination for decades, prized for its rigid, creep-resistant bond. Ironically, this rigidity is its downfall in modern climate-controlled homes. UF forms a thermosetting network that’s strong but glassy-brittle, leading to classic chalk-line failures as wood moves. Additionally, UF requires precise mixing, emits formaldehyde during cure, and offers poor gap-filling.
The primary advantage of UF is its transparent glue line, desirable in fine furniture. However, modern flexible PVAs now offer “natural” dried colors that are nearly invisible on most species. Unless you’re reproducing period pieces requiring authentic materials, UF offers no benefits over current PVA technology. The health risks and brittleness make it obsolete for contemporary work.
Hide Glue: The Historical Flexibility Champion
Hide glue remains the gold standard for reversibility and natural flexibility, used in stringed instruments and museum restorations. Its protein-based polymers create leathery films that move with wood beautifully. However, hide glue demands specialized equipment (heated pots), offers short open times, and provides poor moisture resistance. It also creeps under sustained load, making it unsuitable for structural bent laminations.
The learning curve is steep; improper temperature control yields weak bonds. For production work or one-off furniture pieces, hide glue’s benefits don’t justify its limitations. Modern flexible PVAs mimic hide glue’s elasticity while adding water resistance, longer open time, and vastly simpler application. Consider hide glue only when reversibility is paramount—for instance, in pieces designed for future disassembly or repair.
Why Modern PVA Often Wins for Hobbyists
The compelling case for flexible PVA lies in its forgiveness. Unlike epoxy or UF, PVA cleans up with water, requires no mixing, and forgives minor surface preparation lapses. Its water content actually benefits bent laminations by temporarily plasticizing wood fibers, allowing tighter radius bends during assembly. As the water evaporates, the wood stabilizes while the glue cures, locking in the shape.
Cost-effectiveness is undeniable—flexible PVA costs 30-50% less than epoxy and doesn’t expire quickly once opened. For woodworkers producing fewer than twenty bent pieces annually, the convenience factor outweighs marginal performance gains from exotic adhesives. The key is selecting a true flexible formulation rather than adapting standard PVA through additives or wishful thinking.
Environmental and Health Considerations
VOC Content and Indoor Air Quality
Flexible PVAs generally contain minimal volatile organic compounds (0-15 g/L), making them safe for indoor use. However, some formulations include ammonia or acetic acid as stabilizers, creating noticeable odors during cure. While not hazardous at typical shop ventilation levels, these can irritate sensitive individuals. Always check Safety Data Sheets for specific compounds.
Low-VOC formulations exist but often compromise flexibility, as the plasticizers responsible for elasticity can be VOC sources. The sweet spot is “zero-added-VOC” glues that rely on high-molecular-weight polymers inherently flexible without volatile modifiers. These premium formulas cost 20-30% more but provide peace of mind for health-conscious woodworkers or those working in basement shops with limited ventilation.
Disposal and Cleanup Best Practices
Never wash large quantities of uncured PVA down the drain. While biodegradable, concentrated glue can overwhelm septic systems and municipal treatment facilities. Instead, spread waste glue on scrap cardboard and allow it to dry completely before disposal in regular trash. Cured PVA is inert and landfill-safe.
For cleanup, use damp—not wet—rags to avoid diluting glue lines on active projects. Wash tools in a bucket, then evaporate the water outdoors to concentrate solids for disposal. Keep a dedicated “glue rag” that’s been washed multiple times; residual glue in fabric fibers actually improves the rag’s ability to remove fresh glue without smearing. Replace these rags weekly to prevent bacterial growth from organic compounds.
Water Resistance vs. Waterproof: The Crucial Difference
The terms create dangerous confusion. “Water-resistant” (Type II) means the glue survives occasional moisture without immediate failure but isn’t rated for continuous immersion. “Waterproof” (Type I) indicates the adhesive passes rigorous boil tests and sustained submersion trials. For bent laminations, this distinction matters because waterproofing chemicals can reduce flexibility.
Most bent furniture lives indoors, making Type II perfectly adequate and often superior in flexibility. Reserve Type I for bathroom vanities, outdoor furniture, or kitchen pieces near sinks. Remember, no PVA is truly waterproof in the marine sense; for boatbuilding, epoxy remains mandatory. The waterproof rating simply indicates the adhesive maintains strength after severe water exposure, not that it’s impervious to water vapor transmission.
Testing and Validation Methods
The Bending Test: Qualifying Your Glue Choice
Before committing to an expensive project, create a simple test lamination using your chosen glue and target wood species. Make a six-layer bend over your tightest intended radius, then after full cure, cut test pieces 1 inch wide and bend them to failure. A quality flexible PVA will allow the wood to break before the glue line shows any fractures. If you see chalk lines before wood failure, reject that adhesive for bent work.
Perform this test at extreme temperatures too. Freeze the sample overnight, then bend while cold. Heat another sample to 120°F with a heat gun and test. The glue should maintain integrity across this range. Document your results in a shop journal; glue formulations change, and yesterday’s perfect adhesive may have been reformulated. This 30-minute test saves countless hours of rework.
Destructive Testing: Learning from Failure
Deliberately break test pieces to examine failure modes. Chalk-line breaks reveal themselves as clean, glassy fractures along the glue line with powdery residue. Good flexible bonds show wood fiber tear-out, indicating the glue was stronger and more flexible than the wood itself. Use a magnifying glass to inspect fracture surfaces; partial fiber attachment with smooth glue islands signals marginal performance.
Test at different ages: 1 day, 7 days, and 30 days post-cure. Some flexible PVAs develop full elasticity slowly, appearing brittle initially. Others lose flexibility as they age due to continued cross-linking. You want stable performance from day 7 through at least year one. This long-term view prevents nasty surprises when a piece develops chalk lines months after delivery.
Accelerated Aging Tests for Long-Term Confidence
Simulate years of environmental cycling in days using a simple test chamber. Expose test laminations to alternating humidity: 8 hours at 80% RH, 8 hours at 30% RH, cycling for a week. Follow this with temperature cycling between 40°F and 120°F for another week. Inspect for chalk lines after each cycle. Quality flexible PVA survives this torture test with minimal degradation.
For extreme validation, use a UV exposure box (nail curing lamps work) to simulate sunlight aging. UV degrades polymers, and some flexible additives are vulnerable. While not critical for pieces that live indoors away from windows, this test reveals formulations suited for bright, sunny rooms. The best flexible PVAs include UV stabilizers that preserve elasticity even under intense light exposure.
Cost-Benefit Analysis for Serious Woodworkers
Price Per Project Calculations
Flexible PVA costs range from $15 to $40 per quart, roughly double standard PVA. However, the actual cost per project is negligible. A typical dining chair with four laminated back slats uses about 2 ounces of glue—less than $1 worth even at premium pricing. The real cost isn’t the adhesive; it’s the labor and materials that failed glue destroys.
Calculate backwards: if a failed bent lamination wastes $200 in lumber and 10 hours of labor, and premium glue reduces failure risk by even 10%, it pays for itself after one saved project. For production shops, this math becomes compelling. A $5 premium per chair in glue cost prevents a $500 warranty claim. Don’t economize on the cheapest glue; the risk-reward equation favors quality.
Shelf Life Economics: Avoiding Waste
Flexible PVAs typically offer 12-18 month shelf life unopened, but only 3-6 months after opening. Oxygen and moisture trigger slow polymerization. Buy quantities you’ll use within this window. A solo woodworker might waste half a gallon of bulk glue through spoilage, negating any savings. Instead, purchase quarts or pints with upcoming projects in mind.
Storage dramatically affects longevity. Keep opened containers sealed with plastic wrap under the cap to minimize air contact. Some woodworkers transfer glue to smaller bottles as they use it, reducing headspace. Store upside-down to create a glue plug that seals the opening. At $30 per quart, wasting half the container adds $15 to each project—equivalent to buying premium glue in smaller, fresh quantities.
When Premium Glue Justifies Its Price
Premium flexible PVAs ($35+/quart) justify their cost in three scenarios: extreme radius bends (under 3 inches), high-value lumber where failure is catastrophic, or pieces destined for challenging environments (near heat sources or in humid climates). These formulations use purer polymers with tighter quality control, resulting in batch-to-batch consistency that cheaper glues lack.
For production shops, premium glue reduces variability, leading to more predictable clamp times and fewer rejects. The cost difference amortizes across dozens of pieces, while the reputation protection is priceless. For hobbyists building a single showpiece, the $15 premium is cheap insurance. However, for practice pieces or utilitarian workshop projects, mid-range flexible PVAs perform admirably. Match glue quality to project importance rather than defaulting to the most expensive option.
Advanced Tips from Master Craftsmen
Layering Different Glue Types: A Controversial Technique
Some masters apply a thin “sizing” coat of standard PVA diluted 10% with water to seal end grain and highly porous areas, followed by full-strength flexible PVA on the main surfaces. This prevents the flexible glue from soaking into thirsty wood, ensuring adequate glue line thickness. The technique requires precise timing: apply the sizing coat, let it tack up for 5 minutes, then apply flexible glue while the sizing is still active.
Critics argue this creates a hybrid glue line with unpredictable properties. Proponents claim decades of success in difficult species like teak or rosewood. If you experiment, test extensively first. The sizing must be thin enough to penetrate but not so thin it creates a barrier layer. Most woodworkers find proper surface prep eliminates the need for this complexity, but in architectural work with wildly varying grain densities, it can be a lifesaver.
Adding Flexibility Modifiers: What Works and What Doesn’t
Internet forums abound with recipes for “improving” standard PVA by adding glycerin, propylene glycol, or commercial flex agents. Don’t. These additives compromise bond strength, reduce water resistance, and create unpredictable cure rates. Manufacturers balance dozens of variables; amateur chemistry inevitably creates weak links.
The only acceptable modification is controlled thinning with water for specific applications—never exceed 5% addition. More water reduces solids content, starving joints and weakening the polymer network. If you need more flexibility, buy glue designed for it. The cost difference is minimal compared to the risk of custom formulations failing in a client’s home. Professional shops that experiment with additives do so with access to bond testing equipment; without validation, you’re flying blind.
Temperature Manipulation for Extended Open Time
Need more working time for complex laminations? Cool the glue (not the wood) to 50°F before application. This slows skinning and extends open time by 30-50%. Use a refrigerator, not a freezer—freezing damages polymer emulsions. Conversely, warming the wood slightly (80°F with a heat lamp) accelerates cure without affecting open time, as the heat penetrates the wood, not the glue film.
Never heat the glue itself above 75°F; it thins excessively and loses tack. The ideal shop setup involves cooling the glue bottle in a water bath while warming the bending form. This combination gives you extended working time with rapid cure once clamped. Document the temperatures and results; small variations significantly affect performance, and repeatable processes yield repeatable quality.
Project-Specific Recommendations
Chair Components: High-Stress Curves
Chair backs and rockers endure cyclic loading that tests glue flexibility continuously. For these applications, prioritize adhesives with high fatigue resistance—typically indicated by “structural” or “high-impact” ratings. The glue must survive thousands of flex cycles without work-hardening. Look for Tg below room temperature to ensure the polymer remains rubbery during use.
Radius matters critically. Tight curves (under 4 inches radius) concentrate stress enormously; use premium flexible PVA with elongation exceeding 200%. For gentler curves, mid-range options suffice. Always orient grain to run lengthwise in the lamination, even if it means more waste. Cross-grain chair components will fail regardless of adhesive quality. Consider adding a reinforcing strip of straight-grain wood on the tension side of extreme bends.
Decorative Veneers: Aesthetic Considerations
When laminating decorative face veneers over bent substrates, flexibility takes second place to glue line appearance. The adhesive must not telegraph through thin veneers or create visible lines. Choose flexible PVAs specifically marketed for veneer work—these use finer particle sizes and dry to a natural tan color rather than yellow. Apply with a veneer hammer or vacuum press at lower pressure (30-50 psi) to prevent glue bleed-through.
Test for transparency by gluing two pieces of glass together and examining the dried film. Quality veneer glue appears nearly invisible. Avoid formulations with heavy fillers or opacifiers. The glue line should be under 0.003 inches thick; thicker lines become visible under finish, especially with translucent dyes or oil finishes. Some veneer artists apply glue to the substrate only, letting the dry veneer draw adhesive up for a thinner glue line.
Large-Scale Architectural Millwork
Big projects—curved stair rails, radius window casings—present unique challenges. The sheer surface area means longer assembly times, requiring extended open time formulas. Additionally, architectural pieces often face installation stresses and environmental extremes. Choose Type I waterproof flexible PVA with at least 20-minute open time.
Consider the installation process. Will the piece be bent further during fitting? If so, the glue must tolerate post-cure flexing without damage. Some architectural glues include “post-formable” additives that allow limited bending after full cure. Test this by curing a sample, then bending it 10 degrees further. If chalk lines appear, the glue won’t survive field adjustments. For pieces over 8 feet long, also evaluate gap-filling ability, as long laminations accumulate minor imperfections.
Small Radius Bends: Extreme Flexibility Requirements
Bending to a 1-inch radius pushes wood and glue to their limits. At this scale, even premium flexible PVA may struggle. The solution isn’t necessarily better glue—it’s thinner strips. Resaw to 1/32 inch or less to reduce stress. The glue simply holds the shape; the wood does the bending.
If you must use standard thicknesses, consider a “hybrid” approach: flexible PVA for the inner laminations where compression dominates, and a more rigid adhesive for outer tension layers to resist creep. This complex strategy requires extensive testing but can achieve radii impossible with single-adhesive methods. For most woodworkers, the simpler path is accepting that extreme bends demand extreme thinness, not exotic glues.
Storage, Shelf Life, and Glue Management
Decoding Manufacturer Date Codes
Glue containers feature cryptic date codes indicating production batch. Learn to read them—typically a Julian date (day of year) plus year. Purchase glue less than 6 months old for maximum remaining shelf life. Some manufacturers include “best by” dates; treat these as firm deadlines, not suggestions. Old glue may appear fine but has lost the volatile components crucial for flexibility.
Buy from retailers with high turnover, not big-box stores where glue sits for years. Ask when they received their shipment. Online purchases can be risky; warehouse conditions may exceed recommended storage temperatures. Reputable woodworking suppliers rotate stock aggressively. The $2 savings from a discount retailer isn’t worth receiving 18-month-old glue with only 30% of its useful life remaining.
Proper Storage Temperature Ranges
Store unopened glue at 50-70°F. Freezing destroys emulsions, causing irreversible separation. Heat above 90°F initiates slow polymerization, reducing shelf life by half for each 10°F increment. Basements are ideal; garages are death traps. Once opened, store in the main body of the shop, not near exterior walls where temperature swings are extreme.
For long-term storage of backup containers, a dedicated mini-fridge set to 55°F extends life by 50%. Never store glue in food refrigerators due to contamination risk. If glue freezes accidentally, let it thaw completely at room temperature for 24 hours, then shake vigorously. Test on scrap; if it’s lumpy or fails the flexibility test, discard it. The polymer damage is invisible but catastrophic in bent work.
Signs Your Glue Has Expired
Expired flexible PVA exhibits several telltale signs: stringy, cottage-cheese texture; separation that won’t remix; sour or ammonia smell stronger than normal; and poor tack when tested on wood. The “string test” is reliable: dip a stick and pull it up. Fresh glue forms a continuous stream that breaks cleanly. Old glue forms short, brittle strings or fails to string at all.
More subtle is reduced flexibility in cured tests. Make a thin film on glass and let it cure. Fresh flexible PVA peels off as a rubbery sheet you can stretch. Old glue crumbles or tears without stretching. This test is definitive—if the cured film is brittle, the glue will create chalk lines regardless of how carefully you apply it. Trust the test, not the expiration date.
Bulk Buying vs. Small Containers
The economics favor bulk buying only if you’ll use the glue within the opened shelf life. A gallon costs 40% less per ounce than quarts, but if half spoils, you’ve paid more overall. For solo woodworkers, quarts represent the sweet spot—enough for several medium projects without waste. For shops producing bent work weekly, gallons make sense, but transfer to smaller bottles for daily use to minimize air exposure.
Consider splitting a gallon purchase with woodworking friends. Divide it into pint jars filled to the brim to eliminate headspace, then seal with canning lids. This preserves freshness while capturing bulk pricing. Label each jar with the opening date and use oldest first. This cooperative approach works especially well in guilds or club workshops where multiple members need small quantities of premium glue.
Safety Protocols and Best Practices
Respiratory Protection During Long Assembly Sessions
While flexible PVA is low-VOC, extended exposure in poorly ventilated spaces can cause respiratory irritation. During all-day glue-ups, wear a NIOSH-approved respirator with organic vapor cartridges. This becomes critical when using heat guns to warm forms or working in small, enclosed shops. The respirator also protects against wood dust released during final sanding of cured laminations.
Don’t rely on dust masks; they filter particles but not vapors. The ammonia or acetic acid in some formulations can cause sensitization over time. If you experience throat irritation or headaches during glue-ups, your ventilation is inadequate. Install an exhaust fan that creates negative pressure, pulling fresh air across your work area. The goal is 6-10 air changes per hour during active glue application.
Skin Contact and Sensitization Risks
Repeated skin contact with PVA can cause allergic contact dermatitis in susceptible individuals. The flexible additives—often isocyanate-based—are more sensitizing than standard PVA polymers. Wear nitrile gloves during application, not latex, which PVA can degrade. If glue contacts skin, wash immediately with soap and water; don’t wait until the end of the session.
Barrier creams provide secondary protection but aren’t substitutes for gloves. Apply a lanolin-based barrier cream to hands and forearms before starting, then wear gloves. This two-layer approach protects against accidental tears and makes cleanup easier. If you develop persistent redness, itching, or swelling after glue-ups, consult a dermatologist. You may be developing a sensitivity that requires switching to different chemistry entirely.
Shop Ventilation Requirements
Proper ventilation isn’t just about health—it affects glue performance. Stagnant air slows cure by trapping moisture evaporating from the glue line. Install a ceiling fan on low speed to create gentle air movement without creating dust storms. Position intake vents low and exhaust vents high to capture solvent vapors (though minimal) and moisture.
During winter, avoid heating the shop above 75°F while glue cures. The combination of high temperature and low humidity causes glue to skin over rapidly, trapping moisture underneath and creating weak, foamy glue lines. If you must heat aggressively, use a humidifier to maintain 45-55% RH. Monitor with a hygrometer; your comfort level is a poor indicator of proper curing conditions.
Troubleshooting Chalk-Line Breaks
Post-Mortem Analysis: Reading the Failure
When chalk lines appear, stop and analyze before repairing. Use a razor blade to slice through a failed glue line and examine the fracture under magnification. A clean, glassy break indicates brittle adhesive—wrong product or expired glue. A rough, partially-attached failure suggests insufficient pressure or glue starvation. Dark, discolored glue lines point to excessive moisture or contamination.
Map the failure pattern. Breaks concentrated at clamp points indicate over-pressure. Random distribution suggests material issues (moisture content or grain orientation). Breaks only on the outer radius of curves show the glue lacked tensile strength for tension loads. This forensic analysis prevents repeating mistakes. Photograph failures; patterns become obvious over time and guide adhesive selection for future projects.
Repair Strategies for Compromised Laminations
Minor chalk lines in non-structural areas can sometimes be salvaged. Inject thin flexible PVA using a syringe with a blunt needle, working the glue into cracks while flexing the piece slightly. Clamp with minimal pressure and cure for 48 hours. This works only for surface cracks; deep fractures indicate systemic failure.
For structural pieces, disassembly is the only reliable fix. Score glue lines deeply with a bandsaw, then use steam and wedges to separate strips. Clean all old glue meticulously and re-laminate with fresh adhesive. While painful, this ensures longevity. Half-measures result in callbacks and reputation damage. If the piece is painted, you might get away with epoxy injection and reinforcement plates, but for fine furniture, do it right.
When to Start Over vs. Push Forward
The decision point comes down to failure extent and piece value. If chalk lines appear on more than 20% of glue lines, or any break penetrates fully through the thickness, scrap the piece. Attempted repairs on extensively failed laminations never restore original strength. The internal stresses remain, and new failures will propagate.
For minor surface crazing in low-stress areas (like decorative face veneer), you might proceed with reinforcement—a backing strip or mechanical fasteners. But for structural curves carrying load, perfection is the only acceptable standard. The cost of restarting is less than the cost of a failed piece in a client’s home. Develop the discipline to recognize when effort becomes throwing good money after bad.
Frequently Asked Questions
1. Can I make standard PVA flexible enough for bent laminations by adding glycerin or other plasticizers?
No—this is a recipe for failure. Commercial flexible PVAs use complex co-polymer chemistry that can’t be replicated by home additives. Glycerin weakens the bond, prevents proper cure, and causes long-term stickiness. The result will be chalk-line breaks and potential glue line failure. Invest in properly formulated flexible PVA rather than experimenting with untested modifications.
2. How thin should I resaw my strips for bent laminations?
For most hardwoods, target 1/16 to 1/8 inch thickness. The tighter the radius, the thinner the strips. For curves under 4 inches radius, go down to 1/32 inch. The goal is reducing bending stress on each strip so the wood flexes easily without forcing the glue line to accommodate excessive movement. Always test-bend a dry strip over your form—it should bend with moderate hand pressure only.
3. What’s the minimum clamp time before I can remove a bent lamination from the form?
While flexible PVA develops handling strength in 30-60 minutes, resist demolding for a full 24 hours. The internal stresses in bent work are immense, and premature release allows the glue line to stretch before full cure, creating micro-fractures. For tight curves or high-stress applications, extend to 36 hours. The glue won’t be harmed by longer clamping, but rushing guarantees chalk-line failures.
4. Can I use flexible PVA for bent laminations that will live outdoors?
Only if it carries a Type I waterproof rating. Standard flexible PVAs (Type II) will eventually hydrolyze and lose bond strength in outdoor conditions. Even Type I formulas require protection from direct weather. For truly exterior bent laminations like outdoor furniture, consider marine-grade epoxy despite its rigidity, or accept that the piece will need replacement after several years. No PVA is truly permanent outdoors.
5. Why do I get chalk lines only on the outer radius of my bends?
The outer radius experiences tension forces while the inner radius is in compression. Flexible PVAs handle compression beautifully but can be challenged by extreme tension. This indicates your glue choice lacks sufficient elongation for the radius you’re bending. Either switch to a more flexible formulation, thin your strips further, or increase the bend radius. The glue is working correctly; you’re exceeding its design parameters.
6. How do I know if my glue is still good if it’s past the expiration date?
Perform the “cured film test.” Spread a thin layer on glass, let it dry for 24 hours, then peel and stretch it. Fresh flexible PVA forms a rubbery, stretchy film that elongates before tearing. Expired glue becomes brittle, crumbling without stretching. Also check the string test: dip a stick and pull up—fresh glue forms a continuous stream. If it fails either test, discard it regardless of how it looks in the bottle.
7. Is there a visual difference between flexible PVA and standard PVA after curing?
Yes—flexible PVA dries to a slightly softer, more translucent film that often feels slightly tacky for a day or two before fully curing. Standard PVA dries hard, glassy, and brittle. When you peel dried flexible PVA from a mixing cup, it stretches like rubber. Standard PVA snaps like hard candy. Color differences exist too; flexible formulas are often cream-colored when wet versus yellow for standard PVAs.
8. Can I mix different brands of flexible PVA together?
Absolutely not. Each brand uses proprietary polymer blends, plasticizers, and stabilizers. Mixing creates unpredictable chemical interactions that can prevent proper cure, reduce flexibility, or cause complete bond failure. You might get lucky, but the risk far outweighs any minor convenience. Use one formulation per project, and if you switch brands, test thoroughly before committing to important work.
9. What’s the best way to clean up squeeze-out without affecting the glue line?
Wait 15-20 minutes after final clamping until the glue skins over but remains soft underneath. Scrape with a sharp putty knife held perpendicular to the surface. The semi-gelled glue peels away cleanly without smearing into pores. For tight spots, use painter’s tape applied before clamping, removed while the glue is still tacky. Never wipe with a wet cloth, which thins the glue line and reduces flexibility.
10. How do temperature and humidity affect the flexibility of the cured glue line?
Flexible PVAs remain elastic across wide temperature ranges, but extremes matter. Below the glass transition temperature (typically 30-40°F), the polymer becomes brittle and chalk lines appear. Above 150°F, the glue softens and loses strength. Humidity affects the wood more than the glue, but extreme dry conditions can cause flexible polymers to lose plasticizer slowly over years. For most indoor environments, quality flexible PVA maintains performance for decades.
See Also
- Stop Glue-Line Creep with the 10 Best Epoxy Wood Glue for Tabletops This Year
- Stop Clamp Shortages with the 10 Best Cyanoacrylate Wood Glue for Quick Repairs This Year
- Stop Starved Joints: 10 PVA Wood Glue with Extended Open Time in 2026
- 10 PVA Wood Glue That Prevent Glue-Line Staining on Light Woods in 2026
- Stop Glue-Line Creep with the 10 Best Interior Wood Glue in 2026