Table of Contents
There’s something uniquely nerve-wracking about staring down a gap in your wood project, bottle of epoxy in hand, wondering if you’re about to ruin hours of careful work. If you’re a first-timer, that anxiety doubles. The good news? Epoxy technology has evolved dramatically, and 2026’s formulations are more beginner-friendly than ever. “Forgiving” isn’t just marketing fluff—it’s a real characteristic that can mean the difference between a seamless repair and a sticky, expensive disaster.
Whether you’re tackling a live-edge slab with natural voids, fixing a butcher block that dried poorly, or salvaging a dovetail joint that didn’t quite line up, the right epoxy wood glue transforms from intimidating chemical compound to your most reliable workshop ally. This guide cuts through the technical jargon to focus on what actually matters when you’re learning the ropes: working time you can actually use, mixing ratios that don’t require a chemistry degree, and finishes that hide your novice status.
Top 10 Epoxy Wood Glue Gap Filling
Detailed Product Reviews
1. Starbond Thick Super Glue Pro Kit (2 oz) – Gap-Filling CA Glue (Cyanoacrylate Adhesive) – with Clog-Resistant Cap, Microtips & Extra Nozzle for Woodworking, Crafts, Carpentry, Archery Fletching

Overview: The Starbond Thick Super Glue Pro Kit represents over three decades of industrial-grade adhesive expertise since 1988. This 2-ounce cyanoacrylate formula specifically targets gap-filling applications in woodworking, carpentry, crafts, and archery fletching. With a honey-like viscosity of 2000 cps, it handles gaps up to 0.01-0.02 inches while providing adequate positioning time before setting.
What Makes It Stand Out: Unlike runny instant glues, this thick formulation stays where you apply it, making it ideal for vertical surfaces and void filling. The kit includes clog-resistant caps, precision microtips, and an extra nozzle—professional accessories that prevent waste and enable detailed application. The QR code linking to expert video tutorials demonstrates Starbond’s commitment to user success, while their 30-month shelf life warranty (when refrigerated) underscores product freshness and reliability.
Value for Money: At 2 ounces, this kit costs more than generic super glues but delivers industrial-grade performance with a significantly longer shelf life. The included accessories (worth several dollars separately) and access to professional training resources justify the premium. For serious woodworkers, the consistent quality and gap-filling capability eliminate the frustration of failed bonds.
Strengths and Weaknesses: Strengths include superior gap-filling, extended positioning time, comprehensive accessory pack, excellent shelf life, and strong customer support. Weaknesses involve incompatibility with low-energy plastics (polyethylene, polypropylene, silicone) and the need for surface abrasion on smooth materials. The thicker formula requires patience compared to thin instant glues.
Bottom Line: For woodworkers and craftspeople needing reliable gap-filling performance, this Starbond kit is worth every penny. The professional accessories and warranty make it a smart long-term investment over cheaper alternatives.
2. J-B Weld Tan KwikWood Wood Repair Epoxy Putty, 1 oz. Stick
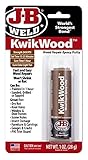
Overview: J-B Weld KwikWood is a hand-mixable two-part epoxy putty stick designed for rapid wood repairs. This 1-ounce stick sets in 15-25 minutes and fully cures in just one hour, offering a light tan finish that blends with many wood tones. With 900 PSI lap shear strength, it repairs dry rot, gouges, cracks, and knot holes without shrinking or rotting.
What Makes It Stand Out: The putty format eliminates mixing tools and measuring errors—simply cut, knead, and apply. Its exceptional workability allows sanding, staining, drilling, and shaping after curing, making it more versatile than liquid epoxies. The one-hour cure time is remarkably fast for epoxy putty, minimizing project delays. It won’t shrink or crack, ensuring permanent repairs that accept screws and nails.
Value for Money: While the 1-ounce size seems small, the concentrated putty formula covers substantial repairs with minimal waste. Priced competitively against liquid epoxies, it saves money by eliminating disposable mixing supplies. For DIYers tackling occasional repairs, one stick handles multiple projects, though larger jobs require additional sticks.
Strengths and Weaknesses: Strengths include effortless hand mixing, fast cure time, excellent post-cure workability, and strong wood-like properties. Weaknesses are the limited working time requiring speedy application, the tan color mismatching some woods, and modest 900 PSI strength unsuitable for structural loads. The small size may frustrate users with extensive damage.
Bottom Line: KwikWood excels for quick, customizable wood repairs where shaping and staining matter. It’s perfect for DIYers who value convenience over bulk quantity. For major restoration projects, stock multiple sticks or consider liquid alternatives.
3. Gorilla 2 Part Epoxy, Clear Epoxy, 0.85 Ounce Syringe (Pack of 2) - 5 Minute Set, Incredibly Strong Bonding

Overview: Gorilla’s 2 Part Epoxy combines the brand’s trademark toughness with user-friendly application in a 0.85-ounce syringe, sold in a practical twin-pack. This clear-drying epoxy sets in five minutes, providing ample repositioning time while curing to an incredibly durable, water-resistant bond suitable for household and automotive repairs.
What Makes It Stand Out: The separate-barrel syringe design prevents premature hardening and dispenses resin and hardener in perfect ratios. The five-minute set time hits the sweet spot—fast enough for efficiency, slow enough for careful alignment. Its gap-filling capability tackles uneven surfaces, while the clear finish ensures invisible repairs on most materials. The twin-pack packaging offers immediate backup for multi-step projects.
Value for Money: Two syringes totaling 1.7 ounces deliver excellent value compared to single-use tubes. The reusable caps extend product life, reducing waste. While premium-priced against store brands, Gorilla’s reputation for reliability justifies the cost for critical repairs where failure isn’t an option.
Strengths and Weaknesses: Strengths include the convenient syringe applicator, optimal set time, clear finish, water resistance, and trustworthy brand backing. Weaknesses involve the small individual volume limiting large repairs, potential curing issues in cold temperatures, and the five-minute window still pressuring complex assemblies. The epoxy isn’t structural-grade for heavy loads.
Bottom Line: This twin-pack is ideal for homeowners needing quick, clean, reliable repairs. The five-minute set time and clear finish make it perfect for visible fixes on various materials. Keep a pack in your toolbox for emergencies.
4. LOOCTOT 60g(2.12 oz) Gap Filler Thick Super Glue Premium Adhesive,CA Glue for Woodworking, Woodturning, Hobby Models, Glass, Plastic, Rubber, Metal.Quick-Dry Waterproof Clear

Overview: LOOCTOT offers a 60-gram (2.12-ounce) thick super glue marketed as a premium gap-filling adhesive for woodworking, hobby models, and multi-material bonding. This cyanoacrylate promises waterproof, transparent bonds in 20-30 seconds, with an anti-clogging cap designed to prevent waste and extend product life.
What Makes It Stand Out: The “calibration viscosity” suggests a tailored thickness for specific gap-filling applications, while the anti-clog cap addresses a common CA glue frustration. Its waterproof claim after 24 hours and transparent finish make it versatile for both functional and aesthetic repairs. The 60-gram quantity exceeds many competitors’ standard sizes.
Value for Money: This budget-friendly option provides more product than premium brands at a lower price point. For hobbyists and casual users, the cost savings are attractive. However, the absence of accessories like microtips or extended warranties means you’ll spend extra on precision applicators. The value proposition favors quantity over comprehensive support.
Strengths and Weaknesses: Strengths include generous volume, fast bonding, anti-clog feature, waterproofing, and multi-material compatibility. Weaknesses center on the unknown brand reputation, vague technical specifications, lack of professional accessories, and no mentioned warranty. Quality consistency may vary between batches compared to established manufacturers.
Bottom Line: LOOCTOT suits hobbyists seeking affordable thick CA glue for light-duty projects. While the quantity and features impress, serious woodworkers should prioritize proven brands like Starbond for critical applications. It’s a decent backup bottle for non-essential repairs.
5. Gorilla All Purpose Wood Filler, Natural Finish, 16 Ounce Tub (Pack of 1) - Water Resistant for Indoor or Outdoor Projects and Repairs

Overview: Gorilla’s All Purpose Wood Filler delivers a robust solution for repairing cracks, gouges, and holes in a substantial 16-ounce tub. This water-resistant compound works indoors and outdoors, drying to a natural finish that accepts paint, stain, and sanding for seamless wood restoration. It even anchors nails and screws, adding functional strength beyond cosmetic repair.
What Makes It Stand Out: Unlike quick-set putties, this filler provides extended working time for large areas and deep voids. Its shrink- and crack-resistant formula ensures durable repairs that won’t fail with temperature fluctuations. The ability to anchor fasteners makes it unique among wood fillers, transforming damaged wood into a solid substrate for hardware. The generous 16-ounce quantity handles extensive projects economically.
Value for Money: This tub offers exceptional value, costing significantly less per ounce than small tubes. One container suffices for multiple furniture restorations, decking repairs, and craft projects. The professional-grade performance at a DIY price point exemplifies Gorilla’s value proposition.
Strengths and Weaknesses: Strengths include large volume, indoor/outdoor versatility, water resistance, zero shrinkage, fastener anchoring capability, and excellent workability. Weaknesses involve longer drying times compared to epoxy putties, potential cracking if applied too thickly in one layer, and the natural finish requiring finishing work to match existing wood. It’s not an adhesive and won’t bond dissimilar materials.
Bottom Line: Every woodworker should have this filler in their shop. The value, performance, and versatility make it indispensable for surface repairs. For structural bonding, pair it with an appropriate adhesive, but for hole-filling and restoration, it’s unbeatable.
6. Titebond Instant Bond Medium CA Super Glue – Jet Black, Ethyl Cyanoacrylate Adhesive for Woodworking, Gap-Filling, 40-60 Second Set – 2 Oz. 8211
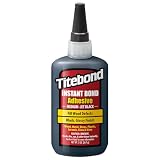
Overview: Titebond’s jet black CA super glue targets serious woodworkers and hobbyists needing both structural bonding and aesthetic enhancement. This professional-grade ethyl cyanoacrylate adhesive delivers impact-resistant bonds while simultaneously filling voids and imperfections with a glossy black finish that blends beautifully into dark woods like walnut and ebony.
What Makes It Stand Out: The rubber-toughened formulation sets this apart from brittle standard CA glues, providing shock absorption for joints subject to vibration or stress. Its 40-60 second working time offers a precious window for precise positioning before the permanent bond sets. The jet black pigmentation isn’t merely cosmetic—it strategically hides knots, cracks, and filler work, eliminating the need for separate staining or touch-ups on dark wood projects.
Value for Money: At the 2-ounce size, this premium adhesive costs more than generic CA glues, but delivers specialized value. The gap-filling capability eliminates separate wood filler purchases, while the integrated color saves finishing time. For pen turners, inlay artists, and furniture restorers working with dark woods, the convenience and professional results justify the price point over buying multiple separate products.
Strengths and Weaknesses: Strengths include exceptional bond strength to diverse materials (wood, metal, stone, ceramic), heat and solvent resistance, and the aesthetic advantage of black coloration. The two-year shelf life ensures reliability. Weaknesses involve the relatively short working time that may pressure beginners, the specialized black color limiting versatility for light-colored projects, and premium pricing that casual DIYers might not justify.
Bottom Line: This is a niche product excelling at specific tasks. For woodworking professionals and serious hobbyists working primarily with dark woods, it’s an indispensable tool that streamlines workflow. Casual users should consider whether the black color and gap-filling features align with their typical projects before investing.
7. Gorilla All Purpose Wood Filler, Natural Color, 6 Ounce Tube (Pack of 1) - Water Resistant for Indoor or Outdoor Projects and Repairs

Overview: Gorilla’s All Purpose Wood Filler delivers a reliable solution for repairing cracks, gouges, and holes in wood surfaces. This 6-ounce tube offers a water-resistant, natural-colored putty that works for both interior and exterior applications, positioning itself as a versatile staple for DIYers and carpenters tackling routine wood restoration projects.
What Makes It Stand Out: The formula’s non-shrinking, non-cracking properties set it apart from budget fillers that often fail after seasonal wood movement. Its ability to anchor nails and screws adds unexpected structural utility beyond cosmetic repair. The paintable, stainable, and sandable characteristics provide exceptional finishing flexibility, allowing seamless integration with existing wood surfaces without visible repair lines.
Value for Money: The 6-ounce tube hits a sweet spot for typical home repair volumes, offering enough product for multiple projects without drying out before use. While priced higher than basic hardware store fillers, Gorilla’s reputation for durability and the indoor/outdoor versatility eliminate the need for separate products. For homeowners maintaining wood trim, furniture, or decking, the reliability justifies the modest premium.
Strengths and Weaknesses: Strengths include excellent water resistance, easy spreadability for smooth application, and true sandability without gumming up. The natural finish accepts stains surprisingly well. Weaknesses involve the natural base color, which may require tinting or careful staining to match darker woods, and longer drying times compared to quick-set alternatives. The tube packaging can be messy for large applications.
Bottom Line: This wood filler earns its place in any DIY toolkit through reliable performance and versatility. It’s ideal for homeowners and woodworkers needing a dependable, finish-ready filler for varied projects. Professionals might prefer larger containers for high-volume work, but for most users, this tube delivers consistent, quality results.
8. Gorilla Max Strength Construction Adhesive, Clear Glue, 2.5 Ounce Squeeze Tube (Pack of 1) - Gap Filling and Waterproof
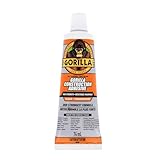
Overview: Gorilla’s Max Strength Construction Adhesive in a 2.5-ounce clear formula represents the brand’s most powerful bonding agent, delivering twice the strength of their Ultimate formula. This heavy-duty glue targets small-scale construction and repair tasks requiring invisible, waterproof bonds across diverse materials.
What Makes It Stand Out: The crystal-clear finish distinguishes it from yellowing construction adhesives, maintaining aesthetic integrity on visible joints. Its gap-filling capability functions as an adhesive caulk hybrid, sealing voids while bonding. The waterproof formulation performs underwater, making it uniquely suited for marine applications, bathroom repairs, and exterior projects exposed to harsh weather.
Value for Money: The compact 2.5-ounce size suits occasional users and precision applications where larger cartridges would be wasteful. While the per-ounce cost exceeds bulk options, the squeeze tube eliminates caulk gun requirements and reduces waste for small repairs. For DIYers tackling intermittent projects, this size prevents product from hardening before use, offering better practical value than larger quantities.
Strengths and Weaknesses: Strengths include exceptional bond strength, true clarity, paintability for seamless finishing, and versatility across materials like wood, metal, ceramic, and plastic. The gap-filling feature adds functional value. Weaknesses center on the limited volume, which quickly depletes in larger projects, and the premium price per ounce. The thick consistency can be difficult to dispense in cold temperatures.
Bottom Line: This adhesive excels for targeted repairs and small assemblies where strength and invisibility matter. It’s perfect for homeowners needing a reliable, multi-purpose adhesive without committing to bulky cartridges. For drawer repairs, trim work, and waterproof fixes, this tube delivers professional-grade performance.
9. STARBOND Black Medium-Thick CA Glue Pro Kit (2 oz) – Rubber-Toughened, Impact-Resistant Cyanoacrylate Super Glue – for Durable Knot Filling, Crack Repair, Woodworking, Guitar, Hobby & RC Projects
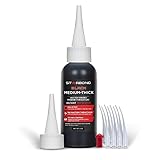
Overview: Starbond’s Black Medium-Thick CA Glue Pro Kit brings 35 years of adhesive expertise to woodworkers and hobbyists requiring precision and durability. This 2-ounce package includes not just the rubber-toughened black CA glue, but a complete applicator system, positioning itself as a professional solution for detailed projects from guitar repair to RC modeling.
What Makes It Stand Out: The included precision tools—anti-clog caps, spare nozzles, and micro-tips—address common CA glue frustrations, enabling controlled application in tight spaces and minimizing waste. The medium-thick “motor oil” consistency provides superior gap-filling while maintaining flow into cracks. Starbond’s small-batch production ensures freshness and extends shelf life to 20 months, a significant improvement over typical CA glues that expire quickly.
Value for Money: This kit commands a premium over basic CA glues but delivers comprehensive value through included accessories that would cost $10-15 separately. For professionals and serious hobbyists, the extended shelf life prevents waste from premature hardening, while the precision tips eliminate ruined projects from over-application. The cost-per-use becomes reasonable when factoring in these included efficiencies.
Strengths and Weaknesses: Strengths include the rubber-toughened impact resistance, ideal for vibration-prone applications like guitars and power tools, plus the professional-grade accessories and proven brand reliability. The black pigmentation integrates seamlessly with dark woods. Weaknesses involve premium pricing that may deter casual users and the specialized nature that makes it less versatile than clear CA glues for general household repairs.
Bottom Line: This kit serves serious craftsmen who value precision and consistency. For woodworking professionals, luthiers, and dedicated hobbyists, the accessory bundle and proven formulation justify the investment. Casual DIYers should opt for simpler, cheaper options unless they frequently work with dark woods or detailed applications.
10. Gorilla Max Strength Construction Adhesive, Clear Glue, 7 Ounce Squeeze Tube (Pack of 1) - Gap Filling and Waterproof

Overview: This 7-ounce version of Gorilla’s Max Strength Construction Adhesive delivers the same formidable bonding power as its smaller sibling but in a more economical size for larger projects. The clear, waterproof formula maintains twice the strength of Gorilla’s Ultimate adhesive, targeting DIYers and professionals needing substantial quantities of invisible, gap-filling glue.
What Makes It Stand Out: The larger tube provides better value while retaining the crystal-clear finish that keeps joints discreet. Its gap-filling capability eliminates separate caulk purchases for many applications, streamlining project workflows. The waterproof, paintable formula excels in demanding environments—from submergible repairs to exterior trim installation—making it a true multi-tasker that reduces the need for specialized adhesives.
Value for Money: The 7-ounce size drops the per-ounce cost significantly compared to the 2.5-ounce tube, making it economical for users with multiple projects planned. While still premium-priced against basic construction adhesives, the concentration, clarity, and versatility justify the cost for serious DIYers. The squeeze tube format remains more convenient and less wasteful than cartridges for moderate-volume applications, striking an ideal balance between economy and practicality.
Strengths and Weaknesses: Strengths include the same exceptional bond strength, true clarity, and all-weather performance as the smaller version, but with better cost efficiency. The larger volume suits baseboard installation, cabinetry, and furniture building. Weaknesses include potential waste if not used within the product’s workable life after opening, and the same thick consistency that can be challenging in cold weather. The premium price may still deter budget-conscious buyers.
Bottom Line: Choose this size if you have several projects queued or tackle medium-scale construction tasks. It offers the best value in Gorilla’s Max Strength line while maintaining convenience. For one-off repairs, the smaller tube remains preferable, but this 7-ounce version serves as a reliable, cost-effective staple for active DIYers and semi-professionals.
What Makes an Epoxy Wood Glue “Forgiving” for Beginners?
Forgiving epoxy isn’t about lowered performance—it’s about expanded margins for error. The most beginner-friendly formulations share specific characteristics that accommodate shaky hands, imperfect measurements, and the learning curve we all face. Extended open times give you the luxury of second-guessing your application technique without watching the mixture turn to gel in your mixing cup. Self-leveling properties minimize the sanding marathon that follows a rushed job. Perhaps most importantly, these products feature simplified mixing ratios that reduce the catastrophic failure rate associated with miscalculated proportions. When you’re still developing your workflow, these features act as silent partners, compensating for inexperience while delivering professional-grade results.
Understanding Gap Filling: Why Epoxy is Your Best Bet
Wood fillers shrink, crack, and lack structural integrity. Traditional wood glue runs out of large voids before it can cure. Epoxy, however, occupies a unique space in the woodworker’s arsenal—it simultaneously adheres, fills, and reinforces. Its zero-shrinkage formula means what you apply is what you get after curing. The exothermic reaction creates a heat-cured bond that literally becomes stronger than the surrounding wood fibers. For gaps larger than 1/8 inch, epoxy isn’t just the best option; it’s often the only option that won’t eventually fail. The material’s ability to accept wood dust for color matching and its compatibility with subsequent finishing products make it irreplaceable for projects where aesthetics matter as much as strength.
Key Features to Look for in Forgiving Epoxy Wood Glue
Not all epoxies deserve a spot in a beginner’s workshop. The learning curve intensifies when you’re fighting your materials instead of mastering technique. Here’s what separates frustration from success.
Working Time: Your Best Friend as a Beginner
Working time (or open time) is the period between mixing and when the epoxy becomes too viscous to manipulate. For first-timers, 30-60 minutes is the sweet spot. Anything under 20 minutes forces rushed decisions and sloppy application. Products offering 90+ minutes might seem appealing, but they often sacrifice final hardness or require extended cure times that test your patience. Look for formulations specifically advertising “extended working time” or “slow set”—these are coded terms for beginner-friendly products. The countdown starts the moment resin meets hardener, not when you begin spreading it on wood.
Viscosity Levels: Finding the Right Flow for Your Project
Viscosity determines how epoxy behaves in the gap. Thin, watery epoxies penetrate deep cracks but can run out the other side of your workpiece, creating a mess and wasting material. Thick, honey-like consistencies stay put in vertical applications but may trap air bubbles and require more aggressive tooling. For gap filling, a medium viscosity—similar to warm maple syrup—offers the best compromise. It flows enough to release trapped air naturally while maintaining enough body to stay where you place it. Some forgiving systems offer adjustable viscosity by adding silica thickeners, giving you custom control without buying multiple products.
Mixing Ratio Simplicity: Why 1:1 Formulas Reign Supreme
Nothing derails a first epoxy project faster than a 5:1 or 10:1 mixing ratio misread at dusk in a poorly lit garage. A single extra pump of hardener can prevent complete cure, leaving you with a permanently tacky, gummy mess. One-to-one ratios by volume eliminate mental math and reduce measurement errors dramatically. Many forgiving epoxies use graduated mixing cups with clear markings or dual-chamber syringes that automatically dispense the correct proportion. This simplicity extends beyond convenience—it directly impacts cure reliability and final mechanical properties.
Color and Finish Options: Matching Your Wood Grain
Raw epoxy cures to a translucent amber that screams “repair” on light-colored woods. Forgiving systems for beginners often include tinting agents or accept universal pigments without complicated chemistry. The ability to mix in fine wood sanding dust from your project creates a custom color match that makes repairs nearly invisible. Some products cure water-clear, ideal for decorative inlays or when you want the gap fill to be a design feature rather than a hidden repair. Consider your project’s final finish: will you stain over the epoxy? Use oil? Polyurethane? Not all epoxies play nice with all topcoats, and the forgiving ones explicitly state their compatibility.
Cure Time vs. Working Time: Striking the Right Balance
Extended working time means nothing if you’re waiting three days before you can sand. Conversely, fast cure times often indicate high exotherm temperatures that can damage delicate wood or create cracks. The ideal forgiving epoxy reaches “green state” (firm enough to shape but not fully hard) within 4-6 hours and full cure in 24. This timeline lets you tackle a project in one day without rushing. Pay attention to “time to sandable” in product specifications—this is the real-world metric that determines your workflow efficiency.
The Science Behind Epoxy Adhesion in Wood Gaps
Understanding why epoxy works helps you use it more effectively. Wood is hygroscopic and porous, constantly moving with humidity changes. Epoxy forms both mechanical and chemical bonds. Mechanically, it flows into microscopic wood pores and hardens, creating interlocking fingers of cured resin. Chemically, the epoxy molecules cross-link with hydroxyl groups in the wood’s cellulose structure. This dual-action bond is why proper surface prep matters—you’re not just gluing surfaces; you’re infiltrating them. The gap-filling capability comes from epoxy’s cohesive strength: it holds itself together under stress, bridging voids that would cause mechanical fasteners or other adhesives to fail.
Common Beginner Mistakes and How to Avoid Them
Even with forgiving epoxy, certain errors can torpedo your project. Recognizing these pitfalls before you start mixing is half the battle.
Mistake #1: Incorrect Mixing Ratios
Eyeballing “close enough” works for cooking, not for epoxy chemistry. Off-ratio mixing produces either a soft, uncured mess or a brittle, cracked result. Always measure by volume using the provided cups or syringes. Mix thoroughly for the full recommended time—usually 3-5 minutes—scraping the sides and bottom of your cup repeatedly. Inadequate mixing leaves sticky patches. Some forgiving epoxies include a visual indicator: when the streaks disappear and the color is uniform, you’re ready.
Mistake #2: Poor Surface Preparation
Epoxy can’t stick to dirt, oil, or old finish. Sand the gap area to bare wood, working up to 80-120 grit—coarse enough for tooth, not so fine that you polish the surface closed. Vacuum thoroughly, then wipe with isopropyl alcohol on a lint-free cloth. Never use mineral spirits; it leaves an oily residue. For oily woods like teak or rosewood, wipe with acetone shortly before applying epoxy to temporarily dry the surface fibers.
Mistake #3: Rushing the Cure Time
That “sandable in 4 hours” claim assumes 70°F and low humidity. At 60°F, cure time can double. Resist the urge to test hardness or apply clamps before the epoxy reaches its green state. Premature stress breaks the fragile polymer chains forming during cure. If you must speed things, use a gentle heat lamp or place the project in a warm (not hot) room. Never use a hairdryer—it introduces dust and creates uneven heating that leads to cracking.
Mistake #4: Ignoring Temperature and Humidity
Epoxy is temperature-sensitive from storage to cure. Cold resin is thick and hard to mix; cold workshops extend cure times exponentially. Ideal working temperature is 65-75°F with humidity under 60%. High humidity can cause amine blush—a waxy film on the cured surface that prevents finish adhesion. If you see a greasy film after cure, wipe it off with warm water and mild soap before sanding. This is less common with newer forgiving formulations but still worth monitoring.
Tools and Supplies You’ll Need for Successful Gap Filling
Beyond the epoxy itself, a modest investment in proper tools prevents headaches. You’ll need:
- Graduated mixing cups (silicone reusable ones save money long-term)
- Flat stirring sticks (not round ones—they don’t scrape corners)
- Quality chip brushes (cheap ones shed bristles into your repair)
- Nitrile gloves (latex allows chemicals through)
- Plastic putty knives for tooling
- Heat gun or torch for bubble removal (keep it moving, 6+ inches away)
- Painters tape to dam open edges
- Denatured alcohol for cleanup
- 80, 120, and 220-grit sandpaper for post-cure finishing
Step-by-Step Guide to Filling Gaps with Epoxy for First-Timers
- Prep the gap: Clean, dry, and tape off surrounding areas. For through-holes, tape the bottom with strong painter’s tape pressed firmly into the edges.
- Mix precisely: Measure resin and hardener into separate cups first, then combine. Mix slowly to avoid introducing air bubbles.
- Tint if desired: Add pigment or wood dust gradually. Mix thoroughly.
- Fill the void: Pour slowly from one side, letting the epoxy flow across. Overfill slightly to account for slight shrinkage (though quality epoxies claim zero shrinkage).
- Remove bubbles: Pass a heat gun quickly over the surface. Bubbles rise and pop within the first 10-20 minutes.
- Let it be: Once bubbles are gone, walk away. No touching for at least 4 hours.
- Sand and finish: Start with 80-grit to level, progress through 220-grit, then apply your topcoat.
Safety Considerations When Working with Epoxy
Epoxy isn’t just sticky—it’s a sensitizer. Repeated exposure can develop into a serious allergy. Always work with adequate ventilation; a garage door cracked open isn’t enough for extended sessions. Nitrile gloves are non-negotiable. If you get epoxy on skin, wash with soap and water, not solvents (which drive chemicals into your pores). Wear a respirator with organic vapor cartridges when sanding cured epoxy—the dust is a mechanical irritant and can contain unreacted chemicals. Keep epoxy components away from children and pets; the resin looks like honey and the hardener smells sweet but both are toxic.
How to Achieve Professional-Looking Results on Your First Try
The secret isn’t perfection—it’s strategic planning. Fill gaps before final assembly when possible; this lets you sand aggressively without fear of scratching adjacent parts. For visible repairs, create a “dam” around the gap with painter’s tape to create clean edges. Mix your epoxy, then let it sit for 5 minutes after mixing—this “induction time” allows initial chemical reactions to begin and reduces bubble formation. When tinting, always go slightly darker than the surrounding wood; repairs that are too light draw the eye. Finally, apply a thin “seal coat” of untinted epoxy to the bare wood first. This prevents air from the wood’s pores from bubbling into your tinted fill coat.
Cost Considerations: Budgeting for Your First Epoxy Project
Forgiving epoxies cost more per ounce than hardware-store varieties, but the price difference is negligible compared to the value of a successful project. Expect to pay $15-30 for a pint kit of quality beginner-friendly epoxy. That covers dozens of small gap repairs. Bulk buying saves money but only if you’re using it regularly—epoxy has a shelf life of about a year once opened. Factor in consumables: mixing cups ($0.20 each), brushes ($1-2), and sandpaper. Your first project might cost $40-50 in materials, but subsequent repairs drop to pennies per gap. Cheaper epoxies with short working times or complex ratios often lead to waste from failed cures, making them more expensive in practice.
Environmental Factors: Temperature, Humidity, and Storage
Store unmixed epoxy in a climate-controlled space. Repeated freeze-thaw cycles degrade the resin and crystallize the hardener. If your garage drops below 50°F in winter, bring the bottles inside. Before mixing, warm the components in warm (not hot) water for 10 minutes—this reduces viscosity and makes mixing easier. During cure, maintain stable temperature. A 20-degree drop overnight can cause cure inhibition, leaving a soft spot. Use a space heater with a thermostat to maintain consistent conditions. High-humidity days (over 70%) can cause cloudiness in water-clear epoxies; save those projects for drier days.
Troubleshooting: What to Do When Things Don’t Go as Planned
Soft spots after 24 hours: The mixture was off-ratio or under-mixed. Scrape out the soft epoxy, re-prep the surface, and re-fill. Don’t apply new epoxy over uncured material.
Excessive bubbles: You mixed too vigorously or the wood wasn’t sealed. Apply a thin seal coat first, or use a slower-setting epoxy that gives bubbles more time to rise.
Epoxy ran out the bottom: Your dam wasn’t adequate. Next time, use thicker epoxy or better tape. For this repair, let it cure fully, then sand flush and re-fill the thin remaining gap.
Amine blush: Wash with warm soapy water, rinse, let dry completely, then sand lightly before finishing.
Cracks in cured epoxy: Exothermic heat was too high. This happens with large masses of epoxy curing too quickly. Next time, pour in thinner layers, allowing partial cure between pours.
Frequently Asked Questions
1. How large of a gap can I fill with epoxy in one pour?
Most forgiving epoxies handle up to 1/2 inch deep in a single pour. Deeper voids require multiple layers to prevent excessive heat buildup (exotherm) that can crack the epoxy or damage the wood. Let each layer reach its gel state (tacky but not liquid) before adding the next.
2. Can I stain over epoxy-filled gaps?
Standard wood stains don’t penetrate epoxy. For color matching, tint the epoxy itself before application. If you must stain, apply a gel stain carefully to the surrounding wood, wiping immediately off the epoxy surface. Better yet, finish the wood first, mask the epoxy area, then fill the gap with tinted epoxy for a perfect match.
3. What’s the shelf life of mixed epoxy?
Zero minutes. Once resin and hardener combine, the chemical reaction is irreversible and unstoppable. You have only the stated working time to use it. Unmixed components last about 12 months if sealed and stored properly, but always check for crystallization in the hardener or cloudiness in the resin before mixing a large batch.
4. Why is my epoxy still tacky after 24 hours?
This indicates incomplete cure, almost always from incorrect mixing ratio or inadequate mixing. Scrape out the tacky material, re-prep with alcohol, and re-mix carefully. Some epoxies remain slightly tacky on the surface due to amine blush; wash with soapy water to differentiate between blush and uncured epoxy.
5. Can I use epoxy outdoors on gap-filled projects?
Standard epoxies yellow and degrade with UV exposure. For outdoor projects, you must apply a UV-blocking topcoat (spar varnish or marine-grade polyurethane) over the cured epoxy. Some forgiving epoxies now include UV inhibitors, but they still require topcoat protection for long-term durability.
6. Is heat necessary for bubble removal?
Not strictly necessary, but highly recommended. A quick pass with a heat gun or torch within the first 20 minutes causes trapped air to expand and rise to the surface. Without heat, bubbles may remain, especially in thicker applications. Keep the heat source moving to avoid scorching.
7. How do I dispose of leftover mixed epoxy?
Never pour liquid epoxy down drains. Let it cure completely in the mixing cup, then dispose of the solid mass with regular trash. Uncured resin and hardener should be taken to hazardous waste collection sites. Check local regulations—some areas classify hardener as corrosive waste.
8. Can I clamp pieces together with epoxy in the gap?
Light clamping pressure is fine and often necessary, but excessive force squeezes all the epoxy out, starving the joint. Use just enough pressure to close the gap without significant squeeze-out. For deep voids, consider filling most of the gap first, letting it partially cure, then assembling with a fresh batch for the final bond.
9. Why does my epoxy have a strong odor?
Quality forgiving epoxies are low-VOC and nearly odorless. Strong smells indicate either cheap formulations with volatile solvents or amine compounds in the hardener. If the odor is overwhelming, improve ventilation and consider switching brands. Persistent headaches or skin irritation are signs of sensitivity—stop using that product.
10. Can I reheat cured epoxy to make it easier to shape?
No. Thermosetting plastics like epoxy don’t soften with heat—they degrade. Attempting to reheat cured epoxy will cause it to smoke, release toxic fumes, and crumble. Always shape epoxy in its green state (partially cured, rubbery) or after full cure using mechanical methods like sanding or carving.
See Also
- 10 Long-Open-Time Epoxy Wood Glue for Complex Assemblies in 2026
- Stop Clamp Nightmares: 10 Polyurethane Wood Glue for Gap-Filling in 2026
- 10 Quick-Set Epoxy Wood Glue for Time-Critical Cabinet Fixes in 2026
- 10 Essential Wood Glue Kits for First-Time Furniture Builders in 2026
- 10 Game-Changing Epoxy Wood Glue for Live-Edge Slab Builds in 2026