Table of Contents
If you’ve ever brushed a rich, beautiful stain onto a pine tabletop only to watch it transform into a patchy, zebra-striped mess, you’re not alone. That heart-sinking moment when the grain pops unevenly and dark splotches appear is practically a rite of passage for woodworkers tackling softwoods. Pine, fir, spruce, and other softwoods are notoriously rebellious when it comes to traditional staining, their unpredictable density and wild grain patterns drinking up liquid pigments like a sponge in some spots while repelling them in others. But here’s the good news: gel stains have revolutionized how we approach these challenging timbers, offering a forgiving, blotch-resistant solution that delivers professional results without requiring decades of finishing experience.
This year, the gel stain market has evolved with advanced formulations that tackle softwood challenges head-on, giving DIYers and seasoned craftsmen alike the tools to achieve even, stunning color on the most difficult projects. Whether you’re refinishing a vintage pine dresser, building new shelving from construction-grade lumber, or adding warmth to spruce trim, understanding how to select and apply the right gel stain makes all the difference between frustration and triumph. Let’s dive deep into the world of gel stains and explore everything you need to know to banish blotchiness for good.
Top 10 Gel Wood Stain
Detailed Product Reviews
1. Varathane Total Control Gel Stain | Low Odor Water-Based Formula | Thick Gel Formula for Vertical Surfaces | Ideal for Wood, Metal & Fiberglass | Half Pint | Dark Walnut

Overview: The Varathane Total Control Gel Stain in Half Pint Dark Walnut offers a modern water-based alternative to traditional oil stains. This compact size is perfect for small-scale projects like refinishing a chair, touching up trim, or staining decorative items. Its thick gel consistency clings to vertical surfaces without dripping, making it ideal for detailed work on furniture, doors, and banisters.
What Makes It Stand Out: The low-odor, water-based formula allows comfortable indoor application without harsh fumes, a significant advantage over oil-based competitors. The one-hour dry time accelerates project completion, letting you apply multiple coats or finish in a single day. Its versatility extends beyond wood to metal and fiberglass, expanding creative possibilities for mixed-material projects.
Value for Money: At half-pint size, you’re paying a premium per ounce compared to larger quantities, but this reduces waste for small projects. The water-based formula means no expensive mineral spirits for cleanup—just soap and water. Compared to oil-based stains, you save on ventilation equipment and time.
Strengths and Weaknesses: Strengths include excellent vertical hold, fast drying, low odor, easy cleanup, and multi-surface compatibility. Weaknesses are limited coverage (approximately 60 square feet), unsuitability for floors or decks, and potential need for multiple coats on dense woods. The small container may dry out if not sealed properly.
Bottom Line: An excellent choice for DIYers tackling indoor furniture refinishing or small decorative projects. The convenience and cleanliness justify the price for those who don’t need a full quart.
2. Varathane Total Control Gel Stain | Low Odor Water-Based Formula | Thick Gel Formula for Vertical Surfaces | Ideal for Wood, Metal & Fiberglass | Quart | Dark Walnut

Overview: The Varathane Total Control Gel Stain in Quart Dark Walnut delivers the same advanced water-based formula as its half-pint sibling but offers four times the material for larger projects. Covering up to 250 square feet, this size suits refinishing multiple furniture pieces, interior doors, or extensive trim work. The Dark Walnut shade provides a rich, contemporary finish that enhances wood grain without overpowering it.
What Makes It Stand Out: The thick, no-drip gel consistency remains the star feature, enabling effortless application on vertical surfaces with minimal mess. The low-odor composition permits indoor use without respiratory concerns or lengthy ventilation periods. Its one-hour dry time stands as a market leader, dramatically reducing project timelines compared to conventional stains that require 4-8 hours.
Value for Money: The quart presents superior value, halving the per-ounce cost of the half-pint version. For projects exceeding 100 square feet, this size eliminates the risk of color-matching issues between batches. When compared to premium oil-based alternatives, you save on solvents, cleanup materials, and time—offsetting any initial price difference.
Strengths and Weaknesses: Strengths include excellent coverage efficiency, consistent color application, versatile surface compatibility, and user-friendly cleanup. The primary weakness remains the restriction against flooring applications, limiting its scope. Some users report the water-based formula raises wood grain, requiring light sanding between coats.
Bottom Line: The optimal size for serious DIY enthusiasts and homeowners undertaking substantial interior projects. The combination of performance, convenience, and coverage makes this the smart purchase for most staining needs.
3. DecoArt Americana Acrylic Gel Stains Paint, 2-Ounce, Walnut
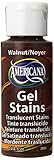
Overview: The DecoArt Americana Acrylic Gel Stain in 2-ounce Walnut is a craft-focused product designed for hobbyists and small-scale artistic applications. This diminutive container holds a thick, creamy water-based stain that prioritizes safety and convenience over industrial durability. It’s formulated for crafts, miniatures, and decorative accents rather than furniture refinishing.
What Makes It Stand Out: The non-toxic certification makes it exceptionally safe for use in confined spaces, classrooms, or homes with children and pets. It completely eliminates oil-based fumes, creating a comfortable working environment. The stain mixes seamlessly with other acrylic paints, allowing custom color creation without compromising texture. Soap-and-water cleanup while wet simplifies the crafting process significantly.
Value for Money: Priced for the craft market, this tiny container offers fair value for its intended purpose but proves prohibitively expensive for furniture projects. A single piece of furniture might require 10-20 bottles, making it impractical beyond artistic touches. For crafters needing precise color for small details, however, it prevents waste associated with larger containers.
Strengths and Weaknesses: Strengths include safety, mixability, easy cleanup, and absence of harmful vapors. Weaknesses are severely limited coverage, lack of durability for high-use items, and potential incompatibility with traditional topcoats designed for oil-based stains. The small opening makes accessing product with standard brushes difficult.
Bottom Line: Perfect for crafters, model makers, and artists working on decorative projects. Avoid for furniture or large surfaces—this is a specialty product, not a general-purpose stain.
4. Americana Gel Stain Wood Stain Paint 3-Pack, Wood Tint Colors Walnut, Oak, Maple, 2-Ounce, With Foam Brushes For Gel Stain Paint

Overview: The Americana Gel Stain 3-Pack bundles three 2-ounce containers in Walnut, Oak, and Maple shades, targeting craft enthusiasts who value variety over volume. Each color provides a different wood tone for small projects, decorative accents, or experimental mixing. The included foam brushes offer immediate application capability, though their quality reflects the craft-grade positioning.
What Makes It Stand Out: Receiving three distinct colors in one package encourages creative experimentation without additional investment. The ability to blend shades creates custom tones like java or antique finishes on a miniature scale. Like its single-color counterpart, this set eliminates oil-based fumes and offers simple soap-and-water cleanup, making it classroom-friendly and apartment-appropriate.
Value for Money: The three-pack delivers better per-ounce value than individual purchases and provides color versatility impossible with single-container products. For craft purposes, this represents solid value. However, the total six-ounce volume remains inadequate for furniture, making this a niche purchase rather than a general staining solution.
Strengths and Weaknesses: Strengths include color variety, included applicators, non-toxic formulation, and mixability. Weaknesses encompass extremely limited quantity, foam brushes that deteriorate quickly, and finishes that may lack the depth of professional stains. The packaging prioritizes shelf appeal over long-term storage, risking product drying.
Bottom Line: An ideal starter set for craft hobbyists exploring wood staining techniques. Purchase if you need multiple tones for small projects; serious furniture refinishers should invest in quart-sized professional products instead.
5. Minwax Gel Stain for Interior Wood Surfaces, Quart, Aged Oak
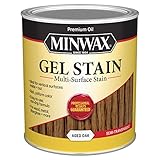
Overview: Minwax Gel Stain in Quart Aged Oak represents the traditional approach to gel staining from America’s most trusted wood finish brand since 1904. This interior-focused product delivers the rich, warm tones associated with classic furniture and cabinetry. The Aged Oak color provides a medium-brown hue with subtle golden undertones that complement traditional and transitional décor.
What Makes It Stand Out: Minwax’s century-long reputation instills confidence in consistency and quality. The thick-bodied formula stays toward the wood surface, offering superior color control and reducing blotching on uneven woods like pine or birch. Its compatibility with non-wood surfaces—including metal, veneer, and fiberglass—adds unexpected versatility for restoration projects involving mixed materials.
Value for Money: The quart size offers professional-grade quantity at a consumer price point, delivering excellent per-ounce value. While typically priced slightly above water-based competitors, the proven durability and depth of finish justify the premium for many users. The established brand reputation reduces the risk of disappointing results.
Strengths and Weaknesses: Strengths include brand reliability, exceptional color control, deep rich finish, and broad surface compatibility. Weaknesses involve stronger odor requiring ventilation, longer dry times compared to water-based alternatives, and mandatory pre-stain conditioning for uniform results on bare wood. The interior-only limitation restricts outdoor applications.
Bottom Line: The go-to choice for traditionalists and those seeking time-tested results on interior woodwork. Accept the odor and slower dry time for a finish that has proven itself for over a century.
6. Varathane Total Control Gel Stain | Low Odor Water-Based Formula | Thick Gel Formula for Vertical Surfaces | Ideal for Wood, Metal & Fiberglass | Half Pint | Kona

Overview: Varathane Total Control Gel Stain in Kona delivers a modern water-based alternative to traditional oil stains. This half-pint container features a thick, no-drip gel formula engineered specifically for vertical surfaces like doors and trim. The low-odor composition enables comfortable indoor use, while the one-hour dry time on wood dramatically accelerates project timelines. Kona provides a rich, dark brown finish compatible with wood, metal, and fiberglass.
What Makes It Stand Out: The proprietary gel consistency eliminates messy runs, giving DIYers professional-grade control. Its water-based chemistry allows soap-and-water cleanup and minimal VOCs, making it ideal for enclosed spaces. The versatility across multiple substrates without requiring separate metal primers is particularly impressive for multi-material projects.
Value for Money: The half-pint size targets small to medium projects—perfect for one or two doors or a small furniture piece. While water-based stains command a premium over oil-based options, the time savings and indoor usability justify the cost. Coverage of approximately 62 square feet makes it economical for targeted applications where precision matters more than volume.
Strengths and Weaknesses: Strengths include exceptional vertical hold, rapid one-hour drying, low odor, and multi-surface compatibility. Weaknesses are the limited volume restricting large projects, unsuitability for floors or decks, and potentially less depth than oil-based stains on dense hardwoods requiring richer saturation.
Bottom Line: Perfect for interior trim work and furniture refreshes where odor and drying time are primary concerns. Best suited for DIYers tackling vertical surfaces in occupied homes who value convenience over maximum coverage.
7. Minwax Gel Stain for Interior Wood Surfaces, Quart, Coffee
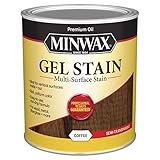
Overview: Minwax Gel Stain in Coffee represents the gold standard in oil-based gel stains from America’s most trusted wood finishing brand since 1904. This quart-sized container provides professional-grade control for achieving deep, even color on woodwork, furniture, doors, and cabinets. The thick-bodied formula stays on the surface longer, allowing superior manipulation and uniform absorption across various wood species.
What Makes It Stand Out: The non-drip consistency excels on vertical surfaces, preventing runs that plague liquid stains. Minwax’s reputation ensures reliable batch-to-batch color consistency. The Coffee shade delivers a sophisticated dark finish that penetrates evenly and adheres to non-porous surfaces like metal and fiberglass with proper preparation, offering true multi-material versatility.
Value for Money: A quart covers substantial area, making it cost-effective for multiple doors or complete furniture sets. While priced higher than standard liquid stains, the gel formulation reduces waste and rework. The requirement for separate pre-stain conditioner on softwoods adds to total project cost but ensures professional results that justify the investment for discerning DIYers.
Strengths and Weaknesses: Strengths include legendary brand reliability, exceptional color control, versatility across materials, and rich pigmentation. Weaknesses involve longer drying times than water-based alternatives, stronger odor requiring ventilation, and mandatory pre-treatment for optimal results on porous woods.
Bottom Line: The go-to choice for serious woodworkers seeking predictable, premium results. Ideal for those who prioritize finish quality over speed and appreciate a trusted heritage brand with proven long-term durability.
8. Minwax 66060000 Gel Stain, Walnut, 1 Quart

Overview: Minwax Gel Stain in Walnut delivers the same professional-grade performance as its Coffee counterpart, offering a classic medium-dark brown tone that complements both traditional and contemporary aesthetics. This quart-sized, oil-based gel stain provides the controlled application that has made Minwax the leader in wood finishing for over a century, enhancing wood grain without overpowering natural character.
What Makes It Stand Out: The Walnut color strikes a perfect balance between warmth and sophistication, creating timeless appeal. The thick-bodied, non-drip formula maintains position on vertical surfaces like cabinet doors and trim, allowing extended working time for achieving uniform coverage. Its versatility extends to metal and fiberglass, making it a true multi-surface solution for cohesive design schemes.
Value for Money: Quart capacity offers excellent coverage for comprehensive projects, from kitchen cabinets to dining sets. The gel consistency minimizes waste through precise application, offsetting the premium price point. While requiring investment in pre-stain conditioner for bare wood, the professional-grade results justify the expense for those seeking a classic walnut finish.
Strengths and Weaknesses: Strengths include timeless color, superior vertical application control, trusted brand consistency, and excellent adhesion to diverse substrates. Weaknesses are typical oil-based constraints: 8-24 hour dry times, solvent odor necessitating ventilation, and cleanup requiring mineral spirits rather than soap and water.
Bottom Line: An outstanding choice for furniture and cabinetry where a classic walnut finish is desired. Best for patient craftsmen who value quality over convenience and seek a proven, durable result that will age gracefully.
9. Furniture Clinic Wood Stain | Natural Oak | Water Based | Fast Drying, Low Odor, & Non-Toxic | for Indoor & Outdoor Furniture and More | Multiple Finishes | (8.5oz / 250ml)

Overview: Furniture Clinic Wood Stain in Natural Oak revolutionizes the staining experience with its ultra-fast, water-based formula. This 8.5-ounce bottle delivers a non-toxic, low-odor solution that dries to a matte finish in just 10 minutes, making it the fastest option for indoor and outdoor furniture projects. The concentrated formula provides excellent coverage while remaining environmentally friendly and safe around families.
What Makes It Stand Out: The unprecedented 10-minute dry time eliminates project delays, allowing multiple coats or same-day sealing. Its water-based composition is genuinely non-toxic and safe around children and pets—a rare claim in wood stains. The Natural Oak color restores wood with authentic, subtle warmth without artificial gloss, and the 12-color range offers excellent selection.
Value for Money: While the small size limits this to furniture and touch-up projects, the concentration maximizes coverage at 3m² per 250ml. The eco-friendly premium is justified for health-conscious users, though you must purchase separate sealer (wax, varnish, or oil) for protection, increasing total project cost compared to all-in-one products.
Strengths and Weaknesses: Strengths include lightning-fast drying, exceptional safety profile, minimal odor, and versatile indoor/outdoor use. Weaknesses are the small volume restricting large applications, mandatory separate sealing step, and metric-only coverage specifications that may confuse buyers accustomed to imperial measurements.
Bottom Line: Ideal for quick furniture makeovers and eco-minded DIYers. Perfect when safety, speed, and low environmental impact outweigh the need for a one-step solution, particularly in homes with children or pets.
10. Water-Based Gel Stain - 200ml Gel Stains for Wood - Gel Wood Stain - Wood Stain for Board, Planks, Cabinet, Craft, Room & Outdoor Furniture - Smoke Gray

Overview: This Water-Based Gel Stain in Smoke Gray offers a contemporary, budget-friendly option for DIY enthusiasts seeking quick results. The 200ml container provides a thick, no-drip gel formula that dries in 15 minutes, combining modern water-based convenience with traditional gel stain control. The trendy Smoke Gray color adds a modern farmhouse aesthetic to furniture, cabinets, and craft projects.
What Makes It Stand Out: The pet-safe, low-odor formulation allows use in occupied homes without health concerns. Its unique compatibility with sealants means you can customize sheen by mixing with varnish or paint sealant, creating a personalized finish. The 15-minute dry time enables rapid project progression, while the gel consistency ensures clean vertical application without runs.
Value for Money: This represents excellent value for crafters and hobbyists tackling small projects. The affordable price point makes experimentation accessible, though unknown brand longevity raises questions about long-term fade resistance. Coverage is suitable for a single chair or several craft projects, positioning it as a specialty product rather than a furniture refinishing staple.
Strengths and Weaknesses: Strengths include affordability, safety for users and pets, easy cleanup, trendy color option, and versatile application. Weaknesses involve unproven brand reputation, limited size for larger furniture, and potentially less durable finish compared to established competitors with decades of performance data.
Bottom Line: A solid entry-level choice for crafters and budget-conscious DIYers. Best for decorative pieces and experimental projects where cost and safety take precedence over long-term proven performance, particularly in households with animal companions.
Understanding the Blotchiness Problem in Pine and Softwoods
The Science Behind Uneven Stain Absorption
Blotchiness isn’t a flaw in your technique—it’s a fundamental characteristic of softwood anatomy. Pine and its relatives feature dramatic density variations between earlywood (the lighter, softer spring growth) and latewood (the darker, denser summer growth). These zones absorb stain at radically different rates, creating that signature splotchy appearance. Add in random resin pockets, pitch streaks, and wildly varying end grain, and you’ve got a recipe for uneven color absorption that can make even premium pine look like a tie-dye experiment gone wrong.
The cellular structure of softwoods compounds this issue. Their relatively large, open pores create capillary action that pulls liquid stains deep into the wood, but inconsistently. Some areas become oversaturated while others remain barely tinted. This isn’t just cosmetic—it’s physics working against traditional thin-bodied stains that rely on penetrating the wood surface.
Why Traditional Stains Fail on Softwoods
Standard oil- or water-based penetrating stains are engineered to soak into wood fibers, which works beautifully on consistent hardwoods like maple or oak. On pine, this same penetration becomes a liability. The stain races into the softer earlywood, darkening it dramatically, while barely touching the harder latewood. Wiping excess only exacerbates the problem, as you’re essentially redistributing pigment from dense areas to porous ones, creating a muddy, uneven finish.
Even pre-stain conditioners, while helpful, are merely a bandage on this fundamental mismatch. They partially seal the wood to create more uniform absorption, but they can’t completely overcome the density differential. Gel stains approach the problem differently, sitting on the surface rather than diving deep, which fundamentally changes the color application dynamic.
What Makes Gel Stains Different?
The Thicker Consistency Advantage
Gel stains behave more like thinned paint than traditional stain, with a viscosity closer to ketchup or pudding. This heavy-bodied formulation is the secret weapon against blotchiness. Rather than flooding the wood’s pores, gel stains rest on the surface, allowing pigments to deposit more uniformly across both dense and porous areas. You control how much color stays on the wood through your wiping technique, not through unpredictable absorption rates.
This consistency gives you an extended open time—often 10-15 minutes compared to 3-5 minutes with liquid stains—letting you work larger sections without racing against drying lap marks. The thickness also means less waste; gel stays where you put it instead of dripping down vertical surfaces or pooling in crevices.
How Gel Stains Interact with Softwood Grain
Because gel stains don’t deeply penetrate, they create a more translucent, layered color effect that enhances rather than fights the wood’s natural character. The pigments sit atop the grain, allowing the wood texture to show through while minimizing the contrast between earlywood and latewood. Think of it as applying a tinted glaze rather than a dye—the color becomes a uniform veil over the surface.
This surface-deposition approach also means you can build color gradually. Thin coats create subtle tints, while additional layers deepen the hue without the risk of oversaturation that plagues penetrating stains. For pine’s notoriously yellow undertones, this control lets you neutralize unwanted warmth or enhance it intentionally.
Key Features to Look for in Quality Gel Stains
Viscosity and Workability
Not all gel stains are created equal. Premium formulations strike a balance between thickness and spreadability—too thick and they become difficult to apply evenly, too thin and they lose their blotch-resistant properties. Look for descriptions like “buttery consistency” or “smooth application” in product literature. The ideal gel should cling to vertical surfaces without sagging but spread easily with a brush or cloth.
Workability also includes how the product responds to re-wetting. Superior gel stains allow you to gently blend edges or feather out lap marks even after several minutes, giving you maximum control over the final appearance. This forgiveness factor is crucial for beginners and professionals alike.
Pigment Density and Color Payoff
High-quality gel stains pack more pigment per ounce than budget options, meaning better coverage and richer color with fewer coats. Cheaper formulations often require three or four applications to achieve the same depth that premium products deliver in one or two. Check the solids content percentage if available—anything above 40% indicates a pigment-rich formula.
Color payoff isn’t just about darkness; it’s about clarity. Cheap stains can appear muddy or opaque, obscuring wood grain entirely. Superior gels maintain translucency while delivering vibrant, clean color that lets the wood’s character shine through. This is particularly important when working with pine’s distinctive knots and figure.
Drying Time and Recoat Windows
The sweet spot for gel stain drying time is 8-12 hours to touch-dry, with a recoat window of 4-6 hours. Faster drying might seem convenient, but it reduces your working time and increases the risk of lap marks. Slower drying allows for better flow and leveling but demands dust-free environments.
Pay attention to cure time as well—some gel stains are dry to the touch in hours but require 24-72 hours before topcoating. This extended cure ensures the stain fully sets and won’t react with subsequent finishes. For project planning, know that humidity and temperature dramatically affect these timelines; a stain that dries in 8 hours at 70°F might need 24 hours in cool, damp conditions.
Preparing Pine and Softwoods for Gel Stain Application
Sanding Techniques for Even Porosity
Preparation begins with progressive sanding to create a uniform scratch pattern that helps the gel adhere consistently. Start with 120-grit to remove mill marks and surface imperfections, then progress to 150-grit for the final pass. Avoid jumping directly to fine grits like 220—these polish the surface and can reduce gel adhesion, leading to uneven color deposit.
Always sand in the direction of the grain, and pay special attention to end grain, which requires extra sanding to reduce its sponge-like absorption. For best results, sand end grain up to 220-grit to partially seal it, creating a more uniform appearance with the face grain. After sanding, thoroughly vacuum and wipe with a tack cloth—gel stains will highlight every speck of dust.
The Role of Wood Conditioners
While gel stains minimize blotchiness, a pre-stain conditioner can still be valuable for extremely problematic woods like knotty pine or construction lumber. The key is using the right type. Avoid water-based conditioners with gel stains—they can raise grain and create adhesion issues. Instead, opt for oil-based conditioners that are fully dry before gel application (typically 2-4 hours).
Apply conditioner thinly and evenly with a foam brush, then wipe away excess after 5-10 minutes. The goal isn’t to seal the wood completely but to partially fill the most porous cells, creating a more level playing field for the gel. Think of it as a primer that reduces extreme absorption differences without preventing the gel from adhering.
Cleaning and Degreasing Protocols
Pine often contains resinous pockets and mill glaze from manufacturing that repel stain. Wipe the entire surface with mineral spirits or denatured alcohol before staining to remove these contaminants. For heavily resinous areas, a light scrub with fine steel wool (0000 grade) dipped in solvent helps break up surface oils.
Never use water-based cleaners or tack cloths treated with water—they raise grain and can cause blotching even with gel stains. After cleaning, allow 30-60 minutes for complete solvent evaporation. The wood should feel completely dry and residue-free before you open the gel stain can.
Application Techniques That Prevent Blotching
The Wipe-On, Wipe-Off Method
The classic application technique involves brushing on a generous amount of gel, then wiping it back with clean cloths to control color depth. Use natural bristle brushes for oil-based gels—they hold and release the thick product better than synthetic brushes. Work in sections no larger than 2-3 square feet, brushing with the grain in long, even strokes.
Wiping is where the magic happens. Use white cotton cloths (old t-shirts work perfectly) and fold them into pads. Wipe with light, consistent pressure in the direction of the grain. The first wipe removes excess, while subsequent passes blend and level the color. For lighter tones, wipe more aggressively; for deeper color, leave more product on the surface. Always have plenty of clean cloths—switch to fresh ones before they become saturated.
Working in Small Sections
Gel stains give you a longer open time, but that doesn’t mean you can treat an entire tabletop as one surface. Work in manageable sections, maintaining a wet edge between them. Overlap each new section by 2-3 inches into the previous one while it’s still wet, then immediately blend the transition with a clean cloth.
On large horizontal surfaces, consider dividing the project into quadrants. Complete one quadrant entirely—including final wiping—before moving to the next. For vertical surfaces like cabinet doors, work from top to bottom, completing one door at a time to prevent drips and runs from affecting finished areas.
Managing Edges and End Grain
Edges and end grain are the biggest culprits for uneven color. Apply gel stain to edges first, using a dry-brush technique—load your brush lightly and work the product thin. For end grain, apply a preliminary “spit coat” of thinned gel stain (mixed 50/50 with mineral spirits) and wipe it back immediately. This partially seals the end grain so the full-strength coat doesn’t absorb too deeply.
When wiping edges, use your cloth folded to a point, applying minimal pressure to avoid removing too much color. End grain should be wiped almost immediately after application, as it can darken dramatically within minutes. Check your work from multiple angles—gel stains can look even under direct light but reveal lap marks when viewed from the side.
Color Selection Strategies for Softwoods
Understanding Undertones in Pine
Pine’s natural color ranges from pale straw to deep honey, with pronounced yellow and orange undertones. These warm undertones can clash with certain stain colors, creating muddy or unnatural results. Cool-toned stains (like ash gray or weathered oak) can neutralize yellow pine, while warm tones (like cherry or mahogany) amplify the golden characteristics.
Always test colors on scrap wood from your project, not just on store samples. Pine’s undertones vary dramatically between boards—even within the same plank. What looks like a rich walnut on one piece might appear greenish on another. Consider the final environment too: north-facing rooms with cool light benefit from warmer stains, while south-facing spaces can handle cooler tones.
Choosing Colors That Minimize Blotch Visibility
Darker stains don’t necessarily hide blotchiness—in fact, they often exaggerate it by increasing contrast between light and dark areas. Mid-toned stains (in the medium brown to medium amber range) tend to be most forgiving on pine. These colors provide enough pigment to create rich color without the extreme contrast that highlights imperfections.
Consider stains with gray or muted undertones rather than pure browns. “Weathered” or “driftwood” style colors deposit pigment more uniformly and disguise the natural yellow variations in pine. If you want a dark finish, plan for multiple thin coats of a medium-toned gel rather than one heavy coat of a dark stain. This builds color gradually and maintains more consistency.
Testing Colors on Scrap Wood
Never skip the testing phase. Create test boards using the exact same sanding sequence, conditioner (if any), and application technique you’ll use on the final project. Apply at least two coats to your test board, as color deepens and evolves with additional layers. Label each test with the stain name, number of coats, and application method.
View your tests in the actual lighting where the finished piece will live. A color that looks perfect in your workshop’s fluorescent lights might appear completely different under residential LEDs or natural daylight. Keep your test boards for future reference—they become invaluable when you need to match the color for repairs or additional pieces.
Common Application Mistakes to Avoid
Over-application and Puddling
The biggest error beginners make is applying gel stain too thickly, creating puddles in corners and recesses that dry tacky and uneven. Remember: gel stains are meant to be applied thinly and built up. A little goes a remarkably long way. If you see glossy, wet pools forming, you’ve applied too much product.
On carved details, moldings, and joints, use a dry brush technique or apply with a cloth-wrapped finger to work stain into crevices without overloading them. After wiping the main surface, go back with a small, dry artist’s brush to remove excess from detailed areas before it sets.
Insufficient Wiping and Sticky Residue
Gel stains that aren’t wiped back properly leave a sticky, tacky surface that never fully dries and ruins topcoat adhesion. This happens when users are afraid of removing too much color. The solution: trust the process. The stain that remains after proper wiping is the color that’s meant to be there—what you wipe away is excess pigment that would cause problems later.
If your surface feels tacky after 24 hours, you didn’t wipe enough. Gently go over the surface with a cloth dampened (not soaked) with mineral spirits to remove the uncured stain layer. Let it dry completely, then assess whether you need another thin coat. Never topcoat over a sticky surface.
Ignoring Temperature and Humidity
Gel stains are sensitive to environmental conditions. Below 60°F, they become too thick to spread easily and dry inconsistently. Above 85°F, they skin over too quickly, reducing your working time. Ideal conditions are 65-75°F with moderate humidity (40-60%). In high humidity, extend drying times between coats by 50% to prevent trapped moisture.
Cold surfaces are as problematic as cold air. If your wood has been stored in an unheated garage, bring it indoors to acclimate for 24-48 hours before staining. Condensation on cold wood prevents proper gel adhesion and guarantees blotchiness. Use a hygrometer and thermometer to monitor your workspace—guessing leads to ruined projects.
Advanced Techniques for Professional Results
Layering and Glazing
Professional finishers often use gel stains as glazes over sealed surfaces for ultimate control. After applying a base coat of gel stain and letting it cure for 24 hours, seal the wood with a thin coat of shellac or sanding sealer. Then apply a second gel stain layer, wiping it back to leave color only in recesses and grain lines, creating depth and dimension.
This technique is especially effective for highlighting carved details or creating an antiqued appearance. The sealed base prevents the second coat from penetrating deeply, so you can manipulate it extensively before it sets. Work small sections and keep a dry brush handy for blending.
Creating Custom Color Blends
Don’t limit yourself to off-the-shelf colors. Gel stains can be mixed like paint to create custom hues. Blend a dark walnut with a medium oak to create a rich, complex brown, or add a touch of black to any color to deepen and mute it. Mix small batches first, recording your ratios precisely.
Test your custom blend on scrap wood, keeping in mind that colors appear lighter when wet. Gel stains also darken slightly as they cure, so evaluate your test after 24 hours. For large projects, mix enough stain for the entire job plus 20% extra—matching a custom color later is nearly impossible.
Tackling Difficult Grain Patterns
Knotty pine and figured softwoods present unique challenges. Knots are dense and resinous, often refusing to accept stain, while surrounding wood is hyper-absorbent. Treat knots individually: sand them to a higher grit (220-320) to reduce their porosity, then apply a thin coat of shellac before staining the entire piece.
For swirling grain patterns, apply gel stain with a swirling motion that follows the grain direction, then wipe with the grain. This deposits more pigment in the figure while maintaining overall uniformity. On boards with extreme figure, consider staining from multiple directions—apply with the grain, then lightly cross-grain wipe to ensure all areas receive even color.
Comparing Gel Stains to Other Blotch-Prevention Methods
Pre-Stain Conditioners vs. Gel Stains
Pre-stain conditioners are the traditional solution for softwood blotchiness, but they’re not a panacea. They work by partially sealing the wood, which helps but doesn’t eliminate the density differential. Gel stains work by changing the application method itself. Used together, they provide a belt-and-suspenders approach, but for many projects, a high-quality gel stain alone is sufficient.
The advantage of skipping conditioner is simplicity and reduced project time. Conditioners add a step, require careful application, and can sometimes interfere with gel adhesion if over-applied. However, for extremely porous woods like fir or for achieving the lightest, most uniform colors, the combination approach yields the most consistent results.
Spray Stains and Toning Systems
Professional finishers often use spray equipment to apply stain evenly, but this requires significant skill and investment. Spray stains can be thinned and misted onto softwoods in multiple light passes, building color gradually. Toning systems involve adding dye to your topcoat, essentially staining and finishing simultaneously.
While effective, these methods lack the forgiveness of gel stains. A single heavy pass with a spray gun creates permanent blotchiness, and toning limits your color correction options. Gel stains remain the most accessible professional-quality solution for the average woodworker without specialized equipment.
When to Choose Each Approach
Choose gel stains for furniture, cabinetry, and any project where you want rich, translucent color with grain visibility. Opt for pre-stain conditioners with traditional stains only when you need to use a specific penetrating stain color that isn’t available in gel form. Reserve spray and toning techniques for production environments where speed justifies the equipment cost and learning curve.
Troubleshooting Blotchiness Issues
Fixing Light and Dark Spots
If blotchiness appears despite your best efforts, all is not lost. For light spots where stain didn’t take, lightly scuff the area with 320-grit sandpaper, then carefully apply a small amount of gel stain with a cotton swab or artist’s brush, feathering the edges. Work in thin layers, letting each dry before adding more.
For dark, oversaturated spots, try removing excess stain with a cloth dampened with mineral spirits. Gently rub the area, working from the center outward to blend. If the spot remains too dark after drying, you may need to sand it back more aggressively and restain the entire section to maintain uniformity.
Dealing with Dried Lap Marks
Lap marks occur when wet stain overlaps dried stain, creating a dark line. If they’re still fresh, blend them immediately with a cloth dampened with mineral spirits. For dried lap marks, sand the affected area with 220-grit paper until the mark disappears, being careful not to sand through the surrounding stain. Then reapply gel stain to the entire section, working quickly to maintain a wet edge.
Prevention is always easier than correction. On large surfaces, keep a wet edge by working quickly in sections, and have an assistant follow behind with a wiping cloth if possible. For vertical surfaces, complete each section from top to bottom without stopping.
Correcting Color That’s Too Dark
Over-darkened gel stain can be lightened, but it’s a delicate process. If the stain is still wet, wipe vigorously with clean cloths to remove as much pigment as possible. For dried stain, gently wet the surface with mineral spirits and immediately wipe—this reactivates the gel and allows some pigment removal.
If these methods aren’t sufficient, you’ll need to sand back the stain and start over. Use 150-grit paper to remove most of the color, then 180-grit to prepare for restaining. This time, apply thinner coats and wipe more aggressively. Remember, it’s always easier to add another coat of stain than to remove excess color.
Maintaining and Protecting Your Stained Softwood
Topcoat Selection for Gel Stains
Gel stains require a protective topcoat to prevent wear and damage. Oil-based polyurethane is the classic choice, offering warm amber tones that enhance gel stain colors. Apply thin coats with a high-quality natural bristle brush, sanding lightly between coats with 320-grit paper. Water-based polyurethanes work too, but they can appear slightly milky over dark stains and don’t add the same warmth.
For a hand-rubbed look, consider applying paste wax over cured gel stain. This provides moderate protection while creating a soft, low-sheen finish that feels luxurious to the touch. Apply wax with 0000 steel wool, working in circular motions, then buff to a subtle glow. Reapply wax annually for continued protection.
Cleaning and Care Recommendations
Gel-stained surfaces should be dusted regularly with a soft, dry cloth. For cleaning, use a damp (not wet) cloth with mild soap, wiping in the direction of the grain. Avoid harsh chemicals, ammonia, or silicone-based cleaners, which can damage the finish or create hazy buildup.
Spills should be wiped immediately—while gel stains are protected by topcoat, prolonged exposure to moisture can cause white rings or discoloration. Use coasters under drinks and placemats under hot dishes. For furniture, rotate objects periodically to prevent uneven fading from sunlight exposure.
Touch-Up Strategies Over Time
Wear and scratches are inevitable. For minor damage, lightly sand the affected area with 320-grit paper, then apply a thin coat of gel stain with a small brush or cloth, feathering the edges. Let it dry, then apply matching topcoat to the repaired spot. Blend the repair by gently wet-sanding the surrounding area with 600-grit paper and rubbing compound.
For larger worn areas, you may need to restain the entire surface to maintain uniformity. The good news is that gel stains are relatively easy to recoat—light sanding and a fresh application often look seamless, unlike penetrating stains that can create visible overlap marks.
Environmental and Safety Considerations
VOC Content and Indoor Air Quality
Most gel stains are oil-based and contain volatile organic compounds (VOCs) that affect indoor air quality. Look for low-VOC formulations if working in occupied homes or poorly ventilated spaces. These products perform nearly as well as traditional formulas while reducing harmful emissions.
Even with low-VOC products, always wear a NIOSH-approved respirator with organic vapor cartridges when applying stain. The pigments and solvents can cause respiratory irritation and long-term health effects. Keep the respirator on during wiping and for at least 30 minutes afterward while solvents evaporate.
Proper Ventilation Requirements
Adequate ventilation is non-negotiable. Open windows and use box fans to create cross-ventilation, positioning one fan to exhaust fumes outdoors and another to draw fresh air in. For basement or interior work, consider renting a negative air machine that filters and exhausts air continuously.
Avoid working on humid days when ventilation is compromised by closed windows. If you must work indoors during poor weather, take frequent breaks outdoors and limit your exposure time. Never use gel stains near open flames, pilot lights, or sparking equipment—the solvents are highly flammable.
Disposal and Cleanup Best Practices
Dispose of stain-soaked rags properly to prevent spontaneous combustion. Lay them flat outdoors to dry completely, then store in a metal container with water before disposal. Never bunch wet rags together or throw them in regular trash while still damp.
Clean brushes and tools with mineral spirits for oil-based gels, collecting the used solvent in a sealed container for proper hazardous waste disposal. Many communities have household hazardous waste collection days. For water-based gel stains (less common but available), soap and water cleanup is sufficient, but the same rag-drying precautions apply.
Cost Considerations and Value Analysis
Price Per Project vs. Price Per Can
Gel stains cost more per quart than traditional stains, but this comparison is misleading. Because gel stains don’t soak deeply into the wood, you use significantly less product per square foot. A quart of quality gel stain typically covers 100-150 square feet in one coat, while a quart of penetrating stain might cover 150-200 square feet but often requires multiple coats on pine.
Calculate cost based on your specific project. For a single dresser, one quart of gel stain is usually sufficient, while you might need two quarts of traditional stain plus conditioner to achieve similar coverage. The time savings and reduced frustration add significant value that isn’t reflected in the price tag.
Shelf Life and Storage
Unopened gel stains last 3-5 years when stored in a cool, dry place. Once opened, use within 1-2 years as skinning and thickening can occur. Always wipe the rim clean before sealing, and consider transferring partially used cans to smaller containers to minimize air exposure.
If a gel stain thickens over time, it can often be revived with a small amount of mineral spirits—add one tablespoon at a time, stirring thoroughly. However, revived stain may have slightly different working properties, so test on scrap wood first. Never thin more than 10%, or you’ll compromise the blotch-resistant characteristics.
When Premium Formulations Are Worth It
Budget gel stains can produce acceptable results on simple projects, but premium formulations justify their cost for fine furniture, cabinetry, and pieces that will be prominently displayed. The superior pigment density, longer open time, and better flow characteristics translate to easier application and more professional results.
Consider your skill level too—premium stains are more forgiving of beginner mistakes. If you’re tackling your first pine project, spending an extra $10-15 on a top-tier gel stain can mean the difference between a piece you’re proud to display and one that gets hidden in the garage.
Project Ideas Perfect for Gel-Stained Pine
Furniture Makeovers
Pine furniture from big-box stores or thrift shops is prime material for gel stain transformations. Dressers, nightstands, and bookshelves with dated golden pine finishes can be sanded and restained in rich espresso or weathered gray for a high-end look at a fraction of replacement cost. The forgiving nature of gel stains makes these projects approachable even for novices.
Consider two-tone effects: stain the top and drawer fronts in a dark walnut while leaving the legs and frame in a lighter tone. Gel stains make these transitions crisp and clean because they don’t bleed into adjacent areas like penetrating stains can.
Built-In Cabinetry
Pine and fir are common materials for built-ins due to their affordability, but their blotchiness can make them look cheap. Gel stains elevate these projects dramatically. For kitchen cabinet refacing, gel stains allow you to stain doors in place without worrying about drips on countertops or floors. The extended open time lets you work methodically across an entire wall of cabinetry.
In home offices and mudrooms, gel-stained built-ins provide custom-furniture appearance without the hardwood price tag. Consider a gel stain base coat followed by a glaze coat to add depth and highlight architectural details like beadboard or crown molding.
Decorative Wood Accents
From picture frames to shelving brackets, small pine accents benefit enormously from gel stains. The controlled application prevents stain from bleeding onto adjacent walls or surfaces during installation. For wall-mounted shelves, stain the pieces before installation, then touch up fastener holes afterward with a small brush.
Gel stains are also ideal for staining pine trim and molding in place. Unlike liquid stains that drip down walls, gel stays put, allowing you to transform baseboards, window casings, and door trim without extensive masking and cleanup.
Frequently Asked Questions
1. Can I use gel stain on previously stained or finished pine?
Yes, but proper preparation is crucial. Scuff-sand the existing finish thoroughly with 150-grit paper to create tooth for adhesion. If the old finish is intact and non-porous, the gel stain will act more like a glaze, sitting on top rather than penetrating. Test adhesion on a hidden spot first, and consider applying a bonding primer if the old finish is glossy.
2. How many coats of gel stain should I apply to pine?
Most projects achieve desired color in 1-2 coats. The first coat establishes the base color and often looks slightly uneven as it dries. A second coat deepens the hue and evens out variations. Rarely do you need more than three coats—if the color isn’t dark enough after two coats, you’re likely using too light a color and should start over with a darker shade.
3. Do I need to sand between coats of gel stain?
Light sanding between coats improves adhesion and smoothness. Use 320-grit paper or fine steel wool to knock down raised grain or dust nibs. Be gentle—you’re not removing color, just smoothing the surface. Always vacuum and tack-cloth after sanding to remove all dust before applying the next coat.
4. Why does my gel stain look streaky after wiping?
Streaking usually results from inconsistent wiping pressure or using a cloth that’s too saturated. Switch to a fresh, dry cloth and wipe with light, even pressure in long, overlapping strokes. If streaks persist, the stain may be too thick—thin it slightly with mineral spirits (no more than 5%) to improve flow.
5. Can I apply gel stain over wood filler?
Yes, but the filler will accept stain differently than surrounding wood. Use a stainable wood filler that’s designed to absorb color. Apply the filler, let it dry completely, then sand it flush. Before staining the entire piece, test the gel stain on the filled area—if it’s too light, touch it up with a small brush after the main staining is complete.
6. How long should I wait before applying a topcoat over gel stain?
Wait a minimum of 24 hours, longer in cool or humid conditions. The stain should feel completely dry and not tacky to the touch. Test by pressing a clean cloth firmly against the surface—if any color transfers, it’s not ready. Rushing this step can cause the topcoat to soften the stain, creating streaks or color pull.
7. Is gel stain food-safe for pine cutting boards or countertops?
No stain is truly food-safe until fully cured and sealed with a food-safe topcoat like epoxy or salad bowl finish. Even then, gel stains are not recommended for direct food contact surfaces because they remain somewhat on the surface. Use mineral oil or beeswax for cutting boards, and reserve gel stains for decorative countertops that will be heavily topcoated.
8. Can I use gel stain outdoors on pine furniture?
Standard gel stains aren’t formulated for exterior use and will fail quickly when exposed to UV light and moisture. However, some manufacturers offer exterior-grade gel stains with added UV inhibitors and fungicides. These are suitable for covered outdoor furniture but still require a compatible exterior topcoat for maximum durability.
9. How do I clean up gel stain spills on unintended surfaces?
For fresh spills on non-porous surfaces like metal or glass, wipe immediately with mineral spirits. On porous surfaces like drywall or unfinished wood, blot (don’t rub) with a clean cloth, then clean the area with mineral spirits. For carpet or fabric, blot with a dry cloth, then use a commercial stain remover designed for oil-based paints—test in an inconspicuous area first.
10. Why is my gel stain still tacky after 48 hours?
Tackiness indicates insufficient wiping or application that was too thick. The uncured stain layer is preventing oxygen from reaching the lower levels. Gently wipe the surface with a cloth dampened with mineral spirits to remove the tacky layer, then let it dry. If the color is now too light, apply a thin, properly wiped coat and allow adequate drying time.
See Also
- Stop Blotchiness: 10 Gel Wood Stains That Solve Pine Staining Issues This Year
- Stop Blotchiness: 10 Gel Wood Stains That Tame Pine Perfectly in 2026
- Stop Blotching: 10 Gel Wood Stains for Pine Projects This Year
- 10 Gel Wood Stains That Solve Blotching on Pine in 2026
- Stop Streaking: 10 Gel Wood Stains That Solve Blotchy Results in 2026