Table of Contents
There’s a world of difference between a door that closes with a satisfying click and one that rattles, sticks, or leaves gaps you could spot from across the room. That difference rarely comes down to the quality of the hardware itself—it’s in the precision of the installation. And when it comes to carving the perfect mortise for a hinge or strike plate, your butt chisel isn’t just another tool in the bag; it’s the difference between a surgical strike and a hatchet job. Professional carpenters know that door hardware installation is a game of thousandths of an inch, where a slightly angled cut or a mortise that’s a hair too deep can throw off an entire project.
This isn’t about accumulating more tools for the sake of it. It’s about understanding why butt chisels—those short, stout blades that feel like an extension of your hand—are non-negotiable for door work. Whether you’re hanging a solid-core oak door in a historic renovation or simply upgrading the hardware on a bedroom door, the right chisel technique paired with the right tool characteristics will elevate your work from functional to flawless. Let’s dive deep into what separates pro-grade butt chisels from the hardware store variety, and how to wield them like a craftsman who’s been fitting doors for decades.
Top 10 Butt Chisels
Detailed Product Reviews
1. Crown Tools 174RB 4 Pieces Butt Chisel Set

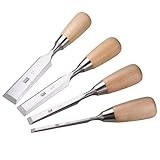
Overview: The Crown Tools 174RB embodies Sheffield, England’s legendary woodworking heritage. This four-piece butt chisel set includes 1/4", 1/2", 3/4", and 1" sizes, featuring hardened and tempered carbon steel blades mated to elegant rosewood handles with brass ferrules. Packaged in a simple cardboard box, these tools prioritize traditional craftsmanship over modern presentation.
What Makes It Stand Out: Sheffield steel carries iconic status among craftsmen, and Crown Hand Tools upholds that legacy. The rosewood handles provide both beauty and functional durability, developing a rich patina over time. Brass ferrules add classic aesthetic appeal while securely anchoring the blade. These represent generations of English tool-making expertise, functioning as both working tools and collector’s items. The carbon steel takes an exceptionally keen edge prized by fine furniture makers.
Value for Money: Positioned in the premium tier, these chisels justify their cost through heritage and material quality. While pricier than Asian imports, they compete favorably with other European premium brands. For purists seeking authentic Sheffield tools, the investment pays dividends in performance and pride of ownership. The craftsmanship ensures decades of service with proper care.
Strengths and Weaknesses: Pros include legendary Sheffield craftsmanship, beautiful rosewood handles, excellent edge-holding carbon steel, and timeless design. Cons comprise the basic cardboard packaging, carbon steel’s rust susceptibility without meticulous maintenance, premium pricing that may deter hobbyists, and handles that can crack under extreme mallet blows if not properly cared for.
Bottom Line: Ideal for traditional woodworkers, collectors, and those who appreciate heritage tools. The Crown set delivers exceptional quality for discerning craftsmen willing to maintain carbon steel properly. Not recommended for beginners seeking low-maintenance tools.
2. 4 Piece Bevel Edge Butt Chisel Set 1/4 inch(6mm), 1/2 inch(12mm), 3/4 inch(20mm), 1 Inch(26mm) with Hornbeam Handles and Stainless Steel Ferrules
Overview: This professional-grade four-piece bevel-edge butt chisel set delivers modern performance with comprehensive sizing. Crafted from chromium-vanadium (100Cr-V) steel hardened to 59 HRc through salt-bath treatment, these tools feature European hornbeam handles secured with stainless steel ferrules. Blades arrive oiled and ground at 25 degrees, ready for precision work.
What Makes It Stand Out: The salt-bath heat treatment ensures consistent hardness throughout each blade, while 100Cr-V steel offers superior toughness compared to simpler carbon steels. Hornbeam wood provides exceptional impact resistance and comfort, outperforming typical beech or plastic handles. The 1.0mm side flanges create perfect pairing chisels for dovetail work. The manufacturer provides unusually detailed specifications, demonstrating transparency for professional buyers.
Value for Money: This set occupies the mid-range sweet spot, offering professional specifications without premium brand pricing. The steel quality and heat treatment match tools costing significantly more. While lacking the heritage appeal of Sheffield or Czech brands, the performance-to-price ratio is compelling for woodworkers prioritizing function over provenance. It’s an intelligent choice for those who value specifications over legacy.
Strengths and Weaknesses: Pros include excellent 100Cr-V steel, documented hardness rating, durable hornbeam handles, anti-corrosion oil coating, and dovetail-ready bevel geometry. Cons involve the generic brand identity (unknown manufacturer), less prestigious origin, potential quality control variability, and minimal packaging information that provides little protection during shipping.
Bottom Line: A smart choice for performance-focused woodworkers seeking modern steel technology and professional specifications. Excellent value for serious hobbyists and professionals who judge tools by results rather than brand heritage. The hornbeam handles alone justify consideration.
3. Woodriver 4 Piece Butt Chisel Set

Overview: WoodRiver’s four-piece butt chisel set represents American woodworking retail giant Woodcraft’s house brand. The set includes 1/4", 1/2", 3/4", and 1" chisels featuring CRV steel blades hardened to RC 59-63 and distinctive genuine Bubinga handles. The tools come nestled in a wooden storage box, emphasizing presentation and workshop organization.
What Makes It Stand Out: The Bubinga handles set this collection apart visually and tactilely—this dense African hardwood offers exceptional durability and a luxurious feel unmatched by common beech or maple. The RC 59-63 hardness range indicates quality heat treatment, while Woodcraft’s extensive retail network provides unmatched customer support and easy replacement. The wooden storage box adds tangible value and protects the investment while keeping the set organized.
Value for Money: Priced in the upper-mid range, you’re paying partly for Woodcraft’s brand assurance and customer service infrastructure. The steel quality competes with European imports, while the exotic handles justify a modest premium. For buyers valuing domestic retailer backing and easy returns, this represents fair value, though pure performance-per-dollar lags behind direct imports. The wooden box adds $15-20 of immediate value.
Strengths and Weaknesses: Pros include beautiful Bubinga handles, CRV steel with verified hardness, excellent retailer support, attractive wooden box, and American brand reliability. Cons feature Bubinga being over-specified for many users, higher price than comparable imports, and less romantic heritage than European makers. The handles may feel overly dense to some craftsmen.
Bottom Line: Perfect for woodworkers wanting high performance with the security of purchasing from a major American retailer. The wooden box and exotic handles make it gift-worthy, while the quality satisfies serious users. Recommended for those prioritizing customer service alongside tool performance.
4. Narex 4 pc set 6 mm (1/4) , 12 mm (1/2) , 20 mm (11/16) , 26 mm (1-1/16) Butt Woodworking Chisels in Wooden Presentation Box 853750
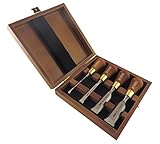
Overview: Narex, the respected Czech manufacturer, delivers this four-piece butt chisel set in an attractive wooden presentation box. Sizes include 6mm (1/4"), 12mm (1/2"), 20mm (11/16"), and 26mm (1-1/16") with blades forged from fine-grained chrome-manganese steel hardened to Rc 59. The stained beech handles feature a clever flat spot to prevent bench rolling.
What Makes It Stand Out: Czech toolmakers have earned a reputation for exceptional value, and Narex exemplifies this. The chrome-manganese steel offers a superb balance of edge retention and sharpenability. The anti-roll handle design demonstrates practical workshop thinking that many premium brands overlook. Bevels are precisely ground at 25 degrees, ready for fine joinery work. The wooden presentation box elevates the unboxing experience and provides permanent storage.
Value for Money: This set arguably offers the best price-to-quality ratio in its class. Czech manufacturing keeps costs reasonable while maintaining strict quality control. The steel rivals German and English brands costing twice as much. For woodworkers seeking professional results without premium pricing, Narex consistently delivers outstanding value. The included wooden box eliminates the need for separate storage purchases.
Strengths and Weaknesses: Pros include excellent Czech craftsmanship, practical anti-roll handles, attractive presentation box, chrome-manganese steel performance, and outstanding value. Cons involve stained beech being less exotic than rosewood or Bubinga, metric sizing potentially confusing imperial-focused users, and less prestigious brand name than Sheffield makers. The ferrules could be more robust.
Bottom Line: The top recommendation for value-conscious buyers refusing to compromise quality. Ideal for both beginners wanting professional tools and experienced woodworkers appreciating sensible design. The anti-roll feature and presentation box make this a complete package that outperforms its price point.
5. BROAD I HOME Narex Czech Steel Butt Woodworking Chisels 6 mm (1/4"), 12 mm (1/2"), 20 mm 11/16", 26 mm (1 1/16") 811056-76 (26 mm (1 1/16"))

Overview: This Narex butt chisel set, marketed by BROAD I HOME, features the same Czech craftsmanship that has made the brand a workshop favorite. The four chisels—6mm (1/4"), 12mm (1/2"), 20mm (11/16"), and 26mm (1-1/16")—utilize fine-grained chrome-manganese steel hardened to Rc 59. Stained beech handles with anti-roll flat spots measure 3 inches, with overall length of 6 3/4 inches and 3/4-inch long bevels.
What Makes It Stand Out: Beyond sharing Narex’s reputation for quality, this listing provides unusually precise dimensional specifications, giving buyers complete confidence. The 3/4-inch long bevels offer extended sharpening life compared to shorter bevels. As with other Narex tools, the chrome-manganese steel delivers professional performance at a workingman’s price. The flat-spot handle design prevents frustrating bench spills and demonstrates user-focused engineering.
Value for Money: Positioned similarly to other Narex offerings, this set delivers exceptional bang-for-buck. Czech manufacturing excellence keeps prices accessible while maintaining rigorous standards. The detailed specifications suggest a transparent seller, adding purchase confidence. Competes directly with budget Asian imports while offering superior steel and European heritage. The anti-roll feature alone prevents costly accidents.
Strengths and Weaknesses: Pros include Narex’s proven quality, precise dimensional information, anti-roll handle feature, excellent steel properties, and outstanding affordability. Cons feature potential confusion with sizing in product title versus description, beech handles lacking luxury appeal, and less robust retailer support than major brands. The packaging is minimal compared to the wooden box version.
Bottom Line: An excellent choice for detail-oriented buyers wanting full specifications and proven performance. Functionally identical to other Narex sets, so purchase based on availability and price. Highly recommended for students, hobbyists, and professionals building their toolkit economically without sacrificing quality.
6. Narex Czech Steel Butt Woodworking Chisels 6 mm (1/4") , 12 mm (1/2") , 20 mm 11/16") , 26 mm (1 1/16") 811056-76 (20 mm (11/16"))

Overview: The Narex Czech Steel Butt Chisel set delivers professional European craftsmanship in a practical four-piece collection. Including 6mm, 12mm, 20mm, and 26mm sizes, these chisels handle everything from delicate detail work to broader paring tasks. The chrome-manganese steel blades, hardened to Rc 59, offer excellent edge retention while remaining easy to sharpen, striking an ideal balance for serious woodworkers who demand reliability.
What Makes It Stand Out: These chisels feature premium fine-grained steel with precisely ground 25-degree bevels that measure 3/4-inch long. The stained beech handles include clever flat spots that prevent bench roll-off—a workshop lifesaver. At 6 3/4 inches overall with 3-inch handles, they provide excellent control for hand-guided precision work and fit comfortably for extended use without fatigue.
Value for Money: Positioned in the mid-range, these deliver 80-90% of premium brand performance at half the cost. Unlike budget options, you’re getting genuine European manufacturing and professional-grade steel without luxury pricing, making them accessible to serious hobbyists and professionals who need reliable tools without breaking the bank.
Strengths and Weaknesses: Strengths include superior steel quality, ergonomic anti-roll handle design, consistent manufacturing standards, and versatile sizing for most tasks. Weaknesses involve metric sizing that may confuse imperial-focused users, relatively short handles less ideal for heavy mallet work, and the need for initial honing out of the box before first use.
Bottom Line: This Narex set is an exceptional value for woodworkers seeking durable, precision tools. The thoughtful design and quality materials make it a reliable workshop investment that performs well above its price point and will serve reliably for years.
7. Narex Czech Steel Butt Woodworking Chisels 6 mm (1/4"), 12 mm (1/2"), 20 mm 11/16"), 26 mm (1 1/16") 811056-76 (12 mm (1/2"))

Overview: This Narex 12mm butt chisel offers the same Czech craftsmanship as the brand’s acclaimed sets, but as a single tool purchase. Perfect for replacing a worn favorite or adding a specific size to your collection, it features the same chrome-manganese steel blade hardened to Rc 59 and 25-degree bevel grind that defines the Narex line. The 6 3/4-inch overall length and 3-inch stained beech handle provide familiar balance and control.
What Makes It Stand Out: Buying individually lets you acquire only what you need without investing in a complete set. The 12mm (1/2-inch) size is arguably the most versatile for general woodworking. You get identical quality—fine-grained steel, stained beech handle with anti-roll flats, and precise manufacturing—without redundancy or unnecessary sizes gathering dust in your toolbox.
Value for Money: Single chisel pricing offers excellent value for targeted needs. Rather than spending on a full set when you need just one size, this provides professional-grade quality at an accessible price point. It’s ideal for woodworkers building their collection incrementally or replacing specific tools that see the most wear in daily use.
Strengths and Weaknesses: Strengths include precise manufacturing, quality chrome-manganese steel, ergonomic handle design with anti-roll feature, and cost-effective single-unit purchasing. Weaknesses involve potential availability issues for individual sizes, metric labeling that may confuse some users, and the same short handle length that limits heavy mallet use compared to longer bench chisels.
Bottom Line: For woodworkers needing a specific size or replacement, this single Narex chisel is a smart, economical choice. It delivers the brand’s renowned quality without requiring a full set investment, making it perfect for strategic tool acquisition and targeted upgrades.
8. HURRICANE 4 Piece Wood Chisel Set for Woodworking. CR-V Steel Beveled Edge Blades with Safety Caps. Durable PVC High Impact Handle, for Precision Carving & DIY Projects (1/4", 1/2", 3/4", 1")

Overview: The HURRICANE 4-piece chisel set targets DIY enthusiasts and beginners with its budget-friendly approach. Including 1/4", 1/2", 3/4", and 1" sizes, this collection covers basic woodworking needs. The drop-forged CR-V steel blades with heat-treated edges promise decent performance for occasional use, while the lightweight PVC handles prioritize impact resistance over traditional aesthetics for everyday fixes.
What Makes It Stand Out: This set excels in accessibility and safety. The included blade guards protect edges during storage—a feature often missing in budget tools. The ergonomic PVC handles withstand mallet strikes better than expected at this price point, and the imperial sizing is familiar to North American users. It’s designed specifically for hobbyists and home use rather than professional demands.
Value for Money: Extremely affordable, this set costs less than a single premium chisel. For hobbyists tackling occasional DIY projects, it offers functional versatility. However, serious woodworkers will quickly notice limitations in steel quality and edge retention compared to mid-range options like Narex, making this a clear entry-level proposition.
Strengths and Weaknesses: Strengths include low price, safety caps, adequate size variety, and impact-resistant handles. Weaknesses involve inferior steel that dulls faster, PVC handles lacking the tactile feel of wood, potential quality control inconsistencies, and edges requiring frequent maintenance to maintain acceptable performance standards.
Bottom Line: This HURRICANE set is perfect for beginners or occasional DIYers who need functional tools without investment. While not professional grade, it provides surprising value for light-duty work and represents a low-risk entry point into woodworking before committing to premium tools.
9. Crown 174RBX 7-Piece Butt Chisel Set

Overview: The Crown 174RBX 7-piece butt chisel set represents British toolmaking heritage from a respected brand. While specific features aren’t detailed, Crown’s reputation suggests quality materials and craftsmanship. A seven-piece set implies comprehensive size coverage, likely ranging from small detail chisels to wider options for versatile woodworking applications from joinery to cabinetry and general furniture making.
What Makes It Stand Out: The seven-piece configuration offers more comprehensive size options than typical four or five-piece sets, reducing the need for future purchases. Crown’s longstanding reputation for reliable hand tools suggests consistent quality control and durable construction suitable for both serious hobbyists and professional woodworkers who need reliable edge retention across multiple sizes.
Value for Money: As a mid-to-high range offering, this set balances quality and quantity. Seven chisels from a reputable brand typically offer better per-tool value than individual purchases. While more expensive than budget options, Crown’s quality control and material standards justify the premium over entry-level sets from manufacturers like HURRICANE.
Strengths and Weaknesses: Strengths include comprehensive size range, reputable brand heritage, and likely professional-grade construction. Weaknesses involve the lack of detailed specifications, probable higher price point than comparable European brands, and unknown handle materials or steel specifications without product details, requiring buyer trust in brand reputation.
Bottom Line: For woodworkers wanting a complete butt chisel set from an established brand, the Crown 174RBX is a solid investment. The seven-piece configuration provides excellent versatility, though the lack of detailed specifications requires some trust in Crown’s manufacturing reputation and commitment to quality.
10. Pfeil “Swiss Made” Butt Chisel 19Mm (3/4")

Overview: The Pfeil 19mm butt chisel exemplifies Swiss precision toolmaking. At 6 inches overall with a 3/4-inch wide blade, this single chisel represents premium craftsmanship. The special alloy chrome vanadium steel promises exceptional edge retention and easy sharpening, while the faceted European locust handle provides both aesthetic beauty and functional ergonomics for controlled, comfortable extended use in fine woodworking.
What Makes It Stand Out: Swiss manufacturing standards ensure meticulous quality control and precision that mass-produced tools cannot match. The contoured locust handle offers superior grip and comfort compared to standard beech handles, while the special alloy steel formulation provides a refined cutting experience that serious woodworkers appreciate. This is a tool designed for discerning craftspeople who value precision above all.
Value for Money: Positioned at the premium end, this chisel costs significantly more than mid-range options but delivers commensurate quality. For professionals and enthusiasts who use chisels daily, the superior steel and ergonomics justify the investment. It’s an heirloom-quality tool that outperforms and outlasts cheaper alternatives, making it economical over decades of use.
Strengths and Weaknesses: Strengths include exceptional steel quality, ergonomic locust handle design, Swiss manufacturing precision, and outstanding edge retention. Weaknesses involve high cost limiting accessibility, single-size purchase requiring additional investment for a full set, and handle design that may feel unfamiliar to those accustomed to traditional shapes.
Bottom Line: For woodworkers demanding the best, this Pfeil chisel is worth every penny. The combination of superior materials, Swiss precision, and ergonomic excellence makes it a joy to use. While expensive, it’s a lifetime investment for serious craftspeople who appreciate fine tools.
Understanding Butt Chisels: The Unsung Heroes of Door Hardware Installation
What Sets Butt Chisels Apart from Bench Chisels?
Butt chisels are the specialized scalpel in a world of utility knives. Unlike their longer bench chisel cousins designed for furniture joinery and general woodworking, butt chisels typically measure just 4 to 5 inches in total length, with blades accounting for roughly 2 to 2.5 inches of that. This compact geometry isn’t arbitrary—it’s engineered for the tight, repetitive strikes required when cutting shallow mortises in door jambs and frames. The shorter blade length translates to superior control and reduced flex, meaning when you’re working within the confined space of a door hinge recess, every ounce of energy transfers directly to the cutting edge without the wobble that longer chisels introduce.
The blade thickness is another distinguishing factor. Butt chisels feature a robust cross-section that can withstand the mallet blows needed to power through hardwood door frames without buckling. Where a delicate paring chisel might chip or deform under such force, a properly forged butt chisel laughs at the abuse. The bevel angle, typically ground to 25 degrees with a micro-bevel at 30 degrees, strikes the perfect balance between sharpness and durability—sharp enough to slice through wood fibers cleanly, yet sturdy enough to endure the tap-tap-tapping of mortise work without requiring constant resharpening.
Why Door Hardware Demands Specialized Chisels
Door hardware installation is unique in woodworking because you’re almost always working in situ—cutting into installed jambs, frames, and doors that can’t be moved to a workbench. This means you’re frequently chiseling vertically or at awkward angles, often with limited swing room for your mallet. A butt chisel’s shortened stature becomes a superpower here, allowing you to maintain proper sight lines and control even when your body position is compromised. You can see the cutting edge meet the layout lines without the handle obstructing your view, a critical advantage when you’re paring the final thousandths from a hinge mortise.
Moreover, door hardware mortises are shallow—typically between 1/8" and 3/8" deep for most hinges and strike plates. This shallow depth requires extreme precision in depth control. The short blade length of a butt chisel means your hand is never far from the work surface, giving you tactile feedback that longer chisels simply can’t provide. You can feel when the blade bottoms out, preventing the dreaded over-cut that weakens the door jamb or leaves your hinge sitting proud of the surface.
Key Features That Define Professional-Grade Butt Chisels
Blade Material: High-Carbon Steel vs. Modern Alloys
The metallurgy of your chisel blade determines everything from edge retention to how easily it sharpens. Traditional high-carbon steel remains the gold standard for many seasoned carpenters because it takes a screaming-sharp edge relatively quickly on oil stones and water stones. It typically contains 0.6% to 0.95% carbon, creating a fine grain structure that polishes to a mirror finish. However, it’s susceptible to rust and requires diligent maintenance, especially in humid climates where door installation work often happens.
Modern alloy steels like A2 and O1 tool steel offer compelling alternatives. A2 steel, with its chromium and molybdenum content, holds an edge up to three times longer than traditional carbon steel—crucial when you’re cutting mortises in abrasive woods like oak or maple. It won’t rust as readily, but it takes longer to sharpen and requires diamond stones or ceramic abrasives for efficient honing. O1 steel splits the difference, offering better edge retention than plain carbon steel while remaining more forgiving to sharpen than A2. For door hardware work where you’re making dozens of repetitive cuts, that extended edge life translates to less downtime and more consistent results throughout the day.
Bevel Edge Geometry: The 25-Degree Rule
The primary bevel angle on a quality butt chisel should be precisely 25 degrees, with many craftsmen adding a secondary micro-bevel at 28 to 30 degrees. This geometry isn’t arbitrary—it’s the sweet spot where cutting efficiency meets edge durability. A steeper angle (30+ degrees) creates a more robust edge that resists chipping but requires significantly more force to drive through wood, leading to fatigue and potential loss of control. A shallower angle (20 degrees) slices effortlessly but folds over or chips after just a few strikes in dense material.
The bevels themselves should be flat and consistent, not hollow-ground. While hollow grinding speeds up the sharpening process by removing less material, it creates a weaker edge that’s prone to micro-fracturing when struck repeatedly. Professional-grade chisels feature flat bevels that you can maintain with simple honing guides. The side bevels should taper elegantly to the cutting edge, allowing the chisel to reach into acute corners of mortises without the body of the blade binding against the sidewalls. This clearance is critical when you’re squaring up the rounded corners left by a Forstner bit or router.
Handle Ergonomics: Comfort During Repeated Strikes
A butt chisel handle sees more concentrated impact than almost any other hand tool in your kit. The best handles distribute this shock while providing a secure grip that doesn’t slip when your hands get sweaty during a summer installation. Traditional wooden handles, typically turned from hornbeam or ash, offer excellent shock absorption and a warm, tactile feel that many pros prefer. The wood should be impact-resistant and impregnated with oils to prevent swelling and cracking. Look for handles with a slight swell in the middle and a gentle taper toward the ferrule—this shape locks into your palm and prevents the tool from rotating during use.
Modern composite handles made from materials like cellulose acetate or fiberglass-reinforced nylon bring different advantages. They’re virtually indestructible, resistant to temperature extremes, and can be molded with ergonomic contours that fit the hand perfectly. The best examples feature shock-absorbing inserts and textured surfaces that maintain grip even when dusty. For door hardware work where you’re making hundreds of mallet strikes in a day, the reduced vibration transmission of these advanced materials can significantly decrease hand fatigue. The key is finding a handle that feels like an extension of your arm, not a foreign object you’re trying to control.
Ferrule and Tang Construction: Durability Under Pressure
The junction where blade meets handle is the Achilles’ heel of any chisel. Professional butt chisels feature a substantial ferrule—typically brass or stainless steel—that reinforces the handle end and prevents splitting under repeated mallet blows. This ferrule should be at least 1/2" long and fit so precisely that you can’t detect any gap between metal and wood. Some premium chisels add a secondary hoop or “shock ring” behind the main ferrule, creating a double layer of protection against splitting.
The tang itself should be substantial, extending at least two-thirds of the way into the handle on socket chisels, or featuring a full-width tang that runs the entire handle length on the most robust designs. Avoid chisels with wafer-thin tangs or those simply epoxied into the handle—they’ll loosen within weeks of professional use. The best butt chisels have blades that are either socket-mounted (where the handle fits into a tapered socket forged into the blade) or feature full-width tangs with through-handle rivets. This mechanical connection ensures that even if the epoxy or wedging fails, the blade won’t separate from the handle mid-strike—a safety consideration that’s non-negotiable when you’re working at awkward angles on installed doors.
Selecting the Right Sizes for Your Door Hardware Projects
The Essential Widths: From 1/4" to 1-1/2"
While you might be tempted to buy every size available, professional door hardware installation really demands mastery of four key widths: 1/4", 1/2", 3/4", and 1". The 1/4" chisel is your detail specialist, perfect for cleaning out the corners of mortises and making fine adjustments to strike plate recesses. It’s narrow enough to sneak into tight spots but substantial enough to withstand careful mallet taps without deflecting.
The 1/2" chisel is arguably the most-used size in door work. It matches the width of most interior door hinges and allows you to remove waste quickly while maintaining control. The 3/4" chisel excels at cutting the main body of mortises for exterior door hinges and commercial-grade strike plates. Finally, the 1" chisel (and occasionally a 1-1/2" for heavy commercial work) handles the broad, shallow recesses for door stops and latch faceplates. Rather than buying a 10-piece set filled with sizes you’ll never use, invest in premium versions of these four workhorse widths and add specialty sizes only as specific projects demand them.
When to Reach for a Narrow Chisel vs. a Wide Blade
The width of your chisel should always match the task at hand, not just the dimensions of the mortise. Narrow chisels (1/4" to 3/8") excel at “wall work”—paring the end grain of mortise walls to create crisp, square shoulders that hinges will register against perfectly. They concentrate force into a small area, giving you surgical control when you’re sneaking up on a final fit. Use them for the initial scoring of layout lines and for the final paring passes that determine whether your hinge sits flush or proud.
Wider chisels (3/4" and up) are your “waste removal” tools. Once you’ve established clean mortise walls with a narrow chisel, the wide blade can hog out material in the middle with fewer cuts, saving time and reducing the chance of inconsistency. However, resist the temptation to start a mortise with a wide chisel—without established walls to guide it, the blade tends to wander, creating a mortise that’s wider at the mouth than at the base. The professional sequence is always: score with narrow, establish walls with narrow, remove bulk with wide, refine with narrow. This methodical approach yields mortises so precise that hinges practically snap into place.
The Anatomy of a Perfect Mortise: Technique Matters
Layout and Marking: Precision Before the First Cut
The chisel is only as accurate as the lines it follows. Professional door hardware installation begins with a sharp marking knife, not a pencil. A knife line creates a physical groove in the wood fibers that your chisel can register in, preventing it from wandering during the first critical cuts. Use a combination square to transfer hinge dimensions directly from the hardware itself—never trust printed measurements, as manufacturing tolerances vary. Score the perimeter of your mortise to a depth of about 1/32", creating a crisp boundary that will guide every subsequent cut.
For strike plates and latch faces, always mark the depth as well as the perimeter. Use a marking gauge set to the exact thickness of the plate, scribing a line across the entire area. This depth line serves as your “stop” indicator when paring, preventing the common mistake of cutting too deep. Pros also mark the waste with diagonal hatch marks—it’s a simple visual cue that prevents the embarrassing error of chiseling on the wrong side of the line when you’re tired or distracted. Remember: five extra minutes in layout saves thirty minutes of repair work later.
The Three-Cut Method for Clean Mortise Walls
The hallmark of a professional mortise is walls so clean they look machined. Achieving this requires the three-cut method, a technique that seems slow initially but produces flawless results. First, make a series of vertical relief cuts across the grain within your mortise boundaries, spacing them about 1/8" apart. These cuts should be slightly shallower than your final depth and serve to break the wood fibers into manageable sections. Use a 1/2" chisel held vertically, tapping lightly with a mallet.
Second, with the bevel facing down, make horizontal paring cuts to remove the waste between your relief cuts. Work from the center outward, always cutting toward the center to avoid blowing out the mortise walls. This is where a sharp chisel shines—a truly keen edge will slice through end grain cleanly rather than crushing it. Third, return to vertical cuts with a 1/4" chisel to square the ends and corners, using the knife lines as your guide. This final pass should require only hand pressure; if you’re hitting it with a mallet, your chisel isn’t sharp enough. The result is mortise walls that are perpendicular to the face and corners so sharp they could cut paper.
Paring vs. Striking: Knowing When to Switch Gears
Understanding the difference between paring cuts and striking cuts separates craftsmen from amateurs. Striking cuts, made with mallet assistance, are for waste removal and establishing depth. The chisel is held at a slight angle (about 15 degrees off vertical) and driven with controlled taps. The force should come from your wrist and forearm, not a wild swing. Each strike removes a small chip, and you work systematically across the mortise. This is the “rough work” phase, and speed is less important than consistency.
Paring cuts are pure hand pressure, used for final fitting and cleanup. Grip the chisel handle in your dominant hand and place your other hand on the blade, using your thumb and forefinger to guide and control the cut. The bevel should face the waste area, and you push with steady, even pressure, taking whisper-thin shavings. This is how you achieve that final thousandth of an inch that makes hardware fit like it grew there. A common pro trick is to warm the chisel blade slightly with your hand before paring cuts—the minimal expansion helps the edge glide through wood fibers even more smoothly. Always listen to your chisel: a sharp one makes a crisp “shhh” sound during paring, while a dull one sounds more like a tearing noise.
Advanced Techniques for Tricky Installations
Working with Hardwood vs. Softwood Door Frames
Hardwoods like oak, maple, and cherry demand respect and a different approach than softwoods such as pine or fir. In hardwood, always start with a scoring cut that’s slightly deeper than your knife line—use a 1/4" chisel and light mallet taps to sever the surface fibers completely. This prevents the wood from tearing as you make subsequent cuts. Work in shallower layers, removing no more than 1/16" of material per pass. The density of hardwood means your chisel will heat up faster; pause occasionally to let it cool, as excessive heat can temporarily soften the steel edge, leading to faster dulling.
Softwoods, deceptively easy to cut, present their own challenges. The low density means your chisel can easily crush the fibers rather than cutting them, especially around the mortise perimeter. Use a sharper primary bevel (around 23 degrees) for softwoods to slice rather than compress. Make your relief cuts closer together—about 1/16" apart—to support the fragile end grain. And resist the urge to power through material; softwoods require a lighter touch and more frequent pauses to check your depth. The biggest mistake is getting overconfident and taking too aggressive a cut, which results in splintered mortise walls that no amount of putty can hide.
Dealing with Existing Paint and Finish
Retrofitting hardware to existing doors means cutting through layers of paint, varnish, or polyurethane—materials that instantly dull a sharp edge. Never cut directly through finish with your best chisel. Instead, use a sharp utility knife to cut along your layout lines, scoring through the finish layer completely. Then, use a heat gun set to low temperature to soften the finish within the mortise area. A few seconds of gentle heating makes the material behave more like wood and less like glass.
If you must chisel through finish, dedicate one older chisel to this task—preferably one with a slightly stouter bevel (30 degrees) that can handle the abrasion. Work at a lower temperature if possible; cold finish is more brittle and prone to chipping away from your clean lines. After cutting, always seal the raw wood in the mortise with a quick-drying shellac before installing hardware. This prevents moisture infiltration that could cause future paint peeling and stabilizes the cut fibers so they don’t telegraph through your final finish. Pros keep a “beater” chisel in their kit specifically for this dirty work, preserving their precision tools for clean wood only.
Repairing Mistakes: The Art of the Patch
Even masters occasionally slip. The mark of a pro isn’t never making mistakes—it’s knowing how to fix them invisibly. If you’ve over-cut a mortise and your hinge sits too deep, don’t reach for wood filler. Instead, cut a paper-thin veneer from a hidden area of the door (the top edge above the header is perfect) using a sharp block plane. Glue this veneer to the bottom of your mortise with yellow glue, using wax paper and a small clamp to apply even pressure. Once dry, trim it flush and recut your mortise to the correct depth.
For blow-out on the mortise walls, the solution is a “Dutchman” patch. Cut a small, precisely shaped piece of matching wood grain and glue it into the damaged area, orienting the grain in the same direction. After the glue cures, recut the mortise wall, blending the patch seamlessly into the surrounding wood. The key is using a chisel to undercut the repair area slightly, creating a mechanical lock that prevents the patch from popping out under hinge pressure. Always make these repairs before finishing, and stain the patch while the glue is still slightly wet—it accepts color more uniformly this way.
Maintenance: Keeping Your Chisels Surgical-Sharp
Honing vs. Grinding: Understanding the Difference
A properly maintained butt chisel should require grinding only once or twice a year under professional use. Grinding, done on a bench grinder or coarse water stone (1000 grit or lower), reshapes the bevel when it’s become nicked or the edge has rounded over from repeated honing. It’s a material removal process that establishes the primary bevel geometry. Most pros grind at 25 degrees, then add a micro-bevel at 30 degrees during honing.
Honing is your weekly—or even daily—maintenance routine. Using progressively finer stones (4000 to 8000 grit), you’re not removing significant metal but rather polishing the existing bevel to a razor edge. The goal is creating a mirror finish on the last millimeter of the cutting edge. For door hardware work, where you’re often cutting end grain, a polished edge is mandatory. Micro-serrations from coarse stones catch and tear wood fibers, leading to ragged mortise walls. Dedicate ten minutes at the end of each workday to honing the chisels you used, and they’ll reward you with effortless cuts tomorrow.
The Stropping Routine for Microscopic Perfection
Even after honing to 8000 grit, there’s one more step that transforms a sharp chisel into a scary-sharp one: stropping. A leather strop loaded with fine polishing compound (0.5-micron chromium oxide) removes the microscopic wire edge left by stones and aligns the edge at a molecular level. Hold the chisel bevel-down on the strop and pull backward (never push forward, which cuts the leather) with light pressure, alternating sides every few strokes.
For door hardware installation, this final polish makes the difference between a chisel that pushes through wood and one that glides. The polished edge encounters less friction, generating less heat and maintaining its sharpness longer. Pros often strop between mortises, giving the chisel a few quick pulls while repositioning the door. This constant maintenance means you’re always working with peak sharpness, and the cumulative time spent stropping is less than the time you’d waste fighting a slightly dull edge. Keep a small, portable strop in your tool belt—it’s as essential as your tape measure.
Storage Solutions That Prevent Damage
Tossing chisels loose in a tool bag is the fastest way to destroy their edges. Professional storage protects both the cutting edge and the handle. Magnetic tool holders mounted in your van or workshop keep chisels organized and prevent them from rattling against each other. If you must transport them in a bag, use individual blade guards made from heavy leather or Kydex. These slip-on covers should fit snugly and extend at least an inch up the blade, protecting the tip from impacts.
For field work, consider a dedicated chisel roll made from heavy canvas with individual pockets for each tool. The roll should have a flap that covers the blade ends before rolling, preventing the tools from sawing through the fabric. Never store chisels in leather rolls long-term in humid environments—leather holds moisture and can promote rust. Instead, wipe blades with a light coat of camellia oil or paste wax before storage. This thin film displaces moisture and prevents oxidation without transferring to your workpiece. The best pros treat their chisels like fine instruments because, in essence, that’s exactly what they are.
Common Pitfalls That Ruin Door Hardware Installations
Over-cutting Mortise Depth: The #1 Rookie Mistake
Nothing screams amateur like a hinge mortise that’s cut too deep, leaving the hinge plate recessed below the surface. This creates gaps, misaligns the door, and weakens the screw holding power. The root cause is almost always poor depth control combined with impatience. Pros use a simple depth gauge: a small block of wood cut to the exact thickness of the hinge leaf. They place this gauge in the mortise frequently while cutting, ensuring they stop at precisely the right moment.
Another technique is the “stop cut” method. After layout, use a router plane or a chisel guided by a depth stop to cut a perimeter groove exactly to final depth. This creates a physical barrier that prevents over-cutting when you’re removing waste from the center. For those who prefer freehand work, try the “sound test”: as you approach final depth, the sound of the chisel changes from a solid “thunk” to a slightly higher-pitched “tick.” This subtle audio cue indicates you’re cutting into wood that’s no longer supported from below. Stop immediately when you hear it. Always err on the side of too shallow—you can remove more wood in seconds, but adding it back requires a repair.
Tear-out Prevention Strategies
Tear-out occurs when wood fibers ahead of the cutting edge lift and split rather than being sliced cleanly. On door faces, this is catastrophic, as it mars the visible surface around your hardware. The first line of defense is cutting direction: always chisel so the blade exits into the waste area, not the finished surface. For hinge mortises on the door edge, this means working from the center outward toward the corners.
Score the perimeter deeply with a knife before any chisel work—this severed fiber barrier prevents tear-out from propagating beyond your layout lines. For particularly splinter-prone woods like pine or cherry, apply a thin coat of shellac to the area before cutting. This consolidates the surface fibers and gives them enough strength to resist lifting. When paring the final passes, take thinner shavings—no more than the thickness of a business card. A chisel that’s even slightly dull will lift fibers rather than cut them, so if you see any tearing, stop and sharpen immediately. Pros also keep a spray bottle of water handy; a light mist on the wood surface slightly raises the grain, making it more elastic and less prone to tearing during that final, critical cut.
Investing Wisely: Price Tiers and What You Get
Budget-Friendly Options for Occasional Use
If you’re a homeowner tackling one or two doors a year, chisels in the $15-25 range can produce acceptable results, but understand their limitations. These tools typically use lower-grade carbon steel that dulls quickly, especially in hardwood. The handles are often poorly shaped hardwood that transmits more vibration, and the ferrules may be thin stamped metal rather than heavy cast brass. They’ll get the job done, but you’ll spend more time sharpening and may struggle with consistency.
The real cost of budget chisels isn’t the purchase price—it’s the hidden expense of rework. A chisel that doesn’t hold an edge forces you to apply more force, increasing the risk of slips and mistakes. The steel may also be more brittle, leading to chipped edges that require grinding to repair, shortening the tool’s lifespan. For occasional use, buy the best you can afford in just the two sizes you’ll use most (1/2" and 3/4") rather than a cheap 5-piece set. Quality over quantity always wins in door hardware work, where precision trumps versatility.
Professional-Grade Tools: Worth the Premium?
Professional butt chisels commanding $40-80 per tool represent a significant investment, but the math works out for anyone who installs hardware regularly. The superior metallurgy means you’re sharpening half as often, saving 15-30 minutes per day. The ergonomic handles reduce hand fatigue, allowing you to maintain precision on the last door of a long day. Most importantly, the consistency they provide means fewer callbacks to fix doors that don’t latch properly or have visible gaps.
Consider the cost of a callback: fuel, time, and the hit to your reputation. A single prevented callback pays for a premium chisel. These tools also last decades with proper care, while budget chisels might need replacement every few years. Look for features like replaceable handles, which some premium brands offer—a damaged handle doesn’t mean replacing the entire tool. The resale value on quality chisels remains high; a well-maintained set can fetch 60-70% of its original price years later. For professionals, they’re not an expense but a capital investment that generates returns through efficiency and reputation.
Safety Protocols That Pros Never Skip
Hand Positioning and Body Mechanics
Door hardware installation often puts you in awkward positions—kneeling, reaching, working overhead. Proper body mechanics prevent injuries that can end a career. Always position yourself so your hammering arm can swing freely from the shoulder, not the wrist. Wrist-only strikes lack power and control, and the repetitive motion causes carpal tunnel syndrome. Your elbow should be slightly bent, and your feet should be planted shoulder-width apart for stability.
Keep your non-dominant hand behind the cutting edge, never in front of it. A slip can drive a razor-sharp chisel into flesh in an instant. When paring, place your guiding hand on the blade itself, with fingers curled back and thumb acting as a fence against the wood surface. This gives you control while keeping digits safe. For overhead work, such as cutting strike plate mortises in a door jamb, wear a climbing helmet with a chin strap. Dropping a chisel from that height can cause serious injury, and the helmet protects you from glancing blows if the mallet misses its mark. Pros also kneel on padded knee pads; hardwood floors are unforgiving, and knee injuries accumulate over years of installations.
Protective Gear Beyond Safety Glasses
Safety glasses are mandatory, but they’re the minimum, not the complete solution. When chiseling, especially in overhead positions, wear impact-rated face shields. A chisel slip can launch a wood splinter with enough force to embed it in skin; your eyes are irreplaceable. The shield also protects against the occasional metal chip when striking a chisel with a steel hammer instead of a mallet.
Cut-resistant gloves have evolved dramatically and now offer enough dexterity for tool handling while protecting against slashes. Wear them when retrieving chisels from your bag or tool belt—it’s easy to brush a finger against a sharp edge. For respiratory protection, a simple N95 mask prevents inhaling the fine dust generated when chiseling painted or finished doors. Old paint may contain lead, and even modern finishes release compounds you don’t want in your lungs. Finally, steel-toed boots with metatarsal guards protect your feet from dropped chisels and falling doors. One dropped solid-core door on an unprotected foot can break bones; the right footwear is cheaper than a trip to the emergency room.
Building Your Butt Chisel Collection Strategically
Starter Set vs. Individual Purchases
The age-old debate of set versus individual purchases depends entirely on your work pattern. If you’re just beginning to specialize in door hardware, a quality 3-piece set containing 1/4", 1/2", and 3/4" chisels provides a solid foundation at a slight discount over individual prices. This covers 90% of residential door work and lets you develop skills across the range of sizes you’ll use most. Choose a set where each tool reflects the same quality standards—manufacturers sometimes package a premium 1/2" chisel with cheaper 1/4" and 3/4" versions to hit a price point.
For established professionals, buying individual chisels makes more sense. You likely have preferences for different handle materials or blade geometries for specific tasks. Maybe you prefer a heavier 1/2" chisel for hogging out material but a lighter, more nimble 1/4" for detail work. Individual purchasing lets you curate a collection perfectly matched to your technique. It also allows you to replace a single worn or damaged tool without buying an entire new set. Many pros build their collection over years, adding one premium chisel at a time and retiring older tools to “rough work” duty.
When to Upgrade: Signs You’ve Outgrown Your Tools
Your chisels will tell you when it’s time to upgrade, if you know what to look for. If you find yourself sharpening more than twice during a single door installation, the steel has likely lost its temper from overheating or is simply too soft for professional use. Edge chipping that requires grinding to repair more than once a month indicates poor-quality steel that will never hold up to daily use. Handle looseness that persists even after re-wedging or epoxying means the tang design is inadequate.
Perhaps the most telling sign is inconsistency in your mortises. If you’re doing everything right technique-wise but still getting ragged walls or depth variations, your chisel may have developed a slight bend or the bevel may have become rounded over from poor sharpening technique. Rather than fighting the tool, replace it. Pros also upgrade when they find themselves reaching for the same chisel size repeatedly while others gather dust—this indicates your current set doesn’t match your working style. Sell the underused tools and invest in a premium version of your go-to size. The right tool feels like an extension of your will; when you stop fighting your chisel and start collaborating with it, you’ll know you’ve found your match.
Frequently Asked Questions
What’s the difference between butt chisels and other chisels?
Butt chisels are specifically designed for installing door hardware with their short 4-5" overall length and robust blade geometry. Unlike longer bench chisels used for furniture joinery, their compact size provides superior control in tight spaces and allows you to see the cutting edge during vertical cuts. The thicker blade stock withstands repeated mallet blows without flexing, while the bevel angle is optimized for the shallow mortises typical in door work. Standard chisels are too long for precision door installation and tend to wobble when cutting vertically into installed jambs.
How many chisels do I really need for door hardware?
For professional results, you need a minimum of four widths: 1/4" for detail work and corner cleaning, 1/2" for most interior hinges, 3/4" for exterior doors and strike plates, and 1" for latch faceplates and door stops. Rather than buying a large set with sizes you’ll never use, invest in premium versions of these four workhorse chisels. This focused collection handles 95% of residential and commercial door hardware installations while maximizing your skill development with tools you’ll actually reach for daily.
Can I use cheap chisels for professional results?
While budget chisels can produce acceptable results in skilled hands, they cost more in the long run through inefficiency and rework. Cheap steel requires constant resharpening, and the poor ergonomics increase fatigue and error rates. A single callback to fix a door that doesn’t latch properly due to a ragged mortise costs more than a premium chisel. For professionals, quality chisels are a capital investment that pays dividends through time savings and reputation protection. Homeowners tackling one project can get by with mid-range tools, but anyone doing regular installations should buy the best they can afford.
How often should I sharpen my butt chisels?
Sharpening frequency depends on the wood species and volume of work. In hardwoods like oak, hone your chisel after every two or three mortises to maintain peak performance. In softwoods, you might get through an entire door installation before needing to touch up the edge. The key is sharpening before you notice dullness—by the time you’re applying extra force, you’ve already compromised the cut quality. Develop a routine of stropping between mortises and a full honing session at day’s end. Grinding to reshape the bevel should only be necessary a few times per year with proper maintenance.
What’s the best way to prevent tear-out around mortises?
Prevent tear-out by first scoring the perimeter deeply with a marking knife to sever surface fibers. Always cut from the center outward, directing the chisel so it exits into waste wood, not the finished surface. For splinter-prone woods, apply a thin coat of shellac to consolidate fibers before cutting. Take thinner paring cuts—no thicker than a business card—and stop immediately to sharpen if you see any fiber lifting. Working with the grain direction and maintaining a razor-sharp edge are your best defenses against tear-out that can ruin a door’s appearance.
Is there a difference between chiseling hardwood vs softwood?
Hardwood requires shallower cuts (1/16" per pass), a slightly steeper bevel angle for edge support, and frequent pauses to let the chisel cool. The dense grain must be severed completely at the surface to prevent tear-out. Softwood needs a sharper, more delicate edge (23-degree bevel) to slice rather than crush the low-density fibers. Make relief cuts closer together (1/16" spacing) to support the fragile end grain, and use a lighter touch to avoid compressing the wood. The same chisel works for both, but your technique must adapt to the material’s characteristics.
Should I buy a set or individual chisels?
Beginners benefit from a quality 3-piece set (1/4", 1/2", 3/4") that provides essential sizes at a modest discount. This covers most residential work and builds fundamental skills. Established professionals should buy individual chisels to curate a collection matched to their specific techniques and preferences. Individual purchasing lets you mix handle materials, blade geometries, and brands to create a personalized toolkit. It also allows replacing single worn tools without buying a whole new set. Upgrade to individual premium chisels as you identify which sizes you use most frequently.
What’s the ideal bevel angle for door hardware work?
The primary bevel should be ground to 25 degrees, with a secondary micro-bevel at 28-30 degrees. This geometry balances cutting efficiency with edge durability for the repeated strikes needed in mortise work. A steeper angle requires too much force and causes fatigue, while a shallower angle folds over quickly in dense wood. The micro-bevel strengthens the very edge without making the entire bevel difficult to push through wood. Maintain this angle consistently with a honing guide for professional results across all your chisels.
Can I use butt chisels for other woodworking tasks?
Absolutely. While optimized for door hardware, butt chisels excel at any task requiring control in tight spaces. Their short length makes them ideal for paring dovetails, cleaning up corners in joinery, and working on assembled furniture where longer chisels won’t fit. Many woodworkers prefer butt chisels for all hand-cut mortise work because the reduced leverage gives better feedback. Just be mindful that using them on abrasive materials like plywood or MDF will dull them faster than door work, requiring more frequent sharpening. Keep a dedicated set for fine work and use older, sharpened-down chisels for rough tasks.
How do I know when it’s time to replace a chisel?
Replace a chisel when the blade develops a bend or twist that can’t be corrected, or when the steel has lost its temper from overheating and no longer holds an edge. Persistent handle looseness after multiple repairs indicates inadequate tang construction. If the bevel has been ground back so far that the blade is shorter than 1.5", it’s lost the mass needed for stability. Also consider replacement when you’ve outgrown the tool’s quality—if you find yourself fighting the chisel rather than collaborating with it, upgrade to a professional-grade tool that matches your skill level. A good chisel should last decades; premature replacement usually indicates poor initial quality rather than normal wear.
See Also
- 10 Best Butt Chisels for Installing Door Hardware This Year
- 10 Butt Chisels That Speed Up Door Hardware Installations in 2026
- The Complete Guide to the 10 Best Butt Chisels for Door Hardware
- 10 Must-Have Bench Chisels for Precision Dovetails in 2026
- 10 Must-Have Corner Chisels for Clean Hinge Mortises in 2026