Table of Contents
Timber framing isn’t just construction—it’s architectural artistry that demands uncompromising structural integrity. When you’re joining massive beams that will shoulder loads for generations, the adhesive you choose becomes as critical as the joinery itself. Polyurethane wood glue has emerged as the gold standard for these monumental connections, offering a unique chemical reaction with moisture that creates bonds stronger than the wood fibers themselves. As we look toward 2026, advancements in formulation chemistry and stricter building codes are reshaping what professionals should demand from their adhesive arsenal.
Whether you’re restoring a 200-year-old barn or raising a new post-and-beam home, understanding the nuanced performance characteristics of modern polyurethane glues will separate heirloom-quality work from costly callbacks. The 24-hour cure cycle that’s standard across premium formulations isn’t just a waiting period—it’s a carefully orchestrated chemical transformation that demands precision in application, environmental control, and patience.
Top 10 Polyurethane Wood Glue Timber Frame
Detailed Product Reviews
1. Wood Superglue Liquid for Cracks, Frames & Precision Repairs – 1.76 oz XXL – Ultra Thin, Fast-Drying, Clear Adhesive for Fine Furniture, Joints, Veneer & Wood Crafts – KRAFTPROTZ

Overview: This specialized cyanoacrylate formula targets precision wood repairs rather than general assembly. The ultra-thin consistency penetrates hairline cracks and veneer seams that standard PVA glues cannot reach, making it indispensable for furniture restoration and detailed craft work. Its 1.76 oz size offers substantially more product than typical superglue tubes, ensuring you won’t run out mid-project.
What Makes It Stand Out: The micro-nozzle delivers exceptional control for intricate joints and dowel work without clogging or waste. Unlike regular CA glues, it dries completely clear without the white blooming effect that mars visible surfaces. The formulation resists heat, moisture, and vibration, extending its utility beyond the shop to light outdoor applications where other superglues would fail.
Value for Money: While priced premium compared to standard wood glues, the XXL tube provides five times the typical superglue volume. For professionals and serious hobbyists performing frequent fine repairs, the cost per use is reasonable. Casual DIYers may find it expensive for occasional use, making it a specialist’s investment rather than a general-purpose purchase.
Strengths and Weaknesses: Strengths include superior penetration, invisible bonds, precision application, and resistance to environmental stress. Weaknesses involve CA glue brittleness—unsuitable for structural joints requiring flexibility. The fast set demands quick work, and the specialized nature means it won’t replace general-purpose wood glue in most shops.
Bottom Line: An essential specialty adhesive for restoration experts and detail-oriented woodworkers. Purchase for precision repairs, but keep standard PVA for bulk assembly work.
2. Titebond Original Wood Glue 5063, Industry Standard for Woodworking, Furniture Repair/Assembly, Construction, Home Repair or Modeling, 8 oz

Overview: The undisputed industry standard for woodworking, Titebond Original has earned its reputation through decades of reliable performance. This 8-ounce bottle of aliphatic resin PVA delivers a bond stronger than the wood itself for interior projects. Its fast-setting formula reduces clamp time, accelerating project completion for both professionals and hobbyists who value efficiency.
What Makes It Stand Out: As the benchmark against which other wood glues are measured, Titebond Original offers predictable, consistent results every time. The fast set time—significantly quicker than many competitors—means less waiting and fewer clamps needed. Its proven track record in professional furniture shops and construction sites provides confidence that cheaper alternatives cannot match.
Value for Money: Exceptional value. This moderately priced glue performs like a premium product and is widely available at most hardware stores. The 8 oz size suits most DIYers, while larger sizes offer bulk savings for production shops. No specialty glue matches its cost-to-performance ratio for general woodworking applications.
Strengths and Weaknesses: Strengths include rock-solid reliability, fast clamp time, easy water cleanup when wet, and incredible bond strength on properly prepared wood. Weaknesses are its lack of water resistance—unsuitable for outdoor use—and relatively short open time that can rush complex assemblies requiring careful alignment.
Bottom Line: The essential foundation of any woodworker’s adhesive arsenal. For interior furniture, cabinetry, and general woodworking, nothing beats its proven combination of strength, speed, and value.
3. Titebond III Ultimate Wood Glue, 16-Ounces #1414

Overview: Titebond III represents the pinnacle of PVA wood glue technology, offering fully waterproof performance without sacrificing ease of use. This 16-ounce bottle provides premium adhesive for demanding applications where moisture resistance is critical. It conforms to ASTM D4236 non-toxic standards while delivering professional-grade strength that exceeds the wood itself.
What Makes It Stand Out: As a true Type I waterproof adhesive, it withstands prolonged water exposure that defeats Titebond Original and most competitors. The 30-minute clamp time allows careful assembly of complex joints, while excellent sandability ensures invisible glue lines. Its non-toxic, solvent-free formula cleans up easily with water yet cures to a completely waterproof bond.
Value for Money: Priced higher than standard PVAs but justified for outdoor furniture, cutting boards, and bathroom cabinetry. The 16 oz size offers good value for active woodworkers. For projects requiring waterproof performance, it’s cheaper than polyurethane alternatives and significantly easier to use without foaming issues.
Strengths and Weaknesses: Strengths include superior waterproofing, excellent heat resistance, easy sanding, strong initial tack, and non-toxic formulation. Weaknesses involve longer clamp time requiring patience, and higher cost per ounce. The longer open time can be a double-edged sword—helpful for complex glue-ups but slowing production work where speed matters.
Bottom Line: The ultimate choice for waterproof woodworking. If you build anything exposed to moisture, this premium PVA justifies its price with unmatched performance and user-friendliness.
4. Grizzly One Wood Glue, Polyurethane Adhesive, 16 Ounce Bottle by Grizzly Glue(16)

Overview: Grizzly One delivers industrial-strength polyurethane adhesive for extreme bonding challenges. This 16-ounce bottle tackles applications where PVA glues fail, bonding oily exotic woods, wet stone, and dissimilar materials. Its 100% waterproof rating and ability to adhere to virtually any porous surface make it the problem-solver’s secret weapon for difficult situations.
What Makes It Stand Out: Unlike PVAs, it doesn’t require perfectly prepared, dry wood—it bonds to damp surfaces and even contaminated oily woods like teak or ipe. The versatility to glue wood to metal, stone, or plastic (when one surface is porous) expands possibilities beyond traditional woodworking. Its complete waterproofing excels in marine and exterior applications where failure is not an option.
Value for Money: Moderately priced for a polyurethane, offering good value for specialized needs. However, it’s overkill for standard indoor furniture. The long clamp time means fewer projects per day, increasing labor costs for production work. Best value for outdoor builders, boat repair, and those regularly working with difficult materials.
Strengths and Weaknesses: Strengths include bonding anything, complete waterproofing, gap-filling properties, and superior exterior durability. Weaknesses are long 2-5 hour clamp time, foaming action that can squeeze out messily, requiring moisture to cure (problematic in very dry conditions), and difficulty removing cured foam from surfaces.
Bottom Line: An indispensable specialty adhesive for challenging materials and extreme environments. Keep it on hand for problem-solving, but use faster-setting PVA for standard woodworking efficiency.
5. Gorilla Wood Glue, 18 Ounce Bottle, Natural Wood Color, (Pack of 1)
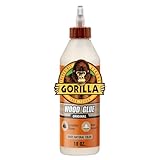
Overview: Gorilla Wood Glue positions itself as the versatile workhorse for both interior and exterior projects. This 18-ounce bottle of PVA adhesive balances fast clamp time with Type II water resistance, appealing to DIYers seeking one glue for most tasks. It dries to a natural wood color, minimizing visible glue lines on most species for professional-looking results.
What Makes It Stand Out: The 20-30 minute clamp time significantly speeds projects compared to Titebond III, while still offering decent water resistance for covered outdoor projects. The natural color drying eliminates the yellowish tint of some PVAs, creating less noticeable joints on light woods. Its ANSI/HPVA Type II rating provides confidence for patio furniture and exterior trim applications.
Value for Money: Excellent value in the 18 oz size, competitively priced against Titebond II. The faster cure time translates to labor savings, while the water resistance covers most non-submerged applications. For the hobbyist wanting one glue for everything, it’s hard to beat the combination of performance, price, and convenience.
Strengths and Weaknesses: Strengths include fast setting, Type II water resistance, natural color, versatility across wood types, and easy water cleanup. Weaknesses are that it’s not fully waterproof (unlike Titebond III or polyurethane), can be thick and require occasional stirring, and lacks the extended open time needed for complex assemblies with many parts.
Bottom Line: The ideal all-purpose choice for DIYers and woodworkers who prioritize speed and versatility. Perfect for general use, though serious outdoor projects demanding maximum water resistance still require Titebond III.
6. Wood Glue, Strongest Glue for Woodworking, Waterproof Clear Wood Glue for Furniture Heavy Duty, Interior & Exterior Furniture Glue for Crafts, Furniture, Baseboard, cabinets, Door (150g)

Overview: This 150g bottle positions itself as a versatile, heavy-duty solution for both interior and exterior woodworking projects. The clear-drying, waterproof formula targets DIY enthusiasts working on furniture, cabinets, baseboards, and crafts. Its compact size makes it approachable for occasional users tackling household repairs or small-scale creations without committing to bulk quantities.
What Makes It Stand Out: The precision-tip applicator promises mess-free application, addressing a common frustration with traditional glue bottles. Its non-toxic formulation stands out for safety-conscious users, while the weather-resistant design claims to handle everything from garden gates to deck repairs. The rapid setting time and clear finish appeal to those prioritizing both efficiency and aesthetics.
Value for Money: At 150g, this glue hits a sweet spot for hobbyists and casual DIYers. While pricing isn’t specified, generic brands typically undercut premium competitors like Gorilla or Titebond by 30-50%. For intermittent use, this size minimizes waste from expired product, though professionals will find it cost-prohibitive for large projects.
Strengths and Weaknesses: Strengths include waterproof performance, clear drying, non-toxic formula, and user-friendly application. The compact bottle suits small projects perfectly. However, weaknesses include unknown brand reliability, lack of ANSI/HPVA certification, and limited quantity for serious woodworking. The “strongest glue” claim lacks independent verification, and durability for structural applications remains questionable.
Bottom Line: This is a solid choice for budget-conscious DIYers handling light to medium repairs and craft projects. While it won’t replace professional-grade adhesives for critical structural work, its convenience and safety features make it worthy of keeping in your home workshop for everyday fixes.
7. Gorilla Ultimate Waterproof Wood Glue, Natural Wood Color, 18 Ounce (Pack of 1) - Waterproof for Indoor or Outdoor Projects and Repairs

Overview: Gorilla’s Ultimate Waterproof Wood Glue delivers professional-grade performance in an 18-ounce bottle. This PVA-based adhesive earns its ANSI/HPVA Type I waterproof rating, making it suitable for demanding indoor and outdoor applications. The natural wood color blends seamlessly with most timber, while the extended working time provides flexibility for complex assemblies.
What Makes It Stand Out: The 15-minute open time is a significant advantage over typical 5-minute formulas, allowing careful alignment of joints. Gorilla’s reputation for toughness is backed by real certifications, not just marketing claims. The glue’s resistance to extreme temperatures and sunlight makes it ideal for outdoor furniture, boats, and exterior trim work.
Value for Money: At 18 ounces, this mid-size bottle offers reasonable value for serious DIYers. While priced 20-40% above generic competitors, the certified waterproof performance and brand reliability justify the premium. Cost per ounce is competitive with other professional PVA glues, and the resealable bottle prevents premature drying.
Strengths and Weaknesses: Strengths include verified waterproofing, extended working time, sandable/paintable finish, and trusted brand backing. The water-based formula cleans up easily. Weaknesses include the natural tan color, which may not suit light woods or visible joints, and a slightly higher price point. The bottle size may be excessive for very occasional users.
Bottom Line: This is an excellent investment for serious woodworkers and DIYers who demand proven waterproof performance. The extended working time and ANSI certification make it ideal for outdoor projects and structural applications where failure isn’t an option.
8. LINECO PVA Adhesive, Picture Frame Glue, Adhere Wood or MDF, Dries Clear Flexible, 8 oz, Ideal for Paper Board Framing Collage Crafts Bookbinding
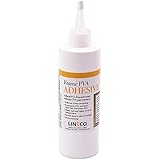
Overview: LINECO’s 8-ounce PVA adhesive serves the niche but demanding world of archival-quality woodworking. Specifically formulated for picture framing, this American-made glue meets stringent conservation standards while delivering versatility for crafts, bookbinding, and furniture assembly. Its clear, flexible drying properties make it ideal for applications where movement and aesthetics matter.
What Makes It Stand Out: The archival certification is the headline feature, ensuring longevity without yellowing or degrading precious artwork. Its extremely high solids content creates joints stronger than the wood itself, while the 30-minute press time accelerates professional workflows. The flexibility prevents cracking in frame joints subject to seasonal movement.
Value for Money: At 8 ounces, this premium product commands a higher price per ounce than mass-market alternatives. However, for professionals framing valuable art or building heirloom furniture, the cost is negligible compared to the value of protected work. Hobbyists may find it overpriced for casual projects.
Strengths and Weaknesses: Strengths include archival safety, professional-grade strength, clear flexible finish, and Made-in-USA quality. It excels on MDF, plywood, and hard-to-stick woods. Weaknesses include the small volume limiting large projects, premium pricing, and specialized nature that may be unnecessary for basic repairs. The focus on framing may overshadow its general woodworking potential.
Bottom Line: This is the gold standard for picture framers, conservators, and fine woodworkers prioritizing archival integrity. While overkill for simple household fixes, its exceptional quality and flexibility justify the investment for any project meant to last generations.
9. Titebond 1416 III Ultimate Wood Glue, 1-Gallon

Overview: Titebond III represents the professional woodworker’s go-to adhesive, now available in an economical 1-gallon container. This waterproof PVA glue has become an industry benchmark for interior and exterior applications, offering FDA-approved indirect food contact safety. The bulk size caters to high-volume users, from cabinet shops to dedicated hobbyists.
What Makes It Stand Out: The FDA approval for cutting boards and wooden utensils sets it apart from nearly all competitors, making it indispensable for kitchen woodworking. Its superior strength formula remains unaffected by finishes, eliminating compatibility concerns. The waterproof rating and proven track record in professional settings provide unmatched confidence.
Value for Money: The gallon size delivers exceptional per-ounce value, typically 40-60% cheaper than buying equivalent volumes in smaller bottles. For professionals or active workshops, this bulk purchase pays for itself quickly. The only caveat is ensuring you use it before the 12-24 month shelf life expires.
Strengths and Weaknesses: Strengths include certified food safety, proven waterproof performance, bulk economy, and universal compatibility with finishes. The water cleanup is convenient. Weaknesses include the large container’s storage requirements and potential waste for casual users. The initial investment is higher, and transferring to smaller bottles for application can be messy without proper dispensers.
Bottom Line: This is the definitive choice for professional woodworkers, kitchen item makers, and high-volume users. The food-safe certification and proven performance make it worth every penny, though casual DIYers should opt for smaller sizes to avoid waste.
10. ClenyMagi Wood Glue, High Strength Fast Drying Clear Wood Glue for Furniture Heavy Duty, Woodworking, Garden, Crafts, DIY, Waterproof, Heat Resistant Tacky Adhesive (1 Bottle of 25g)

Overview: ClenyMagi’s 25g bottle offers a super-glue approach to woodworking, promising instant bonds in 10-15 seconds. This cyanoacrylate-style adhesive targets quick repairs and multi-material applications beyond traditional PVA capabilities. Its waterproof, heat-resistant formula appeals to users needing immediate results for furniture, crafts, and garden projects.
What Makes It Stand Out: The lightning-fast cure time dramatically accelerates project timelines compared to traditional 30-minute PVAs. The gel formula prevents runs on vertical surfaces, while the multi-material bonding (wood, metal, plastic, ceramic) expands its utility beyond typical wood glues. Safety certifications (MSDS, SGS) provide credibility.
Value for Money: At just 25g, this is a single-use or few-use product. While the absolute price is low, the per-ounce cost far exceeds PVA alternatives. You’re paying for convenience and speed, not volume. Ideal for emergency repair kits or specialized applications where instant bonding justifies the premium.
Strengths and Weaknesses: Strengths include rapid curing, waterproof performance, multi-material versatility, and vertical surface application. The non-toxic claim and safety certifications are reassuring. Weaknesses include the tiny quantity limiting project scope, potential brittleness of super-glue bonds, and unsuitability for large surface lamination. The 24-hour full cure contradicts the “instant” marketing slightly.
Bottom Line: Perfect for quick fixes, emergency repairs, and bonding dissimilar materials. Keep it in your toolbox for on-the-spot problems, but don’t rely on it as your primary woodworking adhesive. Traditional PVAs remain superior for structural wood joints and large projects.
Why Polyurethane Glue Reigns Supreme for Timber-Frame Joints
The Chemistry Behind the Bond
Polyurethane glue’s dominance in heavy timber work stems from its unique moisture-curing chemistry. Unlike PVA glues that simply dry through water evaporation, polyurethane adhesives undergo an isocyanate-polyol reaction triggered by ambient moisture in wood and air. This exothermic process creates a thermosetting polymer that literally grows into wood pores, forming both mechanical and chemical bonds. For timber-frame joints, this means the adhesive doesn’t just stick to surfaces—it becomes an integral structural component that can handle the shear stresses inherent in mortise-and-tenon or dovetail connections.
Advantages Over Traditional Wood Glues
Timber framers abandoned traditional hide glue and standard aliphatic resins for good reason. Polyurethane formulations offer gap-filling capabilities up to 1/8 inch without sacrificing strength, crucial when working with hand-hewn timbers that aren’t perfectly milled. They maintain flexibility after curing, allowing wood to move seasonally without creating stress risers at the glue line. Most importantly, they deliver waterproof bonds that meet ASTM D4 standards, ensuring your frame won’t delaminate when exposed to the inevitable moisture cycles of exterior walls or unconditioned spaces.
Understanding the 24-Hour Cure Cycle
What “24-Hour Cure” Really Means
That “24-hour cure” label on the bottle represents the time required to achieve 90-95% of ultimate bond strength under optimal conditions—typically 70°F and 50% relative humidity. However, full polymerization continues for 72 hours or more. For timber-frame applications, this means you can remove clamps after 24 hours, but shouldn’t subject joints to full design loads for at least three days. The timeline extends dramatically in cold or dry conditions, potentially doubling in sub-40°F environments.
Factors That Influence Cure Time
Wood species density directly impacts curing speed. Dense hardwoods like oak or maple contain less free moisture, slowing the reaction, while softwoods like pine or Douglas fir accelerate it. Ambient humidity plays a counterintuitive role: too dry (below 30% RH) starves the reaction, while excessive moisture (above 80% RH) causes accelerated skinning that traps uncured adhesive beneath. Air circulation matters more than you might think—stagnant air creates a boundary layer of CO2 that can inhibit surface curing.
Key Performance Features to Evaluate
Gap-Filling Capabilities
Not all polyurethane glues handle gaps equally. Premium timber-frame formulations contain rheology modifiers that prevent slump in vertical joints while maintaining flow under clamp pressure. Look for products advertising “non-sag” or “gap-filling” properties with verified testing on gaps up to 3mm. The expansion foam that forms during cure should be dense and uniform, not brittle or excessively porous. This foam structure is what carries load across imperfect joints, so its consistency directly correlates to shear strength.
Waterproof Rating and Outdoor Durability
The difference between “water-resistant” and “waterproof” is structural life or death. For exterior timber frames, insist on adhesives meeting ANSI/HPVA Type I water resistance standards, which require surviving three days of boiling water testing without bond failure. In 2026, emerging formulations are adding UV stabilizers to prevent polymer degradation from sunlight exposure on exposed joinery—a critical consideration for barns or pavilions where beam ends remain visible.
Temperature Resistance Range
Timber frames experience extreme temperature swings, from -20°F winter nights to 140°F summer attic spaces. Quality polyurethane glues maintain structural properties from -40°F to 200°F, but the sweet spot for application is narrower. Most formulations won’t cure below 40°F, and application above 90°F can cause premature foaming that weakens bonds. For 2026 projects, look for extended-range formulations that cure reliably down to 35°F, enabled by new catalyst technologies.
Viscosity and Spreadability
Viscosity, measured in centipoise (cP), determines how easily the adhesive spreads across large joint surfaces. Timber-frame work demands products in the 8,000-12,000 cP range—thick enough to prevent run-off on vertical tenons but fluid enough to spread with a notched trowel. Some manufacturers now offer “summer” and “winter” formulations that adjust viscosity seasonally, preventing the glue from becoming too thick in cold storage or too thin in hot application conditions.
Working Time vs. Clamp Time: Critical Distinctions
Open Assembly Time Considerations
Open assembly time—the period between applying glue and bringing joint surfaces together—typically runs 15-20 minutes for standard polyurethane. However, for complex timber-frame joints requiring multiple clamps and alignment checks, seek extended open times of 30+ minutes. Be warned: extending open time often means slower cure, so you’ll need to balance workability against schedule pressure. In 2026, some advanced formulations use dual-stage catalysts that remain stable during assembly then accelerate rapidly under clamp pressure.
Minimum Clamp Duration Requirements
While clamps can technically be removed after 2-4 hours, that’s a recipe for joint creep in heavy timbers. The 24-hour cure cycle demands clamps remain for at least 8-12 hours to prevent the foaming action from pushing joints apart. For draw-bored mortise-and-tenon joints, the mechanical fastening reduces clamp time, but don’t fall into the trap of relying solely on pegs. The glue is doing critical work that pegs alone cannot accomplish.
Surface Preparation: The Foundation of Success
Moisture Content Requirements
Here’s where many timber framers stumble: polyurethane glue needs moisture to cure, but wood that’s too wet prevents proper penetration. The sweet spot is 8-12% moisture content for softwoods, 6-10% for hardwoods. Use a pin-type moisture meter on multiple faces of each timber—surface readings can be deceiving. If wood is too dry (common in kiln-dried stock), lightly mist joint surfaces with water 15 minutes before gluing. Too wet? Allow 24-48 hours of air drying or use a dehumidification tent.
Surface Cleaning Protocols
That beautiful hand-planed surface might look clean, but it’s likely contaminated with microscopic oils from your fingers and airborne dust. Wipe all joint surfaces with denatured alcohol 30 minutes before gluing—this removes contaminants without raising grain like water would. Never use mineral spirits or paint thinner; they leave oily residues. For reclaimed timbers, a light pass with a wire brush followed by compressed air removes deep-seated dirt that mechanical bonds can’t overcome.
Dealing with Oily or Resinous Woods
Cedar, cypress, and old-growth pine present unique challenges with high resin content. The oils interfere with polyurethane’s moisture cure mechanism. Sand these surfaces with 80-grit paper to open pores, then wipe with acetone (not alcohol) to dissolve surface oils. Apply glue while the wood is still slightly tacky from the acetone evaporation—this thin solvent film actually helps the polyurethane penetrate deeper before curing begins.
Application Techniques for Maximum Strength
Proper Dispensing Methods
Forget the squeeze bottle. For timber-frame joints, use a bulk application gun with static mixer nozzles for two-part formulations, or transfer single-part glue to a notched plastic trowel. Apply a continuous bead around the perimeter of the joint, then zigzag across the interior. The notches ensure consistent 1/16" thickness—enough to fill gaps without excessive squeeze-out that wastes material and creates messy cleanup. For vertical mortise walls, apply adhesive to the male tenon only to prevent gravity from pulling uncured glue to the bottom of the joint.
Spread Patterns for Large Joints
A 6x10" mortise-and-tenon joint requires strategic adhesive placement. Focus 60% of the glue on the tenon cheeks, 30% on the shoulders, and just 10% on the tenon tip. This distribution ensures the foaming action pushes adhesive into the mortise ends rather than squeezing completely out of the joint. For scarf joints, apply glue in three parallel beads—one down the center, two along the edges. This creates a hydraulic effect during clamping that drives air out from the center.
Managing Foam Expansion
The characteristic foam expansion is both blessing and curse. Control it by applying consistent clamp pressure across the joint—approximately 150-200 psi for softwoods, 200-250 psi for hardwoods. Use cauls to distribute pressure evenly and prevent starved joints at the edges. If foam extrudes excessively, wait until it’s partially cured (2-3 hours) then trim it flush with a sharp chisel. Never wipe wet foam with solvents; this smears uncured adhesive and weakens the glue line.
Safety Protocols and PPE Requirements
Respiratory Protection
Polyurethane curing releases trace isocyanates and generates CO2 gas—both problematic in enclosed spaces. For timber-frame work inside closed barns or basements, wear a half-face respirator with organic vapor cartridges (NIOSH TC-23C approval). The 2026 updates to OSHA’s isocyanate standard now require quantitative fit testing for any worker using more than one quart per day. Even in open-air timber framing, position yourself upwind during application and consider a disposable N95 for extended glue-up sessions.
Skin and Eye Protection
Isocyanates are potent skin sensitizers. Once you develop a polyurethane allergy, you’re permanently sensitized. Wear nitrile gloves (not latex, which degrades with isocyanates) and long sleeves. If glue contacts skin, wipe with dry paper towels first—water accelerates curing and drives chemicals deeper into pores. Follow with mechanic’s hand cleaner containing pumice. Safety glasses with indirect vents are mandatory; foam expansion can eject droplets upward with surprising force. Keep a bottle of eyewash solution immediately accessible on every job site.
Ventilation Standards
OSHA’s 2026 PEL for isocyanates dropped to 0.005 ppm as an 8-hour TWA. For indoor timber-frame work, this means mechanical ventilation delivering six air changes per hour minimum. Create negative pressure using exhaust fans positioned downwind of glue-up areas. In outdoor settings, be mindful of foam expansion carrying uncured droplets onto surrounding surfaces—these can cause permanent stains and create inhalation hazards when sanded later.
Common Application Mistakes That Weaken Joints
Using Too Much Adhesive
More isn’t better. Excessive glue creates a thick foam layer with poor cohesive strength and wastes expensive adhesive. The optimal glue line thickness is 0.003-0.006 inches. Thicker lines create stress concentrations and can actually reduce shear strength by up to 30%. Measure your coverage rate: a quart should cover approximately 40-50 square feet of joint surface when applied correctly. If you’re using significantly more, you’re over-applying.
Insufficient Clamping Pressure
Timber frames are heavy, and gravity works against you. Insufficient pressure allows the expanding foam to push joints apart, creating voids. Use enough clamps to create uniform pressure every 6-8 inches along the joint. For a typical 8x8" post and beam connection, plan on 4-6 clamps minimum. The joint should extrude a thin, continuous bead of foam along the entire glue line—spotty squeeze-out indicates pressure gaps.
Premature Stress on Joints
The temptation to remove clamps early and move to the next bent is strong, but premature loading is the leading cause of delayed glue-line failure. Even after 24 hours, the polymer continues cross-linking. Wait a full 72 hours before subjecting joints to structural loads like raising bent sections. In cold weather, extend this to 5-7 days. Mark each joint with the date and time of glue-up using lumber crayon to eliminate guesswork.
Cost-Performance Analysis for 2026
Price Per Ounce vs. Coverage Area
Premium timber-frame polyurethane runs $12-18 per 16-ounce bottle in 2026, but focusing on price per ounce misses the bigger picture. Calculate cost per square foot of coverage, factoring in waste. Budget formulations may seem cheaper at $8-10 per bottle, but their higher viscosity and excessive foam expansion can increase usage by 40%. Professional-grade adhesives with controlled foaming often prove more economical on large projects despite higher upfront cost.
Bulk Purchasing Considerations
For a typical 2,000-square-foot timber frame home requiring 3-4 gallons of adhesive, bulk buying makes sense. Five-gallon pails offer 30-40% savings per ounce versus bottles. However, polyurethane has a finite shelf life once opened—typically 6-12 months. Coordinate with other framers or contractors to split bulk orders. Some suppliers now offer “fresh-batch guarantees” for 2026, ensuring pails are less than 30 days from manufacture date.
Shelf Life Economics
That half-used bottle from last year’s project? Test it before betting a frame on it. Polyurethane cures via moisture reaction, and partially used bottles contain cured skin and trapped humidity that accelerates degradation. Professional timber framers budget 10-15% waste factor for opened containers. Store bottles upside-down to create an internal seal against air intrusion, and always record the opening date with a permanent marker. Adhesive more than 6 months old should be used only for non-structural applications.
Storage and Handling Best Practices
Temperature-Controlled Storage
Polyurethane glue is perishable. Store between 55-75°F—never in unheated shops or direct sunlight. Cold storage doesn’t just thicken the adhesive; it causes phase separation of the polyol components that can’t be reversed by warming. Conversely, temperatures above 90°F prematurely activate catalysts, reducing shelf life by months. For 2026 job sites, insulated adhesive lockers are becoming standard equipment, maintaining stable temperature even in winter conditions.
Moisture Contamination Prevention
The enemy of polyurethane is premature moisture exposure. Always wipe bottle threads clean before recapping, and store bottles with the original foil seal intact until first use. For bulk pails, dispense only what you need into sealed containers rather than repeatedly opening the main container. Some professionals add a layer of argon or nitrogen spray (available in wine-preservation canisters) before sealing to displace humid air—a trick that can extend opened shelf life to 18 months.
Rehydration Techniques for Partially Cured Bottles
If you discover a partially cured skin inside a bottle, don’t immediately discard it. For bottles less than 25% cured, carefully cut away the solidified top layer and test the remaining liquid on scrap wood. If it foams and cures normally within the expected timeframe, it’s usable. For borderline cases, adding 1-2% distilled water by weight (use a syringe for precision) can reactivate slightly degraded adhesive, though this reduces ultimate strength by approximately 15% and should never be used for primary structural joints.
Environmental and Sustainability Factors
VOC Regulations in 2026
The EPA’s updated TSCA regulations for 2026 have tightened VOC limits on construction adhesives to 70 g/L. Most polyurethane wood glues now fall well below this at 30-50 g/L, but verify compliance—non-compliant products are being phased out and could leave you without supply mid-project. More significantly, California’s Prop 65 now requires explicit warnings for isocyanate content, affecting job site signage and worker notification protocols.
Eco-Friendly Formulations
Bio-based polyols derived from soybean and castor oil now constitute up to 30% of some premium formulations without sacrificing performance. These “green” polyurethanes offer identical strength and cure profiles while reducing petroleum dependency. For LEED or sustainable timber-frame projects, look for products with Environmental Product Declarations (EPDs) and Health Product Declarations (HPDs) published for 2026. The cost premium is typically only 10-15%.
Disposal Considerations
Cured polyurethane is inert and can be disposed as construction waste. Uncured adhesive, however, is hazardous waste in many jurisdictions. Never rinse uncured glue down drains—the isocyanates react violently with water and can create toxic vapors. For cleanup, wipe tools with dry paper towels, then clean with acetone while glue is still wet. Let soiled towels cure completely in a ventilated area before disposal to prevent spontaneous combustion from the exothermic reaction in confined waste containers.
Project-Specific Selection Criteria
Heavy Timber vs. Engineered Lumber
Gluing a solid 8x8" oak post differs fundamentally from bonding engineered products like glulam or LVLs. Engineered lumber often contains waxes and release agents from manufacturing that inhibit polyurethane cure. For these materials, specify “engineered wood compatible” formulations that contain aggressive wetting agents. Conversely, when working with reclaimed timber, choose adhesives with higher initial tack to prevent slippage during clamping of irregular surfaces.
Historic Restoration vs. New Construction
Restoring 18th-century timber frames requires reversible or minimally invasive methods. While polyurethane isn’t reversible, some 2026 formulations offer lower modulus (more flexible) cures that better accommodate movement in historic structures without crushing ancient wood fibers. For new construction, prioritize maximum strength and durability. The key difference: restoration projects benefit from slower-curing formulations (36-48 hours) that allow fine adjustments, while new builds favor rapid-cure products that accelerate schedules.
Hybrid Joint Systems
Modern timber frames increasingly combine traditional mortise-and-tenon with steel plates, bolts, and engineered connectors. Polyurethane must bond not just wood-to-wood but also wood-to-metal. Look for formulations advertising “multi-substrate” capability with verified testing on galvanized steel, stainless steel, and powder-coated surfaces. The adhesive should maintain flexibility to accommodate differential thermal expansion between wood and metal, which can be 5-7 times greater.
Compatibility with Wood Treatments and Finishes
Pressure-Treated Lumber Challenges
CCA and ACQ pressure treatments contain copper compounds that catalyze premature polyurethane curing on the surface while preventing deep penetration. For treated timbers used in foundation posts or exterior walls, wait 2-3 weeks after treatment before gluing to allow surface chemicals to stabilize. Lightly plane or sand treated surfaces to remove the most contaminated outer layer. Some 2026 formulations now include copper chelating agents that neutralize these effects, but verify compatibility with your specific treatment type.
Pre-Finish Considerations
Planning to oil or stain your frame? Oil-based finishes can wick into uncured glue lines, plasticizing the polymer and reducing strength. Always complete glue-ups before applying any finish, and wait the full 72-hour cure period before finishing. For projects requiring pre-finished components (common in timber-frame kit manufacturing), mask glue lines with painter’s tape and use “finish-compatible” polyurethanes that cure without off-gassing plasticizers. Water-based finishes are generally safe after 24 hours, but test compatibility on scrap pieces first.
Troubleshooting Weak Bonds
Identifying Glue Line Failure
Failed joints in timber frames often don’t separate catastrophically—they creep. Look for hairline cracks in the foam extrusion at the joint edges, or tap the joint with a hammer; a dull thud indicates solid bond, while a hollow sound suggests voids. For critical structural connections, destructive testing of sample joints is prudent. Cut a test joint in half after full cure and examine the glue line under magnification—uniform dark brown foam indicates good penetration, while light tan streaks reveal starved joints.
Remedial Repair Strategies
Discovering a weak bond after raising a bent is every timber framer’s nightmare. For minor gaps, inject low-viscosity polyurethane repair adhesive (formulated for crack injection) using a caulking gun with a 6" nozzle. Drill 1/8" access holes at 45-degree angles to intersect the glue line. For major failures, mechanical reinforcement with steel straps or through-bolts may be necessary. Document everything—remedial repairs require engineering review and can affect warranty coverage.
When to Start Over
Sometimes repair isn’t worth the risk. If destructive testing reveals more than 30% of the glue line is compromised, or if joints have been subjected to load while under-cured, disassembly and re-gluing is the only reliable option. Use a heat gun at 200-250°F to soften cured foam, then carefully separate joints with a flush-cut saw. Remove all old adhesive mechanically; solvents don’t work on cured polyurethane and will just drive contaminants deeper into the wood.
Future Innovations on the Horizon
Smart Adhesive Technologies
The timber-frame adhesives of late 2026 are beginning to incorporate microencapsulated indicators that change color when full cure is achieved—no more guessing if that joint is ready for loading. Early prototypes use pH-sensitive dyes that shift from blue to amber as the isocyanate reaction completes. While currently limited to high-end architectural applications, expect this technology to become standard within 18 months, revolutionizing quality control on large projects.
Enhanced Cure Indicators
Beyond simple color changes, next-generation formulations are experimenting with RFID tags embedded in adhesive cartridges that communicate cure status to mobile apps via temperature monitoring. These systems track exothermic reaction progress and calculate real-time strength development based on ambient conditions. For timber-frame crews working on multi-month projects, this data logging provides documented proof of proper cure for building inspectors and engineers.
Frequently Asked Questions
How does humidity affect the 24-hour cure time in real-world timber-frame applications?
Humidity dramatically impacts cure speed. At 70°F and 80% RH, you might achieve workable strength in 18 hours. At 30% RH, expect 30-36 hours. In arid climates, lightly mist joint surfaces with water 15 minutes before gluing to provide the moisture necessary for proper curing without over-wetting the wood.
Can I accelerate the cure with heat lamps or forced air?
Gentle warming to 80-90°F can reduce cure time by 20-30%, but direct heat above 100°F causes skinning that traps uncured adhesive. Use indirect heating like space heaters warming the entire shop, and maintain air circulation with fans positioned to avoid direct airflow on joints. Never use propane salamanders—the combustion byproducts interfere with the curing reaction.
What’s the maximum gap size polyurethane can reliably fill in timber joints?
Quality timber-frame formulations handle gaps up to 1/8" without strength loss. Beyond that, shear strength drops exponentially. For gaps exceeding 3/16", fill the majority with wood shims or epoxy filler, then use polyurethane for the final 1/16" bond line. Some 2026 products advertise 1/4" gap-filling, but independent testing shows 40% strength reduction at that thickness.
Is polyurethane glue stronger than the wood itself in timber-frame joints?
Yes, properly applied polyurethane achieves 3,500-4,000 psi shear strength, exceeding most softwoods (800-1,500 psi) and approaching hardwoods (2,500-3,500 psi). However, the wood’s cellular structure becomes the limiting factor—joints typically fail in the wood adjacent to the glue line, not in the adhesive itself, provided the glue line isn’t overly thick.
How do I store partially used bottles between timber-frame raising sessions?
Squeeze all air from the bottle before capping tightly. Store upside-down in a sealed plastic bag with a desiccant packet. This prevents air entry and moisture contamination. Mark the opening date and plan to use within 3 months for critical structural work, 6 months for secondary applications. The “sniff test” works—if it smells strongly of isocyanates, it’s still good; if odorless or smells like plastic, discard it.
Can polyurethane glue be used on green timber for traditional wet framing techniques?
Traditional wet framing uses green (high moisture content) wood that shrinks around joints as it dries. Polyurethane can work but requires special consideration. Use formulations designed for wet wood (up to 25% MC), and expect cure times to extend to 48-72 hours. The advantage: the glue accommodates movement better than rigid epoxy, but you must wait for full wood drying before applying design loads.
What’s the best cleanup method for uncured foam squeeze-out?
Let it partially cure for 30-45 minutes until it’s tacky but not fully hardened. Scrape off the bulk with a putty knife, then wipe remaining residue with dry paper towels. Never use water or solvents on uncured foam—they spread the adhesive and drive it into wood pores. Once cured, trim flush with a sharp chisel or sand with 80-grit paper before it fully hardens (within 4-6 hours).
Are there temperature limitations for applying polyurethane in winter timber-frame work?
Standard formulations require application above 40°F and curing above 35°F. For cold-weather work, use extended-range products that cure down to 25°F, but expect 36-48 hour cure times. Pre-condition both adhesive and wood to 60°F for 24 hours before gluing. Insulate joints with foam blankets during cure. Never apply to frosty wood—the ice crystals create voids and prevent bonding.
How does polyurethane perform with reclaimed or barn wood that’s been weathered?
Weathered wood presents two problems: surface degradation and contamination. Remove at least 1/8" from all joint surfaces to expose sound wood. Test the remaining material with a moisture meter—reclaimed wood often has internal moisture pockets. Clean with a wire brush and compressed air, then wipe with acetone to remove any residual oils or old finishes. Consider using a primer coat of thin epoxy to consolidate punky areas before polyurethane application.
Can I mix different brands or batches of polyurethane glue on the same timber-frame project?
Absolutely not. Different formulations use varying isocyanate ratios, catalysts, and polyol blends that may be incompatible. Mixing can result in incomplete curing, weak spots, or excessive foaming. Stick to one brand and batch number for all primary structural connections. If you must switch brands due to supply issues, test compatibility on non-critical joints and allow for extended cure validation before loading.
See Also
- 10 Best Exterior Wood Glue for Timber Frame Joints That Survive Freeze-Thaw
- 10 Must-Have Exterior Wood Glue for Timber-Frame Joints That Survive Freeze-Thaw
- Stop Frozen Joints: 10 Best Cold-Weather Polyurethane Wood Glue in 2026
- 10 Must-Have Interior Wood Glue for Picture Frame Miter Joints in 2026
- 10 Polyurethane Wood Glue for Timber Framing That Foam Just Right in 2026