Table of Contents
Refinishing a staircase is one of those home improvement projects that looks straightforward until you’re staring down at a half-sanded tread with a nasty gouge where the edge used to be. That heart-sinking moment—when you’ve transformed a smooth, rounded nosing into a chipped, uneven mess—has ended more DIY dreams than almost any other sanding disaster. The culprit? Usually, it’s the wrong sander, the wrong technique, or a combination of both. In 2026, random orbital sander technology has evolved specifically to address these challenges, offering features that make edge work on stairs not just possible, but practically foolproof when you know what to look for.
The stakes are uniquely high with staircases. Unlike a flat floor or a standalone piece of furniture, your stairs are a high-traffic architectural element where every flaw becomes a daily reminder of that “one little mistake.” The edges of each tread and the corners where risers meet are particularly unforgiving. Traditional belt sanders chew through these areas like a hungry beaver. Even standard random orbital sanders, without the right design considerations, can leave swirls, dips, and those dreaded edge gouges that scream “amateur hour.” This guide walks you through everything you need to know about selecting and using the perfect random orbital sander for staircase refinishing in 2026—focusing on the technology, techniques, and insider knowledge that keep your edges pristine.
Top 10 Random Orbital Sanders For Staircases


Detailed Product Reviews
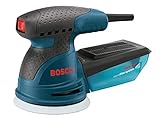
1. SKIL 5” Random Orbital Sander with Cyclonic Dust Box & 3pc Sanding Sheet - SR211601, Multicolor

Overview: The SKIL SR211601 is a corded orbital sander targeting DIY enthusiasts and homeowners who need reliable performance for occasional projects. Its 2.8-amp motor generates 13,000 orbits per minute, handling tasks from furniture refinishing to surface preparation with consistent results.
What Makes It Stand Out: The innovative X-flow cyclonic dust collector distinguishes this sander in its price category. This transparent system uses centrifugal force to separate debris effectively, making emptying mess-free. Its compact, ergonomic profile excels in tight spaces where larger sanders struggle, maximizing user control in confined areas.
Value for Money: Positioned as a budget-friendly option, this sander delivers premium features at a budget-conscious price point. While only three sanding sheets are included, the cyclonic dust collection and variable speed control offer exceptional utility for intermittent users. It’s competitively priced against entry-level models while providing superior dust management.
Strengths and Weaknesses: Strengths: Powerful motor for its class; effective cyclonic dust separation; comfortable vibration-reducing grip; compact design; variable speed versatility; transparent dust container. Weaknesses: Limited included accessories; not built for daily contractor use; dust bin requires frequent emptying on larger jobs.
Bottom Line: For weekend warriors and homeowners tackling periodic sanding tasks, the SKIL SR211601 provides impressive performance and dust control without stretching your budget. It’s a smart entry-level investment.
2. DEWALT 20V MAX Orbital Sander, Tool Only (DCW210B)

Overview: The DEWALT DCW210B brings cordless freedom to professional-grade sanding, operating on the popular 20V MAX battery platform. This tool-only option features a brushless motor that optimizes runtime and efficiency for users already invested in DEWALT’s extensive ecosystem.
What Makes It Stand Out: The brushless motor technology and low-profile design are standout features. At only 8,000-12,000 OPM, it prioritizes control and battery longevity over raw speed. The replaceable 8-hole hook-and-loop pad and dust-sealed switch demonstrate DEWALT’s focus on durability and user convenience in demanding work environments.
Value for Money: As a tool-only purchase, its value depends entirely on existing 20V MAX batteries. For those already equipped, it offers professional quality without redundant batteries. Newcomers face significant additional investment, making it pricey compared to corded alternatives.
Strengths and Weaknesses: Strengths: Cordless convenience; excellent runtime from brushless motor; low-profile for precision work; rugged dust-sealed switch; part of expansive 20V MAX system; quick-change sanding pad. Weaknesses: Battery and charger not included; lower maximum OPM than corded rivals; no sandpapers provided; premium price point.
Bottom Line: This sander excels for existing DEWALT 20V MAX users seeking jobsite mobility. If you’re not already committed to the platform, corded options offer better value.
3. Orbital Sander Corded Hand Sander: DEKOPRO 5" Random Orbital Sander with Dust Box, 6 Various Speeds Electric Palm Sander with Dust Box, 16Pcs Sandpapers for Woodworking & Sanding-Yellow

Overview: The DEKOPRO corded sander positions itself as a feature-packed value proposition for budget-conscious buyers seeking maximum versatility. Its 2.5-amp motor reaches an impressive 14,000 RPM, while six speed settings and a generous 16-piece sandpaper assortment covering grits from 60 to 1000 cater to diverse applications from aggressive material removal to fine finishing.
What Makes It Stand Out: The extensive accessory package is this sander’s headline feature. Including ultra-fine 1000-grit discs is rare at this price point, enabling polishing work beyond typical sanding applications. The six-speed control provides exceptional versatility, while the heat-dissipating ventilation design promises extended lifespan and improved overload capacity.
Value for Money: Outstanding value dominates this offering. The combination of variable speeds, comprehensive sandpaper selection, and ergonomic features at a budget price creates an unbeatable package for beginners. It eliminates the need for immediate accessory purchases, saving both time and money.
Strengths and Weaknesses: Strengths: Exceptional accessory bundle; high 14,000 RPM maximum; six speed settings; effective dust collection; comfortable grip; heat management design; counterweight vibration reduction. Weaknesses: Brand lacks DEWALT/Makita recognition; long-term durability unproven; included sandpaper quality may vary; corded-only operation limits mobility.
Bottom Line: For novices and DIYers wanting maximum versatility without investment risk, the DEKOPRO delivers incredible value. It’s an ideal starter kit that covers coarse removal to fine polishing.
4. DEWALT Random Orbit Sander, Variable Speed, 5-Inch (DWE6423), Power Source Corded Electric
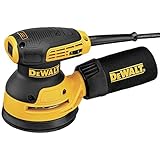
Overview: The DEWALT DWE6423 represents professional-grade corded sanding built for demanding workshop environments. Its robust 3-amp motor provides 8,000-12,000 OPM with variable speed control, while a separate counterweight design significantly reduces vibration during extended use, minimizing operator fatigue.
What Makes It Stand Out: The integrated dust port specifically designed for DWV010/DWV012 dust collectors demonstrates professional intent. This direct-connect system eliminates adapter hassles and maximizes dust extraction efficiency, crucial for dust-sensitive environments and maintaining clean workspaces. The shorter height profile improves workpiece visibility and control for precision applications, allowing users to get closer to their material with better sightlines.
Value for Money: Positioned in the mid-to-high price range, this sander justifies its cost through exceptional durability and consistent performance. While sandpapers and dust collectors are sold separately, the superior build quality ensures years of reliable service for serious woodworkers and professional contractors.
Strengths and Weaknesses: Strengths: Powerful 3-amp motor; superior vibration control; dust-sealed switch longevity; professional dust collection compatibility; compact height; proven DEWALT reliability. Weaknesses: No included accessories; requires separate dust collector purchase; cord limits mobility; premium pricing.
Bottom Line: Serious hobbyists and professionals seeking a durable, low-vibration workhorse will appreciate the DWE6423. It’s a long-term investment in quality sanding performance.
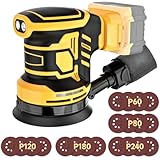
5. 5-Inch Random Orbital Sander, HYCHIKA 13000RPM Electric Orbital Sander with 6 Various Speeds, Palm Sander with 12 Pcs Sandpapers, 1 Pcs Dust Bag, Fit for Woodworking/Sanding
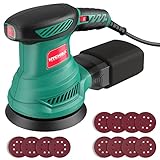
Overview: The HYCHIKA orbital sander balances performance and affordability for DIY enthusiasts seeking a capable mid-range tool. Its 2.5-amp motor offers six variable speeds from 6,000-13,000 RPM, while the included 12 sandpapers and efficient dust collection system address common user needs out of the box.
What Makes It Stand Out: The claimed 80% dust collection efficiency through eight vacuum holes is impressive for this price tier, promising a cleaner workspace and reduced cleanup time. The lightweight, texturized rubber grip prioritizes user comfort during extended sessions, effectively absorbing shock and vibration for improved control and reduced hand fatigue.
Value for Money: This sander delivers solid value with a decent accessory pack and variable speed control at a competitive price point. While not the cheapest option available, the ergonomic design and dust efficiency claims justify the moderate investment for regular DIY users who value comfort.
Strengths and Weaknesses: Strengths: Six speed settings; comfortable shock-absorbing grip; efficient dust collection design; lightweight construction; good RPM range; adequate included sandpapers. Weaknesses: Limited brand history; sandpaper grit selection less comprehensive than DEKOPRO; corded design; long-term reliability uncertain.
Bottom Line: The HYCHIKA is a competent mid-range choice for DIYers prioritizing comfort and dust control. It offers reliable performance without premium pricing, making it suitable for regular home workshop use.
Why Staircase Refinishing Demands Specialized Sanding Equipment
Staircases present a geometric nightmare for sanding tools. You’re dealing with horizontal treads, vertical risers, curved nosings, tight corners, and often, historically significant wood that demands respect. The physics of sanding change dramatically when you move from a flat floor to a 90-degree angle where two surfaces meet.
The Challenge of Edge Work on Treads and Risers
The edge of a stair tread—especially the nosing—is where damage shows first and repairs cost the most. This area experiences concentrated foot traffic, so the finish wears quickly. When sanding, the natural tendency is to tilt the sander to “get into” the edge, which immediately concentrates all the tool’s weight and vibration onto a single point. Without proper equipment design, this creates deep gouges that require extensive wood filler or, worse, replacement of the entire tread. The riser-to-tread junction is equally problematic; sanders with bulky bodies or aggressive orbit patterns can catch this corner and chip away wood fiber before you realize what’s happening.
How Random Orbital Sanders Prevent Gouging
Random orbital sanders excel at preventing edge damage through their dual-action movement. The pad spins in a circle while simultaneously moving in small ellipses, creating a truly random scratch pattern that doesn’t follow the wood grain. More importantly for staircase work, modern 2026 models feature advanced pad cushioning systems and electronic feedback mechanisms that detect resistance changes. When the pad encounters an edge, these systems automatically reduce aggression rather than digging in. The random orbit action also distributes sanding force across a larger area of the pad, preventing the concentration of pressure that creates gouges.
Key Features to Look for in 2026 Models
The random orbital sander market in 2026 has matured beyond simple power and speed ratings. Manufacturers now engineer specific features for precision work, recognizing that DIYers and professionals alike demand tools that can handle delicate edge work without constant babysitting.
Variable Speed Control Precision
Look for models offering stepless speed adjustment from 4,000 to 12,000 orbits per minute, controlled through digital interfaces rather than basic dials. The real game-changer is pressure-sensitive speed control—where the sander automatically reduces speed when it detects increased resistance, such as when you’re working near an edge. This prevents the tool from “grabbing” and digging in. Some advanced units even allow you to set maximum speed limits for specific project phases, essentially creating a “staircase mode” that caps aggression during edge work.
Ergonomic Design for Vertical Surfaces
Sanding risers means holding your sander vertically for extended periods. 2026 models feature redesigned motor housings that position the weight closer to your hand, reducing wrist fatigue. Look for tools with secondary handles that can rotate 360 degrees, allowing you to maintain a comfortable grip whether you’re working horizontally on treads or vertically on risers. The best designs include vibration dampening systems that isolate the handle from the motor housing, preventing numbness during long sessions.
Dust Collection Systems for Indoor Work
Staircase refinishing happens in your living space, not a workshop. Effective dust collection isn’t just about cleanliness—it’s about seeing your progress and avoiding swirl marks caused by dust particles. Modern sanders feature multi-stage cyclonic separation in their onboard canisters, capturing 95% of dust before it hits your vacuum. The critical feature for stairs is a swiveling dust port that stays oriented correctly whether you’re sanding treads or risers, preventing hose kinks that reduce suction and cause dust clouds.
Pad Size and Shape Considerations
For staircase work, the 5-inch pad remains the sweet spot, but 2026 brings innovations in pad edge geometry. Look for pads with beveled or radiused edges that naturally roll over tread nosings without catching. Some manufacturers now offer “stair-specific” pad shapes—slightly smaller diameter pads with tapered edges that maintain full contact on flat surfaces while providing a gentle transition over curves. Avoid the temptation of larger 6-inch pads; while faster on open floors, their size makes edge control clumsy on narrow treads.
Understanding Orbit Patterns and Their Impact
The orbit pattern—the size of the ellipse the sanding pad travels—determines how aggressively a sander removes material and how likely it is to leave visible scratches or gouges.
Standard 5mm vs. Fine 2.5mm Orbits
Most random orbital sanders use a 5mm orbit, which provides aggressive stock removal suitable for flat surfaces. For staircase refinishing, consider models offering interchangeable platens that allow you to switch to a 2.5mm fine orbit. The smaller orbit pattern is less likely to catch on edges and creates a smoother finish that requires less hand-sanding. Some 2026 models feature electronically adjustable orbit sizes, letting you toggle between aggressive and fine modes without changing pads.
Forced Rotation vs. Free Spinning Mechanisms
Traditional random orbital sanders are “free spinning”—the pad rotates based on friction and momentum. Forced rotation models, gaining popularity in 2026, use gears to drive the rotation, providing more consistent cutting power. The downside? They’re more aggressive and can gouge edges if you’re not careful. For staircase work, stick with free-spinning models or forced-rotation units with electronic clutch systems that disengage the forced drive when edge resistance is detected.
Power Sources: Corded vs. Cordless in 2026
The corded vs. cordless debate has shifted dramatically with recent battery technology advances. Your choice affects not just convenience but also sanding quality on intricate stair work.
Battery Technology Advancements
2026 cordless random orbital sanders run on 20V/60V flex battery systems that deliver consistent power until complete depletion—no gradual slowdown that can cause uneven sanding. The critical feature is “power match” technology, where the sander monitors battery output and adjusts motor timing to maintain consistent orbit speed, even as voltage drops. For staircase projects, this means your last riser sands as smoothly as your first. Look for batteries with fuel gauges that display remaining runtime in minutes, not just bars, helping you plan charging breaks.
Managing Power on Multi-Step Projects
A typical staircase has 12-14 steps, and sanding each tread, riser, and stringer thoroughly can take 20-30 minutes per step. A single 5Ah battery might last 45 minutes of continuous use. The solution isn’t just spare batteries—it’s smart power management. Modern sanders feature “eco modes” that reduce power consumption by 30% during fine sanding stages, extending battery life when you need it most. For corded models, look for 15-foot or longer cords with 360-degree swivel connections that prevent unplugging when you move between steps.
Pre-Project Planning and Staircase Assessment
Before you even plug in a sander, your staircase itself tells you what tools and techniques you’ll need. Skipping this assessment is like performing surgery without checking the patient’s chart.
Evaluating Wood Species and Existing Finish
Hard maple and oak treads can handle aggressive sanding; pine and fir require kid-glove treatment. In 2026, digital moisture meters with wood species databases can tell you not just moisture content but also optimal sanding speeds for your specific wood type. For existing finishes, test a corner with a chemical stripper first. Thick, old varnish or paint clogs sandpaper instantly and can cause gouging when the sander jumps from sticky finish to bare wood. Knowing your finish type helps you choose the right starting grit and whether you need a paint-stripping attachment.
Creating a Containment Strategy
Staircase sanding creates fine dust that travels vertically through your home. Modern containment goes beyond plastic sheeting. Consider 2026’s magnetic dust barrier systems that create airtight seals without tape damage to walls. Plan your sanding sequence to work from top to bottom, allowing dust to settle on unsanded lower steps rather than finished upper ones. Mark each step with painter’s tape labels showing grit progression—this prevents accidentally re-sanding a tread with the wrong grit and creating uneven surfaces.
Sandpaper Grit Progression Strategies
The difference between a professional-looking refinished staircase and a DIY disaster often comes down to grit progression. Jumping too aggressively between grits or using the wrong starting point guarantees visible scratches and potential edge damage.
Starting Grit Selection Based on Damage
For lightly worn polyurethane, start with 120-grit. For deep scratches or water damage, you might need 80-grit, but this requires extreme caution on edges. The 2026 approach uses “damage mapping”—photographing each tread and marking problem areas with colored tape. This lets you spot-sand deep damage with a detail sander before using your random orbital for overall flattening, preventing the need for aggressive grits that risk gouging.
Transitioning Between Grits Without Swirl Marks
The rule of thumb is to never skip more than one grit level (e.g., 80 to 120 is acceptable; 80 to 180 is not). For staircase edges, this rule becomes critical. Each grit level should remove the scratches from the previous one. On edges, spend 50% more time with each grit than you think necessary—impatience here leads to visible scratch patterns that only become apparent after staining. Some 2026 sanders include built-in timers that beep at optimal interval lengths, preventing under-sanding.
Edge Sanding with Interface Pads
Never sand directly to the absolute edge of a tread with a bare pad. Instead, use a 1/4-inch thick foam interface pad that cushions the sander’s pressure. This pad compresses slightly, allowing the sanding disc to feather into the edge rather than digging a trench. For the round nosing, wrap your sandpaper around a foam contour pad that matches the curve, then attach this assembly to your random orbital sander using a hook-and-loop backing plate designed for flexible sanding.
The Critical Role of Interface Pads and Backing Plates
Your sander is only as good as the interface between its motor and the sandpaper. For staircase work, this interface becomes the primary defense against edge gouging.
Cushioning Technology for Edge Protection
Modern interface pads use multi-density foam layers—firm in the center for flat surfaces, progressively softer toward the edges. This design automatically compensates when you approach a tread edge, cushioning the transition and preventing the hard plastic backing plate from contacting the wood. In 2026, some pads incorporate “edge-sensing” gel inserts that stiffen on flat surfaces but soften when they detect edge proximity, providing real-time adaptability.
Choosing the Right Hardness Level
Interface pads come in ratings from soft (for contour sanding) to extra-firm (for aggressive stock removal). For staircase refinishing, keep two pads on hand: a medium-firm pad (rated 60-70 durometer) for general tread and riser work, and a soft pad (40-50 durometer) exclusively for nosing and edge work. The softer pad allows the sander to “ride” over edges rather than catching them. Never use a hard backing plate directly on wood—this is the fastest path to irreversible edge damage.
Vacuum Attachment Systems for Dust-Free Sanding
Dust management on stairs isn’t just about cleanliness; it’s about safety, finish quality, and preventing the sander from skating on its own debris.
HEPA Filtration Requirements
When sanding old finishes, you’re not just creating wood dust—you’re potentially releasing lead, old pesticides, and finish chemicals. In 2026, any vacuum system for indoor staircase work must be HEPA-certified with a minimum filtration of 99.97% at 0.3 microns. Look for vacuums with automatic filter cleaning systems that pulse every 15 seconds, maintaining suction without manual intervention. The sander-to-vacuum connection should be a locking, tapered fitting that can’t accidentally detach when you flip the tool to sand a riser.
Auto-Start Vacuum Features
Manually switching a vacuum on and off between steps is impractical. Auto-start systems, now standard on 2026 sanders, use Bluetooth or hardwired connections to trigger the vacuum when you pull the sander’s trigger. The advanced feature to demand is “vacuum delay”—the vacuum continues running for 5-10 seconds after you release the trigger, clearing dust from the hose and preventing clogs. For stairs, ensure your vacuum has a stable base that won’t tip when you pull the hose up to the next step.
Hand-Sanding Integration Techniques
Despite all the technology, hand-sanding remains essential for staircase perfection. The key is knowing when to put the power tool down and how to blend the two methods seamlessly.
When to Switch to Manual Methods
After your final machine sanding with 180-grit, hand-sand the edges and nosings with 220-grit using a foam block. The transition point is simple: if you can’t keep the sander’s pad 100% flat on the surface, switch to hand-sanding. This means the last 1/2-inch of any tread edge, the vertical corners where risers meet stringers, and any decorative details should be done manually. Attempting to power-sand these areas guarantees damage.
Blending Machine and Hand Sanded Areas
The secret to invisible transitions is feathering. After hand-sanding edges, use a 220-grit disc on your random orbital sander (with a soft interface pad) to make 6-inch diameter passes that overlap the hand-sanded zone by 3 inches. This knocks down any slight elevation differences and creates a uniform scratch pattern. Always sand in the direction of wood grain in these transition zones, even though random orbit sanders typically don’t require it—this extra step ensures stain penetrates evenly.
Safety Protocols for Indoor Staircase Work
Sanding a staircase in an occupied home creates unique hazards beyond the usual dust and noise concerns. Your safety plan must account for the fact that this is a primary evacuation route.
Respiratory Protection Strategies
Standard N95 masks are insufficient for finish sanding. In 2026, powered air-purifying respirators (PAPRs) have become compact and affordable for DIY use. These battery-powered units deliver filtered air to a loose-fitting hood, eliminating the breathing resistance of traditional masks and preventing fogging of safety glasses. For the final sanding stages, when dust is minimal but finish chemicals may off-gas, switch to a half-face respirator with organic vapor cartridges. Always perform a fit test before starting—facial hair prevents proper seals.
Securing Work Areas with Children and Pets
A sanded staircase is a hazardous staircase. Each sanded step becomes incredibly slippery with fine dust. Use painter’s tape to secure non-slip tread covers to each step immediately after sanding. For multi-day projects, install temporary child safety gates at both top and bottom of the staircase, and post signs warning of dust hazards. The 2026 approach includes motion-sensor alarms that chime when someone approaches the work zone, giving you time to secure tools and vacuum power cords that become tripping hazards.
Common Mistakes That Lead to Edge Gouging
Even with the perfect sander, technique errors can destroy a staircase. Recognizing these mistakes before they happen is your best insurance policy.
Applying Too Much Pressure
Modern random orbital sanders are designed to work with only their own weight plus minimal additional pressure—typically 2-3 pounds. Pressing harder doesn’t sand faster; it creates heat, clogs sandpaper, and causes the pad to dig into edges. Many 2026 models include pressure indicator lights that glow green when pressure is optimal and red when you’re bearing down too hard. Practice on scrap wood first, training yourself to let the tool do the work.
Tilting the Sander on Edges
The instinct to tilt the sander to reach an edge is nearly universal—and nearly always destructive. When you tilt, only a small portion of the pad contacts the wood, multiplying pressure and creating a crescent-shaped gouge. The correct technique is to keep the pad perfectly flat and use interface pads to feather into edges. If you can’t reach an area with a flat pad, that’s your cue to switch to hand-sanding.
Using Worn Backing Pads
Hook-and-loop backing pads lose their grip over time, especially when exposed to dust and heat. A worn pad allows the sanding disc to slip, creating uneven abrasion and increasing the risk of edge catch. Inspect your backing pad before each project; if the hooks look flattened or the pad feels glazed, replace it. At $15-20, it’s the cheapest insurance against a $500 tread replacement. In 2026, some pads include wear indicators that change color when it’s time for replacement.
Maintenance Tips for Consistent Performance
A sander that’s perfect on step one but loses performance by step ten will create uneven results. Consistency across all steps is the hallmark of professional-quality work.
Cleaning Dust Ports and Fans
Every hour of sanding, blow compressed air through the dust port (with the sander unplugged or battery removed). Staircase work creates fine, powdery dust that packs into cooling fan blades, causing the motor to overheat and lose power. Overheating makes the sander bog down on edges, leading to uneven sanding and potential gouging. Some 2026 models include tool-free fan covers that let you brush away dust buildup without disassembly.
Inspecting Hook-and-Loop Systems
The hook-and-loop system is your sander’s weakest link on staircase projects. The constant on-off of discs as you change grits wears the hooks faster than floor sanding. Weekly, run your finger across the pad surface; you should feel distinct, stiff hooks. If they feel soft or matted, use a brass brush to lift them. Never use a wire brush—it creates metal shavings that rust and stain wood. For cordless models, check that battery contacts are clean; poor connections cause power fluctuations that show up as uneven sanding patterns.
Storage Best Practices
Store your sander horizontally, never hanging by its power cord or battery. Hanging misaligns the motor bearings, causing the pad to wobble slightly—a defect that’s invisible on flat floors but creates waves on stair edges. Use the manufacturer’s storage case with desiccant packs to prevent moisture from swelling the interface pad foam. Before storing after a project, run the sander for 30 seconds with a clean, dry cloth disc to clear all dust from internal passages.
Professional vs. DIY: When to Call an Expert
Sometimes the most cost-effective tool is the phone number of a professional refinisher. Knowing your limits prevents expensive mistakes.
Assessing Your Staircase’s Condition
If your stairs have historical value, intricate turnings, or are constructed from rare wood species, stop before you start. Sanding removes wood; you can only do it so many times before treads become too thin. Professional refinishers use moisture meters and calipers to measure remaining wood thickness. As a DIYer, if you can see exposed nail heads or the wood feels spongy, call a pro. These signs indicate structural issues that sanding won’t fix and may worsen.
Time Investment Realities
A professional crew can refinish a standard staircase in 2-3 days. A DIYer should budget 5-7 days, working 4-hour sessions to avoid fatigue-induced mistakes. The hidden time sink is hand-sanding edges—expect to spend as much time hand-sanding as you do power-sanding. If you have a single staircase and no alternative access between floors, the project becomes logistically complex. Professionals bring containment systems that allow limited stair use overnight; DIY plastic sheeting typically requires 24-hour curing times between coats, leaving your stairs unusable.
Cost Considerations and Budget Planning
The sticker price of a sander is just the down payment. Realistic budgeting prevents mid-project compromises that affect quality.
Tool Investment vs. Rental Economics
A quality 2026 random orbital sander suitable for stairs costs $150-300. Rental runs $40-50 per day, plus sandpaper and interface pads. For a single staircase project, rental makes economic sense. However, if you own your home and plan to refinish furniture, doors, or future flooring projects, purchase becomes justified after two projects. The hidden cost of rental is time pressure—rushing to return the tool leads to skipped grits and poor edge work. Purchase lets you work at your own pace, which is invaluable for staircase novices.
Hidden Costs: Sandpaper and Consumables
Budget $2-3 per sanding disc, and you’ll need 2-3 discs per grit level per step. For a 12-step staircase progressing through 80, 120, 180, and 220 grits, that’s 96-144 discs, or $200-400 in sandpaper alone. Interface pads ($15-25 each) typically last 3-4 steps before losing cushioning. Vacuum bags for HEPA vacuums run $5-7 each and fill quickly with coarse sanding. These consumables often exceed the tool cost, so factor them into your budget from day one.
2026 Technology Trends to Watch
The tool industry continues innovating, and staying informed helps you future-proof your purchase or rental decision.
Smart Sensors for Pressure Feedback
Leading 2026 models incorporate load sensors in the pad assembly that communicate with your smartphone via Bluetooth. An app displays real-time pressure distribution maps, showing exactly where you’re applying force. For staircase edges, you can set alerts that vibrate the tool when pressure exceeds 3 pounds near a perimeter. This gamifies the learning process, training your muscle memory through immediate feedback. Some apps even record your sanding pattern, letting you review coverage to ensure you didn’t miss spots.
AI-Assisted Speed Adjustment
Artificial intelligence has entered the sanding world. These systems learn your sanding style over the first few minutes of use, then automatically adjust speed and orbit aggressiveness based on the wood’s hardness and the presence of edges. When the sensor detects you’re working within 1 inch of a tread edge, it switches to a “guardian mode” that reduces orbit size and speed by 30%. While this technology adds $50-75 to the tool price, it pays for itself by preventing a single tread replacement.
Frequently Asked Questions
How do I know if my random orbital sander is too aggressive for staircase edges?
If you can feel the sander “pulling” itself across the wood or if it leaves visible swirl patterns after one pass, it’s too aggressive. Test on a closet floor or hidden step first. A properly matched sander should glide smoothly with minimal resistance, leaving a uniform matte finish without deep scratches.
Can I use a random orbital sander on painted stairs?
Yes, but with major caveats. Old paint may contain lead, requiring HEPA vacuums and professional disposal. Use 60-80 grit to cut through paint, but only on flat tread surfaces. Switch to hand-scraping and hand-sanding for edges to avoid gouging through the paint layer into the wood. The paint acts as a lubricant, making the sander prone to slipping and digging in.
What’s the best way to sand the vertical face of risers without gouging the top edge?
Use a sanding sponge or contour pad wrapped in sandpaper for the top 1/2-inch of the riser where it meets the tread. Below that, use your random orbital sander with a soft interface pad, working from the bottom up. Keep the sander’s top edge at least 1/2-inch below the tread to prevent contact with the corner.
How long should I wait between sanding grits on stairs?
There’s no drying time between grits, but there is cleaning time. Vacuum and tack-cloth each step thoroughly before switching grits. Any coarse grit particles left behind will continue scratching during fine sanding. Budget 5 minutes per step for cleaning between grits—it’s tedious but essential.
Is it worth buying a vacuum specifically for staircase sanding?
If you’re refinishing more than one staircase, absolutely. A HEPA vacuum with auto-start and anti-tip design pays for itself in time savings and finish quality. For one project, consider renting or borrowing. Never use a standard shop vac without HEPA filtration—the fine dust passes through the filter and circulates throughout your home.
Can I sand spiral staircase treads with a random orbital sander?
Only the center, widest portion of each wedge-shaped tread. The narrow inner sections and curved edges require hand-sanding. Use a detail sander for the moderate curves, but accept that spiral stairs demand 70% hand work. The geometry is too complex for full machine sanding without risking severe gouging.
What causes those crescent-shaped gouges on stair edges?
Crescent gouges happen when the sander tilts, concentrating pressure on one edge of the pad, or when a worn backing pad allows the disc to slip and dig in. They’re also caused by pressing too hard or using too coarse a grit. Prevention: keep the pad flat, use interface pads, and let the tool’s weight do the work.
Should I remove the stair railing before sanding?
If possible, yes. Railings attached to treads create obstacles that force awkward sander angles, leading to uneven edges. If removal isn’t feasible, mask the railing thoroughly and plan to hand-sand within 3 inches of each post. The time spent removing and reinstalling railings is less than the time spent fixing gouges caused by working around them.
How do I prevent the sander from leaving swirl marks on stair treads?
Swirl marks come from skipping grits, sanding too fast, or using worn sandpaper. The 2026 solution: use fresh discs (they dull faster than you think), maintain a steady 1-inch-per-second movement speed, and always finish with a fine-grit pass using a soft interface pad. A final hand-sanding with 220-grit following the grain eliminates any remaining swirls.
Can I rent a professional-grade random orbital sander for stairs, or should I buy a consumer model?
Rental shops stock contractor-grade tools that are more powerful and durable than consumer models. For stairs, this power can be a liability unless the tool has advanced electronic controls. If renting, specifically request a “fine-finish” or “detail” random orbital sander, not a general flooring model. If buying, a mid-range consumer model with variable speed and soft-start features often provides better edge control than a brute-force professional unit.
See Also
- 10 Compact Random Orbital Sanders That Fit in Tight Staircase Corners in 2026
- 10 Compact Random Orbital Sanders for Tight Corners and Edges in 2026
- 10 Heavy-Duty Random Orbital Sanders That Tackle Oak Stair Treads Without Bogging in 2026
- 10 Lightweight Random Orbital Sanders for Overhead Sanding Without Fatigue in 2026
- Stop Burning Edges: 10 Precision Random Orbital Sanders for Trim Carpenters in 2026