Table of Contents
The art of wood inlay demands precision that goes far beyond standard woodworking. When you’re etching delicate patterns into walnut burl or laying mother-of-pearl into maple, the wrong dye choice can transform a masterpiece into a muddy mess faster than you can say “bleed-through.” As we approach 2026, the wood dye landscape is evolving with smarter formulations, digital color matching tools, and climate-adaptive chemistry that would have seemed like science fiction just five years ago. Whether you’re restoring a 19th-century marquetry table or creating contemporary geometric patterns, understanding how to select the perfect dye isn’t just about color—it’s about chemistry, physics, and a touch of future-forward thinking.
This guide cuts through the marketing fluff and dives deep into what actually matters when choosing dyes for intricate inlay work. We’re talking about the molecular behavior of colorants in tight grain structures, the way different solvents interact with exotic woods, and how emerging technologies are reshaping what’s possible at your workbench. No product pitches here—just the hard-won knowledge that separates amateur results from gallery-worthy finishes.
Top 10 Wood Dye
Detailed Product Reviews
1. Wood Dye - Aniline Dye 5 Color Kit - Wood Stain Powder
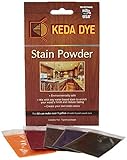
Overview: The Keda Dyes five-color aniline powder kit delivers professional-grade wood coloring in an eco-conscious package. Each kit produces five quarts of vibrant liquid stain from concentrated powders in exotic hues. Designed for woodworkers seeking deep penetration and clarity, these dyes deliver translucent color that preserves wood grain rather than obscuring it. The water-based formulation makes cleanup simple while providing exceptional colorfastness on interior projects.
What Makes It Stand Out: Keda’s commitment to environmental responsibility without sacrificing performance distinguishes this kit. The powder format eliminates bulky liquid shipping and allows precise concentration control. These dyes achieve remarkably vibrant results that surpass typical hardware store stains, with exotic colors not found in standard palettes. The ability to blend the five included shades creates limitless custom possibilities, while the aniline composition ensures deep wood penetration for professional finishes.
Value for Money: Producing five quarts of high-performance dye for the price of a single quart of premium liquid stain represents exceptional value. At approximately one-fifth the cost per quart compared to pre-mixed alternatives, this kit pays for itself on the first project. The concentration level means small batches stay fresh, reducing waste from storage degradation common with large liquid containers.
Strengths and Weaknesses: Strengths include eco-friendly formulation, superior color vibrancy, unlimited custom mixing potential, and excellent grain clarity. Weaknesses involve required mixing time and learning curve for concentration adjustment. Powder dyes also demand careful moisture control during storage to prevent clumping. The kit lacks detailed mixing ratios for specific wood species.
Bottom Line: This kit excels for woodworkers prioritizing environmental impact and color customization. Ideal for furniture makers and craftspeople comfortable with mixing their own stains, it delivers professional results at an apprentice price point. Highly recommended for interior projects requiring vibrant, grain-popping color.
2. Wood Stain Powdered Solvent - Wood Dye - Indoor and Outdoor Furniture and More - Fast Drying - Wood Dye Powder - Wood Stain for Crafts - 5 Color Kit

Overview: This comprehensive powdered dye kit targets DIYers and professionals seeking water-based versatility for both interior and exterior applications. The five primary colors mix with water to create one quart each of vibrant stain, providing a complete color foundation for any woodworking project. Formulated without performance-reducing fillers, these dyes promise clean, transparent color that enhances natural wood beauty while offering practical fast-drying characteristics.
What Makes It Stand Out: The indoor/outdoor versatility immediately distinguishes this kit from competitors limited to interior use. Its fast-drying, low-odor formula enables comfortable garage or workshop application without ventilation concerns. The primary color palette (black, blue, brown, red, yellow) functions like a painter’s primer set, allowing precise color matching through simple mixing. The absence of fillers ensures maximum color potency and grain clarity.
Value for Money: Creating five quarts of premium stain from one affordable kit delivers substantial savings over purchasing individual pre-mixed stains. The ability to custom-mix eliminates buying multiple specialty colors for one-off projects. For craftspeople and hobbyists, this single kit replaces an entire stain collection, offering exceptional return on investment while reducing storage requirements.
Strengths and Weaknesses: Strengths include dual interior/exterior capability, rapid drying time, minimal odor, powerful color concentration, and primary-color mixing system. Weaknesses center on powder preparation requiring careful measurement and the water-based formula raising wood grain, necessitating light sanding between coats. The marketing copy contains repetitive phrasing that may confuse some buyers.
Bottom Line: This versatile kit suits woodworkers wanting one solution for all project locations. Perfect for furniture builders, fence restorers, and craft enthusiasts, it balances performance with user-friendliness. The primary color system rewards experimentation, making it an excellent choice for creative woodworkers seeking professional results.
3. Transtint Dyes, Dark Walnut
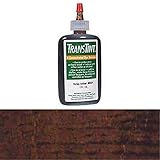
Overview: This single-color concentrate from Transtint delivers professional-grade dark walnut dye in a versatile 2-ounce format. The formulation yields two quarts of stain when mixed with either water or alcohol, providing flexibility for different project requirements. Specifically designed for fine woodworking, this dye creates rich, transparent brown tones that enhance rather than mask wood grain, making it ideal for furniture restoration and musical instrument finishing.
What Makes It Stand Out: The ability to mix directly into water-based finishes and solvents sets this product apart, enabling toning and shading without separate staining steps. This integration capability streamlines complex finishing schedules. Transtint’s legendary batch consistency ensures color matching across projects separated by years, critical for repair work. The concentrated formula’s potency means microscopic adjustments create significant color shifts, giving experts surgical precision.
Value for Money: While priced at a premium, the concentration justifies the cost. Two quarts of comparable quality pre-mixed stain would cost substantially more. For professionals requiring consistent, high-end results, the per-project expense remains minimal while delivering superior outcomes that command higher prices. The versatility of water or alcohol mixing adds economic flexibility.
Strengths and Weaknesses: Strengths include finish integration capability, professional-grade concentration, versatile solvent compatibility, and exceptional color depth. Notable weaknesses are the interior-only limitation and single-color format requiring additional purchases for variety. The high concentration demands careful measurement and experience. Alcohol mixing requires proper ventilation and safety precautions.
Bottom Line: This is a specialist’s tool, not a casual DIY product. Perfect for experienced woodworkers creating fine furniture, instruments, or detailed restoration work where color precision and finish integration matter. The Dark Walnut shade provides timeless elegance, but buyers must understand its interior-only constraint before purchasing.
4. Wood Stain Liquid Solvent - Wood Dye - Indoor and Outdoor Furniture and More - Fast Drying - Wood Dye Powder - Wood Stain for Crafts - 5 Color Kit

Overview: Despite the contradictory title mentioning “Liquid Solvent,” this product delivers a five-color powdered dye kit identical in function to standard powder sets. The primary color palette mixes with water to produce five quarts of versatile stain suitable for interior furniture and exterior structures. The formulation emphasizes fast drying and low odor while maintaining eco-friendly credentials for broad woodworking applications.
What Makes It Stand Out: The five-color primary system provides exceptional mixing flexibility, enabling users to match any wood tone or create bold artistic effects. Its fast-drying, low-odor water-based formula allows comfortable indoor application while remaining durable enough for outdoor fence or furniture projects. The powder format ensures maximum shelf life and eliminates waste from dried-out liquid stains.
Value for Money: This kit offers value comparable to other five-color powdered sets, effectively replacing numerous pre-mixed stains at a fraction of the cost. The ability to mix small batches on demand prevents material waste, while the dual interior/exterior capability eliminates purchasing separate products. For budget-conscious woodworkers, the cost-per-quart ratio provides professional-grade results without premium pricing.
Strengths and Weaknesses: Strengths mirror similar kits: versatile indoor/outdoor use, rapid drying, minimal odor, and unlimited color customization. The primary weakness is the product listing’s contradictory terminology—advertising “liquid” while describing powder—creating potential confusion. Additionally, water-based dyes raise grain requiring extra sanding, and the included colors lean toward craft applications rather than traditional wood tones.
Bottom Line: This kit delivers solid performance for woodworkers needing versatility and color variety, but the listing requires careful reading to understand the actual product. Ideal for hobbyists and DIYers tackling diverse projects from furniture to outdoor structures. Verify you’re comfortable with powder preparation before ordering to avoid disappointment.
5. Vibrant Wood Dye Liquid Offered in 5 Color Liquid Dye Kit - Solvent Alcohol Dye
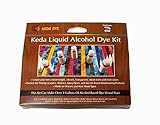
Overview: This professional-grade alcohol-based liquid dye kit provides five concentrated colors designed for serious woodworkers and production shops. Each 1-ounce bottle mixes with lacquer thinner, denatured alcohol, or acetone to produce a staggering 2.5 gallons of stain, delivering unprecedented yield. The solvent-based formula penetrates dense hardwoods effectively while offering rapid evaporation for fast project turnaround.
What Makes It Stand Out: The exceptional versatility across multiple solvents—including lacquers, shellac, epoxy, and polycrylic—enables integration into complex finishing schedules. Unlike water-based alternatives, alcohol dyes don’t raise wood grain, eliminating sanding between coats. The massive 2.5-gallon yield from a compact kit makes this ideal for large furniture sets, musical instrument production, or architectural millwork where consistency across volume matters.
Value for Money: Creating 2.5 gallons of premium dye stain from one kit represents extraordinary value, costing pennies per ounce compared to pre-mixed alternatives. For professional shops, the time saved through fast drying and no-grain-raising alone justifies the investment. The concentration level allows precise cost control for large or small projects, making it economically superior for both one-off pieces and production runs.
Strengths and Weaknesses: Strengths include massive yield, solvent versatility, professional-grade concentration, non-grain-raising performance, and rapid drying. Significant weaknesses involve alcohol fumes requiring excellent ventilation, flammability concerns, and unsuitability for beginners uncomfortable with solvent safety protocols. The liquid format, while convenient, has shorter shelf life than powders once opened.
Bottom Line: This kit serves professional woodworkers, luthiers, and production shops demanding maximum yield and solvent compatibility. Not recommended for casual DIYers due to safety requirements, but indispensable for experts seeking efficiency and superior finish quality. The alcohol base provides unmatched speed and clarity for critical applications.
6. Navy Blue Wood Stain Powder, Wood Dye Powder- Just Add Water - Water Based - for Indoor and Outdoor Wooden Crafts - Fast Drying - Dye Powder 2 oz Makes 2.2 Gallon of Stain (Navy Blue, 2 oz)

Overview: This concentrated navy blue wood dye powder from NINESUNG offers a water-based solution for staining both interior and exterior wood projects. The 2-ounce package yields an impressive 2.2 gallons of stain when mixed, providing exceptional coverage for furniture, fences, crafts, and musical instruments. The powder format ensures a long shelf life and allows users to mix only what they need for each project.
What Makes It Stand Out: The remarkable concentration sets this product apart—just 2 ounces creates over 2 gallons of stain, making it vastly more economical than pre-mixed alternatives. The navy blue shade delivers a rich, consistent color that penetrates evenly without raising wood grain. Its fast-drying formula and non-toxic, low-odor composition make it suitable for indoor use without harsh fumes. The simple mixing process (2-5% ratio) gives users precise control over color intensity.
Value for Money: At this concentration level, the cost-per-gallon is significantly lower than ready-to-use stains. A single package can handle multiple large projects, offering professional results at a DIY price point. While the initial investment may seem higher than small bottles of liquid stain, the coverage makes it substantially more economical for frequent users or big projects.
Strengths and Weaknesses: Strengths include exceptional economy, versatile indoor/outdoor application, eco-friendly formulation, and customizable color depth through layering. The powder format ensures stability during storage. Weaknesses involve the extra preparation step of mixing, potential difficulty in perfectly replicating custom color mixes, and the need for a separate clear sealer to protect the finish. Color accuracy requires testing on scrap wood first.
Bottom Line: Ideal for serious DIY enthusiasts and professionals tackling multiple projects, this navy blue dye powder delivers outstanding value and performance. The mixing requirement is a minor trade-off for the economy and versatility offered. Perfect for those comfortable with preparing their own stains.
7. Ninesung Wood Stain Powder, 10 Colors/Set, Wood Dye Powder, Colored Wooden Stain, Furniture Color Dye for Outdoor Indoor Wooden (10 Colors)

Overview: This comprehensive set from NINESUNG provides ten vibrant wood dye powders in one convenient package, each in a resealable foil bag. The collection includes purple, red, yellow, blue, green, black, pink, navy blue, rose red, and orange—offering a complete spectrum for creative wood projects. Each 2-ounce color delivers the same high concentration and water-based formulation as individual packages.
What Makes It Stand Out: The sheer variety in a single purchase makes this set exceptional for hobbyists and professionals who need multiple color options. The resealable packaging keeps powders fresh and prevents moisture contamination. Having diverse colors on hand eliminates the need to order individual shades for small projects. The consistent quality across all colors ensures predictable results whether you’re staining furniture, toys, or decorative items.
Value for Money: Buying this set offers significant savings compared to purchasing ten individual colors separately. For users who regularly work with multiple hues, the convenience and reduced per-color cost make it economically smart. However, if you only need one or two colors, the initial investment may exceed your requirements. The set excels for craft businesses, schools, or avid DIYers with varied project needs.
Strengths and Weaknesses: Strengths include color diversity, cost savings for multi-hue projects, consistent formulation across colors, and compact storage. The water-based, non-toxic formula remains safe for all applications. Weaknesses involve potentially unused colors for some users, the need for careful labeling to avoid mix-ups, and multiple small packages that require organized storage. Mixing consistency demands careful measurement for each color.
Bottom Line: Perfect for creative woodworkers, craft centers, and furniture restorers needing color variety, this ten-color set delivers professional-quality results with exceptional flexibility. The convenience of having a complete palette outweighs the slightly higher upfront cost for anyone working with diverse projects.
8. NINESUNG Professional 5-Colors Wood Dye Powder Set - 2oz Each for Furniture, Decks & DIY Crafts - Fast-Acting, Weatherproof Pigment - Works on Indoor/Outdoor Wood Surfaces (5 Colors)

Overview: This professional-grade set features five curated wood dye powders in moisture-proof canisters, targeting serious woodworkers and DIY enthusiasts. The selection includes purple, rose red, navy blue, green, and black—colors frequently used in furniture restoration and custom projects. Each 2-ounce canister provides the same high concentration formula that mixes with water to create vibrant, penetrating stains.
What Makes It Stand Out: The upgraded packaging distinguishes this from foil bag alternatives. The moisture-proof canisters offer superior protection against humidity and spills, ensuring product longevity in workshop environments. The curated color palette focuses on sophisticated, professional tones rather than basic primary colors. This thoughtful selection reduces decision fatigue while covering most common project needs from furniture to decks.
Value for Money: Positioned between single-color packages and the ten-color set, this five-color collection offers excellent value for users who need variety without excess. The canister packaging adds durability that justifies the modest price increase over bagged versions. For professionals, the reliable storage prevents costly product loss from moisture damage, making it a smart long-term investment.
Strengths and Weaknesses: Strengths include superior moisture-proof packaging, professional color curation, consistent high-quality results, and the same eco-friendly, fast-drying formula. The canisters stack neatly and label clearly. Weaknesses involve fewer color options than larger sets, a higher per-ounce cost than buying single colors in bulk, and the same mixing requirements inherent to all powder dyes. The limited palette may not suit projects needing bright primary colors.
Bottom Line: An excellent choice for serious DIYers and professionals who value product protection and a refined color selection. The canister packaging proves its worth in humid environments or busy workshops where product integrity matters as much as performance.
9. TransTint Dyes, Dark Vintage Maple, 2 oz

Overview: TransTint’s Dark Vintage Maple is a professional-grade concentrated liquid dye designed for fine woodworking and restoration. Unlike powder alternatives, this 2-ounce bottle contains pre-dissolved dye that yields approximately 2 quarts of stain. The formula works with water, alcohol, shellac, or lacquer, offering exceptional versatility for various finishing techniques and wood types requiring premium results.
What Makes It Stand Out: The liquid form eliminates mixing inconsistencies and grain-raising issues common with powders. TransTint’s sophisticated chemistry produces transparent, rich color that enhances wood grain rather than obscuring it. The ability to mix with different solvents allows finishers to integrate color directly into topcoats, creating seamless, professional-grade results. Its reputation among luthiers and furniture restorers speaks to its reliability for critical projects.
Value for Money: While pricier than powder dyes per ounce, TransTint delivers professional results that justify the premium. The 2-ounce bottle provides ample material for multiple projects when diluted. For fine furniture, musical instruments, or restoration work where color clarity is paramount, the cost becomes negligible compared to the value of the finished piece. DIYers may find it expensive for casual projects.
Strengths and Weaknesses: Strengths include superior grain clarity, versatile solvent compatibility, consistent liquid formula, and professional-grade color quality. The Dark Vintage Maple shade offers sophisticated, muted tones ideal for restoration. Weaknesses involve higher cost, potential for spills with liquid form, and the need for careful solvent selection based on project requirements. Beginners may face a learning curve with the various mixing options.
Bottom Line: Essential for professional woodworkers, luthiers, and serious restorers who demand flawless, transparent color. The premium price delivers proportional quality gains. Casual DIYers should consider their project requirements before investing, but for fine work, TransTint remains unmatched.
10. Furniture Clinic Wood Stain | Dark Oak | Water Based | Fast Drying, Low Odor, & Non-Toxic | for Indoor & Outdoor Furniture and More | Multiple Finishes | (8.5oz / 250ml)

Overview: Furniture Clinic’s Dark Oak stain offers a ready-to-use water-based solution for wood finishing projects. This 8.5-ounce (250ml) bottle provides coverage for approximately 3 square meters, drying to a natural matte finish in just ten minutes. The pre-mixed formula eliminates preparation time, making it ideal for quick projects and users preferring convenience over mixing powders. The low-odor, non-toxic formulation ensures safe indoor application.
What Makes It Stand Out: The ten-minute drying time significantly accelerates project completion compared to traditional stains requiring hours. As part of the Furniture Clinic ecosystem, it’s specifically designed to work seamlessly with the company’s waxes, varnishes, and oils, creating a integrated finishing system. The ready-to-use format eliminates the guesswork of mixing ratios, ensuring consistent results every time. The Dark Oak color provides a versatile, contemporary wood tone suitable for modern and traditional pieces.
Value for Money: While less economical than concentrated powders, the convenience factor justifies the moderate price for many users. The 250ml size suits small to medium projects perfectly, preventing waste from mixing too much. For occasional DIYers or those completing single projects, the ready-to-use format saves time and eliminates the need to invest in multiple colors or large quantities.
Strengths and Weaknesses: Strengths include immediate usability, rapid drying, predictable results, low odor, and brand-specific compatibility with finishing products. The water-based cleanup is simple and environmentally responsible. Weaknesses involve higher cost-per-coverage than powders, limited to water-based application, and the need to purchase separate sealers for protection. The smaller bottle size may prove insufficient for large projects like decks.
Bottom Line: Perfect for DIYers prioritizing convenience and speed over maximum economy. The fast-drying formula and integrated product line make it excellent for furniture refresh projects. Professionals may find the coverage limiting, but for most home users, the ease of use justifies the modest premium.
Understanding Inlay-Specific Dye Requirements
Why Standard Stains Fail for Intricate Work
Standard wood stains are designed for broad surfaces, not the hairline precision that inlay demands. Their pigment particles are too large to penetrate tight end-grain boundaries without flooding adjacent areas, and their binder-heavy formulas create a film that obscures the crisp edges you’ve painstakingly cut. Inlay work requires dyes that behave more like watercolors than house paint—colorants that travel with capillary action rather than against it. The difference lies in molecular size: quality dyes for inlay use colorants measured in nanometers, not microns, allowing them to nestle into wood fibers without overwhelming the delicate valleys and peaks of your carved channels.
The Anatomy of Precision Coloration
When dye hits a 1mm-wide inlay groove, it encounters competing forces: surface tension wants to pool, while wood’s cellular structure pulls liquid along the grain. Perfect inlay dyes balance these forces through carefully controlled surface energy and evaporation rates. The ideal formulation wets the wood just enough to saturate the fibers within the groove but resists wicking into surrounding areas. This requires a sophisticated interplay between solvent viscosity, dye concentration, and the wood’s own extractives—a dance that becomes even more complex when you’re working with multiple species in a single pattern.
Tip 1: Prioritize Dye Transparency Over Opacity
The Science of Light Penetration
Transparency isn’t just about seeing the wood grain—it’s about how light interacts with the dyed fibers to create depth. Opaque pigments sit on the surface like colored dust, reflecting light uniformly and flattening dimension. Transparent dyes, conversely, penetrate the cell walls and allow light to enter the wood structure, bounce around, and exit with a luminous quality that seems to emanate from within. For inlay, this matters exponentially because you’re often layering colors or creating gradients within tiny spaces. A truly transparent dye lets you build complexity without building bulk, maintaining the tactile crispness of your cuts while adding visual richness.
Testing Transparency Levels
Before committing to any dye, perform a simple backlight test: apply the dye to a thin slice of your target wood species and hold it against a strong LED light source. A high-quality transparent dye will create a glowing effect with minimal hazing. Next, test on end-grain—where opacity issues reveal themselves most brutally. Apply a single drop and watch how it spreads. If you see a cloudy ring forming around the edges, that dye contains too much binder or suspended pigment. For 2026’s most demanding projects, look for dyes that specifically advertise “molecular dispersion” rather than “colloidal suspension”—the former indicates true solution-based colorants.
Tip 2: Master the Chemistry of Dye Concentration
Dilution Dynamics for Fine Detail
Concentration control separates the masters from the masses. Most commercial dyes arrive at “standard” strength—roughly 2-4% colorant by weight—which is often far too aggressive for fine inlay work. The sweet spot for hairline details typically lives between 0.1% and 0.5%, requiring precise dilution. But here’s the counterintuitive part: over-diluting with solvent alone can destabilize the dye molecules, causing them to precipitate and create spotty coverage. The 2026 approach involves using manufacturer-recommended “dye stabilizers”—proprietary additives that maintain molecular suspension even at extreme dilutions, allowing you to create whisper-light washes that still deliver uniform color.
Building Color Gradually
Inlay artistry rarely demands uniform color. You’re often creating depth, shadow, or gradients within a single element. This requires a “patient layering” mindset that runs contrary to the “one-and-done” staining mentality. Each layer should contain 25-50% of your final target concentration, applied with controlled drying intervals. The key is understanding “critical saturation”—the point where wood fibers can no longer accept dye without expelling previous layers. For most hardwoods, this occurs after 3-4 passes with alcohol-based dyes, or 2-3 passes with water-based formulations. Pushing beyond this threshold doesn’t deepen color; it creates mud.
Tip 3: Consider the Wood Species Interaction
Hardwoods vs. Softwoods Absorption Patterns
The cellular architecture of your wood species dictates dye behavior more than any other variable. Hardwoods like maple and cherry feature dense, uniform vessels that create predictable absorption—dye travels slowly but evenly. Softwoods such as pine contain pronounced earlywood and latewood bands that drink dye at different rates, creating unintentional zebra stripes in your inlay. For 2026’s complex projects, smart woodworkers are pre-treating softwood inlays with “absorption equalizers”—dilute shellac or protein-based sizes that partially seal the more porous latewood, creating a more uniform canvas for your dye.
Exotic Woods and Unpredictable Reactions
Bocote, padauk, and purpleheart don’t just look exotic—they contain extractives that can wage chemical warfare on your dye. These woods bleed oils, acids, and tannins that can shift dye colors dramatically or prevent absorption entirely. The 2026 solution involves “extractive locking” pretreatments: mildly alkaline solutions that neutralize acidic compounds, followed by a protein-based barrier coat. Always test on scrap from the exact same board as your inlay piece; wood from the same species but different regions can contain vastly different chemistry. Document your results with photos and notes—over time, you’ll build a personal database that becomes more valuable than any manufacturer’s color chart.
Tip 4: Evaluate Lightfastness Ratings for Longevity
Understanding ASTM Standards
That vibrant violet you love today could fade to sad lavender within months if you ignore lightfastness. The American Society for Testing and Materials (ASTM) provides the only reliable benchmark, rating dyes from I (excellent) to V (poor). For inlay work exposed to any natural light, accept nothing less than ASTM I or II. But here’s the nuance: these ratings apply to the dye in isolation, not the dyed wood. Wood’s own lignin and extractives can accelerate fading through photochemical reactions. The 2026 best practice is to look for “wood-normalized” ratings—some manufacturers now test dyes specifically on common inlay woods and provide adjusted longevity estimates.
UV Protection Integration
Even the most lightfast dye needs backup. Modern UV inhibitors have evolved from simple benzophenone compounds to “hindered amine light stabilizers” (HALS) that actually regenerate themselves during UV exposure. The trick is applying them correctly: a light HALS-infused topcoat before your final finish creates a sacrificial layer that protects both dye and wood. For the ultimate protection in sun-exposed pieces, consider “dye-integrated UV absorbers”—formulations where the UV protection is chemically bonded to the dye molecule itself, impossible to separate or wear away. These represent the cutting edge of 2026’s inlay preservation technology.
Tip 5: Test for Bleed-Resistance in Fine Lines
The Capillary Action Challenge
Bleed is the inlayer’s nemesis. A dye that wicks 0.5mm beyond your groove can ruin the sharp definition that defines quality work. Bleed resistance isn’t about viscosity—that just slows the inevitable. True resistance comes from “controlled penetration depth”—dye formulations that saturate only the first few cell layers before their solvent evaporates, locking color in place. Test this by cutting a 0.5mm-wide groove in your target wood, applying dye with a fine-tipped applicator, and immediately blotting with white paper. Any transfer beyond the groove’s immediate edge indicates poor bleed resistance. For 2026’s finest work, look for dyes with “rapid cell-wall fixation” chemistry.
Creating Crisp Boundaries
Sometimes you need to actively prevent bleed rather than just hoping your dye behaves. The 2026 approach moves beyond messy wax or tape barriers to “chemical edge definition.” Applying a micro-thin line of protein-based sizing—or even a 2% gelatin solution—along the edges of your inlay channels creates a temporary dam. The dye’s solvent can’t penetrate this barrier, but the barrier itself is water-soluble and removes cleanly after dyeing. For alcohol-based dyes, switch to a shellac-based edge sealer. The key is applying these barriers so thinly they don’t affect the final inlay fit; think brush strokes measured in microns, not millimeters.
Tip 6: Factor in Sanding and Finishing Compatibility
Pre-Dye Surface Preparation
Inlay surfaces must be sanded to a higher standard than flat panels. Any scratch deeper than the dye’s penetration will catch color unevenly, creating dark lines that mimic grain. For most inlay work, final sanding should progress to 400-grit, but the real secret is the “water-popping” technique: lightly misting the surface with distilled water, letting it dry, then performing a final 600-grit pass. This raises crushed fibers and ensures uniform porosity. However, this technique can cause some dyes to penetrate too deeply, so adjust your concentration down by 20% after water-popping. In 2026, many professionals are switching to “dry sanding lubricants”—ultra-fine abrasive powders that reduce friction without raising grain.
Post-Dye Sealing Strategies
Your dye is only as durable as what you put over it. For inlay, film-forming finishes like polyurethane can create a “step” at the inlay edge that catches light wrong. The 2026 solution is “gradient sealing”—applying a thin, penetrating epoxy sealer only to the dyed inlay areas, then sanding flush before applying your overall finish. This locks the dye within the wood while creating a perfectly level surface. For water-based dyes, always use a water-based sealer first; switching to solvent-based too soon can reactivate the dye and cause bleeding. The waiting game is crucial: let dyes cure for 24-48 hours before any sealer application, even if they feel dry to the touch.
Tip 7: Understand the Role of Solvent Types
Alcohol-Based vs. Water-Based Dyes
The solvent debate isn’t about flammability or smell—it’s about control. Alcohol-based dyes (typically using ethanol or methanol) evaporate within minutes, giving you rapid results but little working time. They’re ideal for small, discrete inlay elements where you need to build color quickly. Water-based dyes linger for 10-30 minutes, allowing blending and correction, but their slower penetration can cause more pronounced grain raising. The 2026 hybrid approach uses “azeotropic solvents”—carefully blended mixtures that evaporate in phases, giving you initial control followed by rapid lock-in. These formulations are becoming the gold standard for complex multi-species inlays.
The Rise of Bio-Solvents in 2026
Environmental regulations are reshaping solvent chemistry. New bio-solvents derived from agricultural waste (like 2-methyltetrahydrofuran from corn cobs) offer performance matching traditional petrochemical solvents with 90% lower VOCs. More importantly for inlay work, these bio-solvents often have higher surface tension, which paradoxically improves precision by resisting unwanted spreading. They’re also less likely to react with exotic wood extractives. The trade-off? Slower evaporation in humid conditions and higher cost. For heirloom-quality work, the investment pays dividends in both environmental responsibility and technical performance.
Tip 8: Account for Climate and Humidity in 2026
Environmental Impact on Drying
Your workshop’s climate directly manipulates dye behavior. At 70°F and 40% relative humidity, an alcohol dye might dry in 90 seconds. Push humidity to 70%—increasingly common in 2026’s volatile weather patterns—and that same dye can take 5 minutes, dramatically increasing bleed risk. Temperature swings cause wood fibers to expand and contract, altering absorption rates mid-project. The modern solution isn’t just climate control (though that’s ideal); it’s “environmental compensation.” Some 2026 dye kits now include “drying accelerators” or “retarders” that you add based on real-time hygrometer readings, customizing the formulation to your immediate conditions.
Adaptive Formulations
Forward-thinking manufacturers are releasing “climate-responsive” dyes that adjust their own evaporation rate based on ambient moisture. These use hygroscopic co-solvents that either attract or repel atmospheric water, maintaining consistent drying times across 30-80% humidity ranges. For the purist who prefers traditional dyes, the alternative is “micro-climate control”—creating a small, controlled environment around your workpiece using a modified display case with silica gel dehumidification or ultrasonic humidification. This allows you to maintain perfect 45% RH regardless of what’s happening outside, ensuring batch-to-batch consistency.
Tip 9: Embrace Digital Color Matching Technology
Spectrophotometer Integration
The human eye can distinguish approximately 10 million colors, but it can’t remember them accurately from day to day. Enter the smartphone spectrophotometer—2026’s game-changer for inlay artists. These pocket devices (often clip-on accessories for your phone) measure the exact spectral reflectance of your wood and proposed dye, predicting the final color with 95% accuracy. More importantly, they account for wood’s undertones. That “perfect” red dye that looked great on paper might shift orange on cherry’s pink base; the spectrophotometer sees this before you waste hours of work. The data exports directly to dye mixing apps that calculate precise dilution ratios.
AI-Powered Color Prediction
Machine learning has finally cracked the code of wood-dye interaction. New software platforms trained on thousands of actual wood samples can now predict not just the final color, but how it will shift over time, under different lighting conditions, and when sealed with various finishes. You photograph your inlay piece, select your target color, and the AI suggests not just which dye to use, but the exact concentration, number of layers, and even application technique. It learns from your corrections, building a personalized model of your specific workshop conditions and hand-application style. This isn’t cheating—it’s augmenting human skill with computational precision.
Tip 10: Plan for Layering and Blending Capabilities
The Multi-Pass Technique
Single-pass dyeing is for amateurs. Professional inlay work relies on “stratified coloring”—building up hue, saturation, and value in separate passes. Start with a yellow dye to warm the base, follow with red to create depth, and finish with a touch of brown to ground the color. Each layer uses a different concentration: base layers at 0.3%, detail layers at 0.1%, and shadow accents at 0.05%. The magic happens in the timing: allow each layer to reach “tack cure” (dry to touch but not fully cured) before applying the next. This creates partial blending at the cellular level while maintaining distinct color zones. For 2026’s most advanced work, artists are using “intermediate flash curing”—brief bursts of UV LED light between layers to lock each stratum without full curing.
Creating Depth Through Glazing
Glazing isn’t just for oil painting. In the inlay world, a glaze is a highly diluted dye (0.01-0.02%) applied over a sealed, base-dyed surface to shift tone without adding color intensity. This technique creates atmospheric depth, making some inlay elements recede while others pop forward. The key is using a dye with “glaze stability”—formulations that won’t reactivate the sealed layer beneath. Test this by applying your base dye, sealing with dewaxed shellac, waiting 24 hours, then applying glaze. If the glaze wipes off cleanly with a damp cloth after 30 seconds, it’s suitable. If it stains the base layer, find a different product. The 2026 innovation is “nano-glaze” technology, where dye molecules are encapsulated in microscopic resin spheres that burst only when abraded, allowing perfect control.
Beyond the Basics: Advanced Application Techniques
Airbrush Precision for Micro-Inlays
For inlays narrower than 1mm, brushes are too crude. The 2026 standard is the gravity-feed airbrush with a 0.2mm nozzle, operating at 15-20 PSI. This delivers dye droplets so fine they behave like a gas, settling into grooves without flooding. The technique requires “staccato triggering”—quick bursts rather than continuous flow, with the airbrush held at a 45-degree angle to prevent bounce-back. Mix your dye with 10% flow improver to prevent tip dry, and work under magnification. The investment in equipment pays off when you’re coloring a vine pattern with stems thinner than a hair.
Masking Strategies for Complex Patterns
Traditional masking tape is too thick for most inlay work, creating ridges that catch dye. The 2026 solution is “liquid masking”—water-soluble polymers applied with a fine pen that cure to a flexible, impermeable film within minutes. These can be cut with a scalpel to follow curved inlay lines precisely. For multi-color designs, apply the mask, dye the first color, cure it with a hair dryer, then apply a second mask layer before dyeing the next section. The masks peel away cleanly without disturbing the cured dye beneath. Some artisans are experimenting with “photo-reactive masks” that cure only where exposed to specific light wavelengths, allowing for photographic precision in pattern definition.
Common Pitfalls to Avoid
Over-Saturation and Detail Loss
The most heartbreaking mistake is achieving perfect color only to sand it away during final finishing. Over-saturated dye penetrates too deeply and bleeds back to the surface during sealer application. The warning sign is a “halo” around your inlay after the first topcoat. Prevention lies in the “blot and wait” technique: after dyeing, wait 10 minutes, then blot firmly with a clean, lint-free cloth. This removes surface dye while leaving color locked in the upper cell layers. Follow with a light buff using 0000 steel wool to remove any residual surface color. If you see dye transferring to your cloth after 30 minutes, you’ve used too much—strip and restart.
Incompatible Finish Systems
Your dye and finish must be chemically married, not just physically layered. Oil-based dyes under water-based finishes can cause fisheyes and adhesion failure. Water-based dyes under solvent lacquer can re-dissolve and bleed. The 2026 rule: test your finish system on a dyed scrap, then torture-test it. Apply the finish, let it cure for a week, then place a drop of water on the inlay and cover it with a cup overnight. If the water leaves a mark or lifts color, your system is incompatible. For absolute security, use “finish-family” dyes—manufacturers now produce dye lines specifically formulated for their finishing systems, eliminating guesswork.
The Future of Wood Dye Innovation
Nanoparticle Pigments
The line between dye and pigment is blurring. New “nano-pigments” measure just 10-50 nanometers—small enough to penetrate wood like a dye but stable like a pigment. They offer the lightfastness of pigments with the transparency of dyes, plus one game-changing feature: magnetic alignment. Some formulations contain iron oxide nanoparticles that can be oriented with a weak magnetic field, creating directional color effects that shift as you move around the piece. For inlay, this means creating patterns that seem to shimmer and move without metallic powders.
Smart Dyes with pH Indicators
Imagine a dye that changes color if your finish begins to fail, alerting you to UV damage before it’s visible. Smart dyes with integrated pH indicators are entering the 2026 market, shifting from blue to red when wood acidity changes due to moisture intrusion or oxidation. For museum conservators and high-end furniture makers, this technology provides early warning of environmental stress. While still expensive, they’re becoming standard for restoration work on valuable pieces where prevention is cheaper than remediation.
Frequently Asked Questions
How do I prevent dye from bleeding into surrounding wood when working with very fine inlay lines?
Use a two-pronged approach: select a dye with rapid penetration and flash-drying characteristics (alcohol-based with low surface tension), and apply a protein-based edge sealer along the inlay boundaries. Work under magnification with a fine-tipped applicator, apply dye in short bursts, and immediately blot excess with a dry brush. Some professionals are now using laser-cut adhesive stencils that stick directly to the wood surface, creating physical barriers thinner than human hair.
What’s the best way to match an existing wood color when creating replacement inlay pieces?
Invest in a smartphone spectrophotometer and use AI-powered color matching software. Photograph the original piece under 5000K lighting, measure the color, and let the software calculate your dye formulation. Always mix 10% more than you need and store it in an airtight, UV-blocking container. Test on scrap from the same wood species, seal it with your intended finish, and compare after 24 hours. Color memory is unreliable; trust the data.
Can I mix different dye brands or types to create custom colors?
Mixing within the same solvent family (water-based with water-based) is generally safe, but cross-brand mixing risks chemical incompatibility. Different manufacturers use proprietary dispersants and stabilizers that can react, causing precipitation or viscosity changes. If you must mix brands, create a test batch and let it sit for 48 hours. If it remains clear and stable, it’s likely compatible. For critical work, stick to single-brand color mixing systems designed for interoperability.
How long should I wait between dye application and sealing?
Minimum 24 hours for alcohol-based dyes, 48 hours for water-based formulations, regardless of how dry they feel. Dye molecules continue migrating and settling within wood cells long after surface evaporation. Rushing this step risks reactivation and bleed. For humid environments, extend these times by 50%. You can accelerate safely using gentle heat (100°F max) and air circulation, but never use a heat gun directly on the surface—this causes skinning that traps solvents beneath.
Are water-based dyes truly as colorfast as alcohol-based versions?
Modern water-based dyes have closed the gap significantly through advanced resin encapsulation, but alcohol dyes still edge ahead in lightfastness for certain colors, particularly blues and violets. The difference is often moot for pieces kept indoors away from windows. For sun-exposed work, choose water-based dyes rated ASTM I with integrated HALS stabilizers. The real advantage of water-based isn’t durability—it’s working time and lower VOCs, which matter more for complex inlay blending.
What’s the ideal temperature and humidity for dyeing inlay work?
Target 65-75°F and 40-50% relative humidity. Below 60°F, dyes dry too slowly and can bleed. Above 80°F, they skin before penetrating, causing uneven color. Humidity below 30% causes rapid evaporation and lap marks; above 60% extends drying times dangerously. If you can’t control your whole shop, create a micro-environment using a plastic tent and a small dehumidifier/humidifier. Consistency matters more than hitting exact numbers—changes mid-project cause visible banding.
How do I fix a dye job that turned out too dark or uneven?
Act quickly. For alcohol-based dyes, wipe immediately with a cloth dampened with the same solvent. For water-based, use distilled water with a drop of dish soap. If the dye has cured, you’ll need to sand back carefully with 320-grit paper, focusing only on the affected area, then re-dye. For severe cases, use a “dye-lifting” solution: a weak bleach or oxalic acid preparation that breaks down color molecules without damaging wood. Always neutralize after lifting and let the wood dry completely before reattempting.
Can I use dyes on inlay materials other than wood, like bone or shell?
Traditional wood dyes won’t bond to non-porous materials. For bone, use protein-based dyes after a light etching with dilute acid. For shell (mother-of-pearl, abalone), you need specialized “nacre dyes” that contain adhesion promoters and are designed for calcium carbonate surfaces. Some artists are experimenting with UV-curable resin dyes for shell inlay: tint a thin resin, fill the cavity, cure with UV light, then sand flush. This creates a colored backing that shines through the translucent shell.
What’s the difference between “dye” and “stain” for inlay purposes?
Dyes color the wood itself at a cellular level; stains contain suspended pigment particles that sit in the pores and on the surface. For inlay, this distinction is critical. Dyes preserve crisp edges and transparent depth. Stains obscure detail and can fill fine grooves unevenly. Some products marketed as “stain” are actually thinned dyes, while others are pigment dispersions. Read the ingredients: if it lists “pigment” or mentions stirring/shaking, it’s a stain. True dyes are solutions that require no agitation and list “colorant” or “dyestuff” as the active ingredient.
How do I store mixed dyes for future touch-ups?
Store in airtight, amber glass bottles with minimal headspace. Oxygen and UV are the enemies. Add a few drops of a preservative like sodium benzoate for water-based dyes to prevent microbial growth. Alcohol-based dyes need no preservative but will slowly evaporate; seal the cap with Parafilm. Label everything with the exact formula, date, and target project. Refrigerate for long-term storage, but let the dye return to room temperature before use—cold dye behaves differently. Test on scrap before using stored dye on your piece; even under ideal conditions, expect 5-10% color shift after six months.
See Also
- 10 Tips for Finding the Perfect Water-Based Wood Stain for Maple in 2026
- 10 Tips for Finding the Perfect Wood Stain for Maple Floors in 2026
- 10 Tips for Finding the Perfect Semi-Transparent Stain for Pergolas
- 10 Wood Dye Colors That Mimic Exotic Hardwoods in 2026
- 10 Wood Stain Sprays for Even Coverage on Intricate Carvings in 2026