Table of Contents
The modern touch-up professional doesn’t have time for messy brush bottles or volatile solvents that require ventilation masks and cleanup. You’re juggling three job sites before lunch, working in occupied luxury homes, or touching up furniture in client showrooms where downtime is measured in minutes, not hours. In 2026, your reputation hinges on invisible repairs delivered at lightning speed—and the right wood stain markers have become as essential as your cordless drill.
But here’s the challenge: walk into any supplier and you’ll face a wall of options that look nearly identical. Water-based, alcohol-based, oil-based, hybrid formulations, chisel tips, bullet tips, dual-ended markers with “revolutionary” features. The marketing blurbs promise perfection, but only seasoned pros know that the difference between a five-minute seamless touch-up and a costly callback often comes down to nuances no packaging advertises. This guide cuts through the noise, focusing on what actually matters when you’re building a mobile arsenal that performs reliably across species, sheens, and environmental conditions.
Top 10 Wood Stain Markers
Detailed Product Reviews
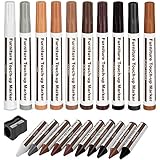
1. Furniture Repair Kit Wood Markers - Set of 13 - Markers and Wax Sticks with Sharpener Kit, for Stains, Scratches, Wood Floors, Tables, Desks, Carpenters, Bedposts, Touch Ups, and Cover Ups
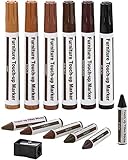
Overview: This comprehensive 13-piece furniture repair kit equips DIY enthusiasts with everything needed to address common wood damage. The set includes six repair markers, six wax filler sticks, and a dedicated sharpener, offering a dual-action approach for both surface scratches and deeper imperfections. Designed for versatility, it works on furniture, floors, cabinets, and bedposts, making it an all-in-one solution for household touch-ups.
What Makes It Stand Out: The kit’s dual-format approach sets it apart—markers handle superficial scratches while wax sticks fill deeper gouges and nail holes. The included sharpener ensures precise application of wax sticks, a feature often overlooked in competing kits. With six wood-tone colors ranging from maple to black, users can tackle multiple furniture pieces without purchasing additional products.
Value for Money: Priced competitively against professional repair services, this kit delivers exceptional value for homeowners with several wood pieces needing attention. The 13-piece configuration eliminates the need for separate purchases, and the permanent formula reduces the frequency of reapplication. Compared to buying individual markers, this bundled approach saves approximately 30-40%.
Strengths and Weaknesses: Strengths:
- Comprehensive dual-action system for various damage depths
- Six versatile color options cover most common wood tones
- Integrated sharpener enhances precision and control
- Permanent, fast-drying formula for immediate results
Weaknesses:
- Color matching may require blending for exotic wood species
- Wax components can wear down in high-traffic floor areas
- Less effective on unfinished or severely damaged wood
Bottom Line: An excellent starter kit for homeowners seeking professional-looking results without the professional price tag. Ideal for maintaining multiple furniture pieces throughout the home.
2. Minwax 63487000 Wood Finish Stain Marker for Touch Ups, Dark Walnut, .33 fl oz
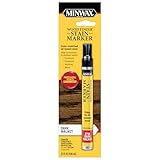
Overview: Minwax brings its century-long wood finishing expertise to a precision stain marker format. This single-marker solution delivers the brand’s trusted Dark Walnut stain in a convenient pen applicator, perfect for quick touch-ups on furniture, trim, and flooring. The .33-ounce capacity provides ample product for numerous small repairs.
What Makes It Stand Out: The Minwax name represents proven quality in wood finishing since 1904. Unlike generic alternatives, this marker contains genuine wood stain rather than surface pigment, penetrating the wood for authentic color that won’t sit on top. The fast-drying formula and precise felt tip allow for accurate application without messy cleanup.
Value for Money: While single-color markers typically offer less versatility than kits, Minwax justifies its premium through superior stain quality and longevity. For those specifically needing Dark Walnut, it eliminates waste from unused colors. The price point reflects brand trust and professional-grade results, making it cost-effective for targeted repairs.
Strengths and Weaknesses: Strengths:
- Authentic Minwax stain penetrates rather than coats
- Trusted brand with proven track record
- Fast-drying formula enables quick project completion
- Precision tip for accurate scratch targeting
Weaknesses:
- Single color limits versatility across different furniture pieces
- No wax filler for deeper scratches or gouges
- Requires separate clear coat for ultimate protection
- Smaller volume than multi-marker kits
Bottom Line: Perfect for Minwax loyalists and those needing Dark Walnut specifically. Delivers authentic stain quality in a convenient format, though best supplemented with a filler for comprehensive repairs.
3. Thboxes Furniture Repair Kit Wood Markers, 13 Pcs Marker Set and Wax Sticks with Sharpener, 6 Colors Furniture Markers Touch Up for Scratches Stains Holes Bedposts Floors Tables Cabinets Desks
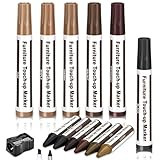
Overview: Thboxes offers a complete 13-piece furniture restoration system combining markers and wax filler sticks with a sharpening tool. This kit targets a wide spectrum of wood damage—from surface scratches to deeper holes and gouges—across furniture, flooring, and cabinetry. The six-color palette addresses most domestic wood tones.
What Makes It Stand Out: The kit emphasizes color customization, allowing users to layer and mix shades for a more natural, seamless repair—an advanced feature rarely highlighted in budget alternatives. The paper-wrapped wax sticks resist drying out, while the dedicated sharpener maintains precision for detailed work on intricate moldings or carved details.
Value for Money: This kit presents strong value for renters and DIY beginners, offering professional-grade tools at a fraction of restoration costs. The ability to blend colors effectively multiplies the six base shades into countless custom matches, reducing the need for multiple kit purchases. Competitively priced against similar 13-piece sets.
Strengths and Weaknesses: Strengths:
- Layering capability provides superior color matching
- Paper-wrapped wax prevents premature drying
- Comprehensive for both minor and moderate damage
- Beginner-friendly with no additional tools required
Weaknesses:
- Brand recognition lags behind Minwax or Rejuvenate
- Wax application requires practice for smooth finish
- Limited color range may not match exotic or bleached woods
- Sharpener quality is basic
Bottom Line: An impressive budget-friendly kit that punches above its weight with color-mixing flexibility. Ideal for experimental DIYers who want more control over their repair results.
4. Rejuvenate Exact Match Wood Furniture & Floor Repair Markers, 6 Count, Brown Markers Cover All Scratches, Scuffs And Damage To Wood Furniture And Flooring

Overview: Rejuvenate streamlines furniture repair with a focused six-marker set designed exclusively for surface scratches and scuffs. This marker-only approach eliminates complexity, offering straightforward color application for furniture and flooring. The set includes maple, oak, cherry, walnut, mahogany, and espresso shades.
What Makes It Stand Out: Rejuvenate’s reputation for floor care products lends credibility to this offering. The “Exact Match” branding reflects confidence in color accuracy, while the espresso shade provides a modern alternative to standard black. The marker-only format simplifies the decision-making process for users intimidated by wax fillers.
Value for Money: For those dealing exclusively with superficial damage, this six-marker set offers targeted value without paying for unused wax components. The price reflects brand positioning between budget generics and premium Minwax. However, deep scratches require separate filler purchase, potentially negating initial savings.
Strengths and Weaknesses: Strengths:
- Trusted brand specializing in floor and furniture care
- Streamlined marker-only approach for simplicity
- Modern espresso color option
- Good color saturation and coverage
Weaknesses:
- No wax filler for deeper damage limits versatility
- Six markers may not suffice for extensive projects
- Colors cannot be easily blended like liquid alternatives
- Marker tips can fray with heavy use
Bottom Line: Best suited for light maintenance on surface scratches. A solid choice for Rejuvenate brand fans, but incomplete as a standalone solution for significant furniture damage.
5. Minwax Repair Markers
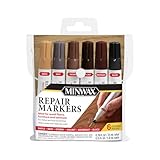
Overview: Minwax offers its trusted wood finishing technology in marker form for quick scratch concealment. While product details are minimal, the Minwax name signals quality stain-based markers designed for furniture, cabinets, trim, and floors. These markers restore color to nicks and minor scratches efficiently.
What Makes It Stand Out: The Minwax brand heritage provides immediate confidence in product performance. Unlike pigment-based competitors, Minwax markers likely contain penetrating stain for authentic wood color that integrates with the grain. The simplicity of the offering suggests a focus on core functionality without unnecessary complexity.
Value for Money: Assuming a multi-marker configuration, the value proposition rests on brand trust and stain quality rather than quantity. Minwax typically commands a 20-30% premium over generics, justified by superior color accuracy and durability. However, the vague product description makes precise value assessment challenging.
Strengths and Weaknesses: Strengths:
- Minwax brand reputation for wood finishing excellence
- Likely stain-based formula for authentic results
- Suitable for multiple wood surfaces
- Professional-grade colorfastness
Weaknesses:
- Inadequate product description creates uncertainty
- No mention of included colors or quantity
- Likely lacks wax filler for deeper repairs
- Premium pricing without transparent specifications
Bottom Line: A safe bet for Minwax devotees prioritizing brand trust over detailed specifications. Recommend verifying package contents before purchase to ensure it meets your specific repair needs.
6. Wooden Furniture Floor Scratch Repair Markers and Wax Sticks for Stains, Scratches, Wood Floors, Tables, Desks, Carpenters, Bedposts, Touch Ups, and Cover Ups (Set of 13)

Overview: This 13-piece furniture repair kit offers a dual-action solution for minor wood damage, combining six touch-up markers with six wax filler sticks and a sharpener. Designed for quick cosmetic fixes, it addresses scratches, scuffs, and discoloration on furniture, floors, and cabinetry. The set includes six wood tones—maple, oak, cherry, walnut, mahogany, and black—to match common finishes.
What Makes It Stand Out: The kit’s hybrid approach sets it apart, providing both marker pens for surface scratches and wax sticks for deeper gouges. The included sharpener ensures the wax stays precise, while the compact selection covers most traditional hardwood shades. It’s marketed as a permanent solution for DIY enthusiasts seeking professional-looking results without specialized skills.
Value for Money: Priced in the budget-friendly range, this kit costs significantly less than a single professional furniture repair visit. For renters, homeowners, or woodworkers managing multiple pieces, it delivers adequate versatility at a fraction of replacement cost. However, the limited color palette may require mixing for exotic woods.
Strengths and Weaknesses: Strengths include user-friendly application, quick drying time, and effective coverage for superficial damage. The wax sticks fill gaps better than markers alone. Weaknesses involve limited color matching—only six shades may not suffice for modern stained finishes. The “permanent” claim is questionable; wax can wear off high-traffic areas, and markers may fade with cleaning. Some users report tip drying prematurely.
Bottom Line: This kit excels for basic touch-ups on traditional furniture but falls short for complex repairs. Ideal for occasional use on minor blemishes where perfect color matching isn’t critical.
7. DAIXISM Furniture Repair Kit Wood Markers Wax Sticks, for Stains, Scratches, Wood Floors, Tables, Desks, Carpenters, Bedposts, Touch Ups, and Cover Ups (21)
Overview: DAIXISM’s 21-piece kit expands on the standard repair set with ten color options, including six markers, six wax sticks, and essential accessories. Targeting a broader spectrum of wood tones, it adds white, grey, chestnut, and burnt sienna to the traditional palette. This kit serves homeowners and woodworkers tackling diverse furniture collections.
What Makes It Stand Out: The expanded color range is the primary differentiator, offering better odds of finding a close match for contemporary and painted furniture. The company positions users as “the pro,” emphasizing empowerment through DIY repair. The warranty addresses logistics-related defects upfront, suggesting confidence in product quality.
Value for Money: With ten colors versus the typical six, this kit provides superior matching capability for a modest price increase. The additional shades prevent the need to purchase multiple kits, making it economical for households with varied wood finishes. Professional touch-ups often exceed $100 per incident, so the ROI is clear for frequent use.
Strengths and Weaknesses: Strengths include excellent color variety, dual-marker/wax flexibility, and straightforward application. The quick-dry formula works on all wood types. Weaknesses mirror competitors: wax durability concerns in high-use areas, markers may not penetrate deep scratches, and color accuracy varies by lighting. Some users note inconsistent pigment saturation between markers.
Bottom Line: A solid step-up from basic kits, perfect for those with mixed furniture styles. The color selection justifies the purchase, though manage expectations about “permanent” results on heavily worn surfaces.
8. Varathane 368035 Less Mess Wood Stain and Applicator, 4 oz, Golden Oak

Overview: Varathane’s innovative 2-in-1 stain and applicator simplifies small staining projects with a water-based, low-odor formula. The sponge-tip applicator controls flow for precise coverage on crafts, touch-ups, and minor wood pieces. Golden Oak provides a warm, medium-toned finish that enhances natural grain without traditional staining mess.
What Makes It Stand Out: The integrated applicator eliminates brushes, rags, and cleanup hassle. The water-based chemistry ensures soap-and-water cleanup and minimal VOCs, making it indoor-friendly. The controlled-flow tip prevents over-application, a common DIY pitfall, while the compact size suits occasional users who don’t need quart cans.
Value for Money: At the price point of a premium coffee, this product offers exceptional convenience for small-scale projects. It avoids investing in separate brushes, solvents, and large stain quantities that may expire. However, the single-color limitation restricts versatility compared to multi-color repair kits.
Strengths and Weaknesses: Strengths include mess-free application, quick cleanup, controlled color delivery, and low odor. The water-based formula dries faster than oil-based alternatives. Weaknesses: it’s a stain, not a scratch repair solution—unsuitable for filling damage. The 4 oz size limits project scope, and sponge tips can clog if not cleaned promptly. Color matching is fixed; no customization.
Bottom Line: Excellent for staining raw wood or refreshing faded areas, but not a scratch repair tool. Choose this for finishing small projects, not for concealing existing damage.
9. New Upgrade Furniture Pens for Touch Up, 12 Colors Wood Scratch Repair Markers, Professional Repair Tools for Stains, Scratches, Wood Floors, Tables, Bedposts

Overview: This marker-only kit provides 12 precision pens for surface-level wood restoration, complemented by a suede cloth and user manual. Colors range from black and grey to bamboo and espresso, covering exotic and common finishes. Designed for scratches, minor cracks, and fading, it targets users seeking pinpoint accuracy without wax fillers.
What Makes It Stand Out: The pen format offers superior control for fine scratches and detailed work on intricate furniture. Twelve colors exceed most competitors, including modern tones like espresso and bamboo. The inclusion of a suede cloth for prep work demonstrates attention to detail. The manual guides novices through a two-step process.
Value for Money: Pure marker sets typically cost less than hybrid kits, making this economical for surface-only repairs. The color variety rivals professional touch-up kits costing three times more. However, lacking wax sticks means deeper damage requires separate purchases, potentially increasing total investment.
Strengths and Weaknesses: Strengths include precise application, extensive color palette, quick drying, and beginner-friendly operation. The pen tips access tight corners easily. Weaknesses: no filler material for gouges, pens can dry out if caps aren’t secure, and coverage may require multiple layers. The manufacturer explicitly states it’s not for holes or large cracks—honest but limiting.
Bottom Line: Best-in-class for surface scratch concealment with unmatched color selection. Pair with wax sticks for a complete repair solution. Perfect for detail-oriented users and light damage.
10. Furniture Repair Kit Wood Markers - Markers and Wax Sticks for Stains, Scratches, Wood Floors, Tables, Desks, Carpenters, Bedposts, Touch Ups, and Cover Ups (25)

Overview: This comprehensive 25-piece kit delivers maximum versatility with 12 markers, 12 paper-wrapped wax sticks, and a sharpener. Twelve colors—including maple, oak, cherry, walnut, mahogany, white, grey, chestnut, burnt sienna, black, bamboo, and espresso—address virtually any wood finish. The blister packaging organizes components for easy access.
What Makes It Stand Out: The sheer component count and color diversity make this the most complete consumer kit available. Paper-wrapped wax sticks reduce handling mess. The dual dozen configuration ensures you won’t run out of one type before the other. It’s positioned as a professional alternative for extensive furniture collections.
Value for Money: Offering twice the markers and wax sticks of standard kits for roughly 50% more cost, the per-piece value is exceptional. For property managers, woodworkers, or enthusiasts maintaining numerous pieces, this bulk approach saves repeated purchases. Casual users may find the volume excessive.
Strengths and Weaknesses: Strengths include unparalleled color matching, abundant supply, dual-format flexibility, and organized packaging. The range covers traditional to contemporary stains. Weaknesses: bulk storage requirements, potential for markers to dry before full use, and the same durability concerns plaguing wax-based fillers. The “permanent” claim remains optimistic.
Bottom Line: The ultimate kit for serious DIYers or professionals needing variety and volume. Overkill for occasional use but unbeatable for comprehensive furniture maintenance. Store markers horizontally to maximize lifespan.
The Evolution of Wood Stain Markers in Professional Use
Why Traditional Touch-Up Methods Are Becoming Obsolete
Remember the days of carrying glass bottles with reducer, mixing cups, and a collection of sable brushes? Those kits weighed ten pounds and required a level surface, adequate ventilation, and fifteen minutes just to set up. Today’s mobile professionals operate under entirely different constraints. You’re often working in fully furnished homes with children and pets nearby, in high-rise elevators where fumes are unacceptable, or on factory floors where production can’t pause.
The shift isn’t just about convenience—it’s about compliance. 2026’s stricter VOC regulations in California, New York, and the emerging federal standards have rendered many traditional solvent-based stains non-compliant for commercial use. Wood stain markers have evolved from novelty items to sophisticated tools that deliver professional results while meeting environmental standards. The best formulations now offer the same pigment load and penetration as traditional stains, but in a delivery system that fits in your shirt pocket and dries in under two minutes.
What Defines a Professional-Grade Stain Marker
The gap between hobbyist markers and pro-grade tools is substantial, though it rarely appears on the label. Professional markers feature medical-grade precision tips that won’t deform under pressure, reservoir systems that maintain consistent flow even when you’re holding the marker at extreme angles to reach tight corners, and formulations with suspended pigments that resist settling during weeks in your truck.
Look for markers that specify “non-grain raising” (NGR) properties even in water-based formulas—this indicates the manufacturer has added co-solvents and surfactants that prevent the wood fibers from swelling and creating a fuzzy surface. Pro-grade markers also disclose their solids content; anything above 18% solids by volume indicates a formulation designed for building color and coverage, not just surface tinting. The barrel material matters too—aluminum or reinforced nylon prevents solvent loss through evaporation, which can concentrate pigments and alter color accuracy over time.
Core Types of Wood Stain Markers for Mobile Professionals
Alcohol-Based vs. Water-Based: Performance Implications
Alcohol-based markers remain the workhorse for most field repairs, and for good reason. They flash off in 30-90 seconds, penetrate dense hardwoods like maple and birch without raising grain, and blend seamlessly into existing finishes without leaving a halo effect. The isopropanol or ethanol carriers evaporate completely, leaving behind resin and pigment that integrate with the wood substrate. In 2026, we’re seeing improved formulations with slower evaporation rates—extending working time by 15-20 seconds without compromising dry time—which is crucial for blending larger areas.
Water-based markers have undergone a renaissance, shedding their reputation for poor performance. Modern acrylic-polymer dispersions offer surprising durability and are the only option for LEED-certified projects or occupied medical facilities where zero VOC is mandatory. The trade-off is longer dry times (3-5 minutes to touch-dry) and the potential for grain raising on porous woods. However, they excel on engineered products like MDF and plywood where deep penetration isn’t desirable, and they clean up with water—a major advantage when you’re working in client spaces without access to solvents.
Oil-Based Markers: When Maximum Durability Matters
For exterior touch-ups, high-wear surfaces like stair treads, or commercial furniture that sees constant cleaning, oil-based markers still reign supreme. They cure through oxidation, creating a film that becomes part of the finish rather than just coloring the wood. The key advancement in 2026 is the integration of alkyd resins modified with soya or linseed oil derivatives that comply with VOC limits while maintaining that characteristic durability.
The downside? Cure time. While they may feel dry in 10-15 minutes, full cure takes 24-72 hours, during which the repair remains vulnerable to solvents in cleaning products. Oil-based markers also require mineral spirits for cleanup and tool maintenance—something to consider when you’re working in spaces where chemical odors are prohibited. Smart pros reserve these for specific applications rather than everyday carry.
Hybrid Formulations: The Best of Both Worlds
The most exciting development for 2026 is the emergence of true hybrid markers that combine rapid alcohol flash-off with the durability of oil-modified resins. These use a dual-phase carrier system: the alcohol evaporates first, allowing quick handling, while slower-curing resins continue to cross-link over several hours. The result is a touch-up that feels dry almost immediately but achieves full hardness and solvent resistance within 4-6 hours.
These hybrids typically cost 30-40% more than conventional markers, but they eliminate the need to carry multiple formulations. For the mobile pro, this means one marker can handle interior furniture, cabinet faces, and protected exterior surfaces. Look for markers that specify “cross-linking polymers” or “dual-cure technology”—these indicate legitimate hybrid chemistry, not just marketing speak.
Essential Features That Separate Pros from Amateurs
Tip Technology: Precision Applicators That Make a Difference
The tip is where theory meets reality. Professional markers utilize fiber extrusion technology that creates consistent porosity throughout the tip material, ensuring even flow from the first use to the last drop. Bullet tips in 1mm and 2mm diameters handle fine scratches and edge wear, while chisel tips (3mm and 5mm) cover larger areas and can create artificial grain patterns.
2026 innovations include “adaptive flow” tips that automatically regulate pressure—squeeze harder and the tip releases more stain without flooding, perfect for feathering edges. Some premium markers now feature replaceable tip cartridges, allowing you to switch from bullet to chisel mid-job or replace a damaged tip without discarding a half-full marker. For furniture touch-ups, consider markers with a separate “graining tip”—a stiffer, forked applicator that creates realistic wood grain lines while the main tip handles the base color.
Drying Time and Curing: On-the-Job Efficiency Factors
In the field, “dry to touch” and “ready for topcoat” are two different timelines that can make or break your schedule. Professional markers should specify both. For alcohol-based markers, dry-to-touch in under 90 seconds is standard, but check the technical data sheet for “recoat window”—the time during which subsequent layers will chemically bond rather than just sit on top. This window typically ranges from 1-10 minutes.
Water-based markers present a different challenge: they may feel dry but remain vulnerable to reactivation by subsequent coats or cleaning products. Look for markers that achieve “blocking resistance” (the ability to resist sticking to protective paper or adjacent surfaces) within 30 minutes. The best pro markers also indicate “sandability”—the point at which you can lightly abrade the repair to blend sheens without gumming up your abrasive.
UV Resistance and Color Stability: Long-Term Performance
Nothing damages your reputation like a touch-up that fades or shifts color within six months. Professional markers now include hindered amine light stabilizers (HALS) and UV absorbers similar to those in automotive coatings. These additives are invisible in the wet stain but migrate to the surface during drying, providing multi-year protection against sunlight.
The 2026 standard is “UV420” protection, which blocks high-energy visible light in the 420-nanometer range—the spectrum most responsible for yellowing light woods and fading dark stains. Markers formulated for exterior use should specify “UVA/UVB stabilization” and provide accelerated weathering data, typically measured in Xenon-Arc hours. For interior work, don’t assume UV protection is unnecessary; modern LED lighting emits significant UV, and windows without low-E coatings can cause fading even on north-facing walls.
Color Matching Mastery for Seamless Repairs
Understanding Undertones and Grain Simulation
The biggest mistake pros make is matching the surface color while ignoring the undertone. Maple stained to match cherry might look correct under fluorescent shop lights but reveal a greenish cast in natural daylight. Professional color theory for wood involves identifying the dominant undertone: orange (mahogany, cherry), red (cedar, red oak), yellow (pine, birch), or neutral/brown (walnut, white oak).
Advanced markers for 2026 are moving beyond simple color matching to “spectral matching”—formulations that replicate how light interacts with the actual wood substrate. This involves translucent base colors that allow the wood’s natural figure to show through, plus separate markers for adding grain pores and figure. Some manufacturers now offer “undertone sets”—three markers (base, mid-tone, and deep accent) that let you build color depth rather than applying a single opaque layer.
Building a Custom Color Palette System
The pros who command premium rates don’t carry every color—they carry the right colors and know how to modify them. Start with a foundation of six markers: raw wood, light neutral, medium warm, medium cool, dark warm, and dark cool. To this, add three “toners”—yellow oxide, burnt sienna, and raw umber—that let you shift any base color to match the specific piece.
In 2026, smart pros are adopting the “CMYKW” system borrowed from printing: Cyan, Magenta, Yellow, Black, and White markers that can be layered to create any hue. This requires more skill but reduces your kit from 30+ markers to just five, plus a few specialty colors for exotic woods. The key is understanding that these are translucent toners, not opaque paints—they modify the underlying wood color rather than covering it.
Application Techniques That Elevate Your Work
Feathering and Blending: The Invisible Repair
The marker is only as good as the hand holding it. Professional feathering involves applying the stain with the grain, starting slightly beyond the damage and pulling the marker toward the center of the scratch. The initial contact point receives the heaviest deposit; as you lift pressure, the color fades to nothing. This creates a gradient that eliminates hard lines.
For deeper damage, apply multiple feathered passes, each slightly shorter than the last, building color depth in the recess while maintaining a soft perimeter. The 2026 pro technique involves a “dry-brush” pass with an empty marker or a cotton swab immediately after application, physically blending the wet stain into the surrounding finish. This works particularly well on open-grain woods where you need to simulate pores.
Layering Strategies for Depth and Realism
Single-layer touch-ups look flat because real wood color varies with depth. Professional repairs use at least three layers: a base color that matches the overall tone, a second layer 10-15% darker applied only to the deeper portions of the damage to create shadow, and a third layer that’s actually lighter than the wood, applied to the high points and edges where natural wear would occur.
This “highlight and shadow” approach is particularly critical on high-gloss finishes where light reflection reveals flat, monochromatic repairs. Some advanced pros carry a “clear marker” loaded with just resin and no pigment, which they apply as a final layer to adjust sheen and add depth without altering color. In 2026, we’re seeing markers with adjustable pigment loads—twist the barrel to reduce pigment flow for highlight passes, then twist back for full saturation on base coats.
Durability Factors: What Pros Need to Know
Scratch Resistance and Topcoat Compatibility
A touch-up that looks perfect but fails when the client cleans their furniture is worse than no touch-up at all. Professional markers must achieve a pencil hardness of at least 2H after full cure to withstand normal use. This is particularly important on flooring and tabletops. The marker’s resin system determines hardness: acrylics for water-based, shellac or acrylic for alcohol-based, and alkyd for oil-based.
Topcoat compatibility is where many markers fail. The stain must accept the client’s existing finish—whether that’s a polyurethane, conversion varnish, lacquer, or oil. Incompatible chemistries cause fisheyes, crawling, or delamination. The 2026 professional standard is “universal adhesion” markers that use adhesion-promoting additives like silanes or zirconium complexes. These create a chemical bridge to virtually any cured finish. Always test on a hidden area first, but markers specifying “direct-to-substrate” or “universal base” are designed for this challenge.
Moisture and Heat Tolerance Ratings
Kitchen cabinets near stoves, bathroom vanities, and exterior doors face environmental stresses that interior furniture doesn’t. Professional markers now include moisture vapor transmission rates (MVTR) and heat deflection temperatures (HDT) in their technical specs. For high-moisture areas, you want a marker with MVTR below 15 g/m²/day—this means the cured stain acts as a moderate moisture barrier rather than absorbing humidity and swelling.
Heat tolerance is measured in HDT: the temperature at which the stain softens under load. For kitchen cabinets near ovens or fireplaces, you need HDT above 140°F. Oil-based markers typically exceed this, while water-based formulations may require a post-application clear coat to achieve the same performance. Some 2026 markers include ceramic microspheres that increase heat resistance while maintaining flexibility—a game-changer for radiator covers and outdoor kitchens.
Portability and Organization: The Mobile Professional’s Edge
Climate-Controlled Storage Solutions
Your truck can hit 140°F in summer and drop below freezing in winter—both extremes that destroy marker performance. Heat causes solvents to expand and leak, while cold precipitates pigments out of suspension. Professional-grade markers use sealed, pressurized reservoirs that minimize these effects, but smart pros don’t rely on packaging alone.
Invest in a climate-controlled marker case. In 2026, the best options are USB-rechargeable heated/cooled cases that maintain 65-75°F regardless of ambient conditions. These slim cases hold 20-30 markers and run for 8+ hours on a charge—perfect for multi-day jobs. For budget-conscious pros, insulated lunch bags with gel ice packs (swapped daily) provide adequate protection for alcohol and water-based markers. Never store oil-based markers below 40°F; the oxidation process slows dramatically, and they may never cure properly if frozen.
Quick-Access Organization Systems
When you’re on a ladder touching up crown molding, you can’t dig through a bag. Professional organization means color-coded caps with actual wood species printed on them, not just color swatches. Use a marker wallet that unfolds like a tool roll, with individual sleeves for each marker and a clear window showing the color. This protects tips from damage while allowing instant visual identification.
The 2026 pro move is adding RFID or NFC tags to your markers. A quick scan with your phone shows purchase date, estimated fill level based on usage, color formula, and compatibility notes. This prevents grabbing a marker that’s been sitting for a year and has dried out, or using a color you bought for a specific client’s custom stain. For teams, this data syncs across devices, so your apprentice knows which markers are fair game and which are reserved for specific accounts.
Safety, Compliance, and Environmental Considerations
VOC Regulations and Eco-Friendly Alternatives
By 2026, the EPA’s national VOC limit for wood stains drops to 250 g/L, with California’s CARB standard at 100 g/L for interior use. This has pushed manufacturers toward bio-based solvents and exempt compounds. Professional markers now highlight their VOC content prominently, with many achieving “Super Compliant” status below 50 g/L.
But compliance isn’t just about numbers—it’s about documentation. Jobs on government buildings, schools, or healthcare facilities require VOC certificates and Safety Data Sheets. Smart pros maintain a digital binder (cloud storage works great) with SDS for every marker in their kit, ready to email to GCs or facility managers. The markers themselves should have batch numbers printed on the barrel, allowing you to trace exactly which formulation was used if questions arise months later.
Proper Ventilation and PPE for Confined Spaces
Even “low-VOC” markers release compounds during application and drying. In confined spaces like elevator cabs or small bathrooms, use a portable exhaust fan with flexible ducting to create negative pressure. This isn’t just for your health—it’s to prevent overspray and odor from migrating to occupied spaces.
Your PPE kit should include nitrile gloves (not latex, which can be degraded by alcohol solvents), safety glasses with side shields, and a half-face respirator with organic vapor cartridges for oil-based work. For alcohol-based markers in well-ventilated areas, a simple N95 dust mask is often sufficient, but always follow the SDS recommendations. In 2026, some pros are using personal air quality monitors that clip to their belt and alert when VOC concentrations exceed safe levels—cheap insurance when you’re working in unpredictable environments.
Cost vs. Value: Investing in Your Mobile Arsenal
The cheapest markers run $3-5 each, while professional-grade tools can exceed $25 per marker. The math is simple: one callback to fix a failed touch-up costs more than an entire premium marker set. A $20 marker that delivers perfect results 100 times is cheaper per use than a $5 marker that fails on the third attempt.
Consider the “total cost of ownership.” Markers with replaceable tips and refillable reservoirs have higher upfront costs but pay for themselves within months. A refillable system also lets you custom-mix colors in the field—decant different stains into empty markers to match that impossible species your client imported from Brazil. In 2026, subscription services are emerging where manufacturers send fresh markers quarterly and include a prepaid return label for empties, ensuring you always have fresh stock without the capital outlay.
Maintenance and Storage: Maximizing Marker Lifespan
Preventing Tip Drying and Pigment Settlement
Even the best markers fail if neglected. The cardinal rule: store markers horizontally. This keeps the pigment suspended evenly and prevents the tip from drying out. Vertical storage causes pigments to settle at the bottom, leading to inconsistent color as you use the marker.
For markers that see occasional use (like that specialty color for Brazilian cherry), implement a monthly “rotation”—shake vigorously for 30 seconds, then make a test stroke on scrap wood. This re-suspends pigments and prevents the tip from sealing with dried resin. Some pros add a drop of marker thinner (manufacturer-specific) to the tip if a marker has been idle for months, but this risks diluting color; better to use it regularly or accept that specialty colors have a 12-month shelf life.
Field Cleaning and Tip Restoration
Inevitably, you’ll pick up finish residue, wax, or grime on your marker tip, causing it to clog or deposit contaminants. Carry a tip cleaning block—essentially fine abrasive paper mounted on a firm foam block. A few gentle strokes across the block while the tip is extended removes buildup without damaging the fiber structure.
For severely clogged tips, some 2026 markers allow tip removal and replacement in the field. Keep a spare tip cartridge in your kit; swapping takes seconds and saves a $20 marker. Never use metal tools to clean tips—they deform the precise fiber alignment. If a tip becomes permanently stained with a dark color and you need to switch to a light color, saturate it with clear blender solution (available from pro suppliers) and make test strokes until it runs clear.
Troubleshooting Common Field Problems
Halo Effects and Color Mismatch Under Different Lighting
The dreaded halo—a light ring around your touch-up—occurs when the marker’s solvent attacks the existing finish, causing it to reflow and create a visible border. The solution is two-fold: use markers with “low-attack” solvents (clearly specified in technical data), and apply a barrier coat first. A quick pass with a clear, fast-drying shellac marker isolates the damage, preventing solvent migration.
Color matching under LED versus natural light is another common pitfall. LEDs emit spikes in the blue spectrum that can make warm stains appear flat or greenish. The 2026 pro technique involves a “light audit”—carry a small, high-CRI (Color Rendering Index) flashlight with you. Shine it on your repair; if the color shifts dramatically from the ambient lighting, you need to adjust your mixture. Some pros now carry a mini spectrophotometer that connects to their phone, providing exact color measurements in multiple lighting conditions.
Dealing with Wax, Oil, and Existing Contaminants
Touching up a dining table where Pledge has been used weekly for a decade? That silicone and wax will repel any stain marker, causing beading and poor adhesion. Professional kits now include “surface prep markers” loaded with mild detergent and degreasing agents. A quick pass dissolves contaminants without damaging the underlying finish, evaporating in seconds and leaving a receptive surface.
For oily woods like teak or rosewood, or surfaces contaminated with furniture polish, use a “tackifier” marker first. These contain adhesion promoters that bite through light oil residues. In extreme cases, a single pass with 320-grit abrasive in a foam-backed sanding block creates enough tooth for adhesion without visibly scratching the surrounding finish. Always follow with a clean, dry brush to remove dust before staining.
Looking Ahead: 2026 Innovations on the Horizon
Smart Markers and Digital Integration
The buzz at the 2025 woodworking shows was all about “connected” markers. These prototypes feature internal sensors that track usage, solvent levels, and even color accuracy. By 2026 Q3, expect the first commercial release of markers that sync to an app, alerting you when a color is running low or when a batch is approaching its expiration date.
More exciting is the integration with digital color matching. Point your phone’s camera at the wood, and AI suggests the exact marker combination or custom mix ratio. Some systems will even track which markers you use most frequently for specific clients, automatically generating restock lists. While this may seem gimmicky, for large operations with multiple techs, it ensures consistency and reduces inventory waste.
Bio-Based and Bio-Degradable Formulations
Sustainability isn’t just marketing—it’s becoming a bid requirement. The next generation of markers uses bio-based resins derived from lignin (a wood waste product) and pigments from natural sources like iron oxides and carbon black. These formulations match the performance of petrochemical versions while meeting the strictest environmental certifications.
Even more revolutionary are markers with biodegradable reservoirs. Once empty, the barrel and tip break down in industrial composting within 90 days. For the mobile pro, this means no more guilt about plastic waste and potential marketing advantages when bidding on green building projects. The performance is identical; only the end-of-life disposal changes.
Building Your Ultimate Mobile Touch-Up Kit
The Essential 15-Color Core Palette
Rather than carrying 50 colors, curate a versatile core set that covers 95% of scenarios. Your base kit should include: Raw Pine, Golden Oak, Medium Oak, Dark Oak, Red Oak, Cherry, Mahogany, Walnut, Espresso, Jacobean, Weathered Gray, Classic Gray, White Wash, Clear Blender, and Black Grain. To this, add three metallic markers (gold, silver, bronze) for hardware touch-ups, and two “effect” markers—one for pore filler and one for burn-in sticks.
Store these in a rigid case with custom foam cutouts, organized from light to dark. Add desiccant packs to control humidity, and include a small card with each marker’s purchase date and typical use case. This system weighs under three pounds but handles everything from Scandinavian blonde maple to ebonized walnut.
Specialty Add-Ons for Niche Markets
If you service high-end furniture, add markers for exotic species: Brazilian Cherry, Teak, Zebrawood, and Wenge. For floor refinishers, carry “floor-grade” markers with extra abrasion resistance and rapid cure additives. Cabinet installers need “grain pattern” markers that create realistic cathedral grain on plywood edges.
In 2026, consider a “client-specific” case. For property management companies, you might have a second small kit with just the three colors used throughout their apartment complexes. For luxury yacht builders, a waterproof case with marine-grade formulations. These specialized kits allow you to charge premium rates while carrying less overall inventory.
Pro Tips from Veteran Touch-Up Specialists
The 24-Hour Rule for Critical Jobs
On high-visibility projects—like a $20,000 conference table—never let the client see your touch-up the same day. Apply the repair, allow it to cure overnight, then return the next day to evaluate under different lighting. What looked perfect at 3 PM may reveal issues at 10 AM when sunlight hits differently. This single practice eliminates 90% of callbacks and positions you as a meticulous craftsman rather than a quick-fix artist.
Creating Custom Colors in the Field
When you encounter an unstained piece or a custom color that no marker matches, become a mixologist. Apply the base color, let it flash off for 30 seconds, then immediately apply a second color while the first is still tacky. The solvents blend the layers, creating intermediate tones. For precise control, use a palette—literally a piece of glass or melamine where you scribble both colors, then pick up the mixture with a cotton swab or your finger wrapped in a soft cloth. This allows infinite color adjustment without committing to mixing full markers.
The Psychology of Client Perception
Here’s a secret: the repair doesn’t have to be 100% invisible—it just has to be invisible to the client. Always position yourself between the repair and the main light source when presenting your work. This minimizes shadows that reveal texture differences. Use a magnifying loupe to inspect your own work, but never hand it to the client—what you see as a minor imperfection is invisible to their naked eye. And always under-promise: tell the client you’ll “significantly improve” the damage, not make it disappear. When you exceed expectations, you become the hero.
Frequently Asked Questions
1. How long do professional wood stain markers actually last in the field?
With proper horizontal storage and monthly rotation, alcohol-based markers remain viable for 18-24 months. Water-based markers have a shorter 12-month shelf life due to potential bacterial growth, while oil-based markers can last 3+ years if unopened. In daily use, a 10ml marker typically provides 200-300 feet of continuous line, equivalent to 50-75 average touch-ups. Refillable systems extend this indefinitely, with only tip replacement every 6-12 months depending on usage intensity.
2. Can I really achieve invisible repairs on high-gloss finishes with markers alone?
Markers excel on satin and matte finishes, but high-gloss (90+ sheen) presents challenges. The marker leaves a slightly lower sheen that catches light differently. The 2026 pro technique involves applying the stain, letting it cure, then using a micro-mesh sanding pad (up to 12,000 grit) with a drop of mineral oil to level and polish the repair to match the surrounding gloss. Some specialists carry a small UV-cure resin pen that adds a glass-like topcoat in seconds, though this requires a UV flashlight and adds complexity.
3. What’s the best way to match stain colors for exotic woods not in standard marker lines?
Start with the closest domestic species marker, then modify. For purpleheart, use a dark walnut base and add a touch of burgundy toner. For bubinga, start with mahogany and add red oxide. Document your formula by creating a test strip on the actual wood species, then photographing it with the marker caps visible in the shot. Most professional suppliers offer custom color matching services—send them a 2-inch wood sample, and they’ll formulate and fill markers to match, typically within a week and costing 2-3x standard markers.
4. Are there any surfaces where stain markers should never be used?
Avoid using stain markers on bare, oily exotic woods like teak or cocobolo without thorough degreasing—the oils prevent penetration and adhesion. Never use them on waxed or shellac-coated surfaces intended for French polishing; the solvents will craze the finish. For heritage pieces with original nitrocellulose lacquer, test extensively in a hidden area, as modern solvents can cause irreversible damage. When in doubt on priceless antiques, use reversible methods like wax sticks or pigment powders instead.
5. How do I prevent marker tips from drying out between jobs?
The critical factor is storage orientation—horizontal is mandatory. For markers that see sporadic use, invest in “tip savers”: small silicone caps that seal over the existing cap, creating an airtight secondary barrier. Some pros store rarely-used markers in ziplock bags with a damp (not wet) paper towel and a few drops of the appropriate solvent—this maintains 100% humidity without saturating the tip. If a tip does dry, don’t soak it in solvent; instead, wrap it in a solvent-dampened paper towel for 10 minutes to slowly rehydrate the fibers.
6. What’s the protocol for touch-ups in occupied healthcare facilities or schools?
These environments require zero-VOC, zero-odor products and often documentation of ingredients. Use only water-based markers certified by Green Seal or equivalent. Apply during unoccupied hours, even with zero-VOC products, as some individuals have chemical sensitivities. Provide the facility manager with SDS sheets and a written protocol including ventilation plan and dry time before re-occupancy. Some facilities require third-party air quality testing post-application—factor this $200-500 cost into your bid.
7. Can wood stain markers be used on engineered products like MDF or laminate?
Yes, but with modifications. MDF’s porous edges drink stain and look muddy—seal first with a clear sanding sealer marker, let dry, then apply color. For laminate, success depends on the finish. High-pressure laminate (HPL) with a melamine surface is non-porous; markers will sit on top and wipe off. However, many modern “wood grain” laminates have a thin real wood veneer that accepts stain beautifully. Test in a hidden area, and always use a primer marker first to promote adhesion on non-porous surfaces.
8. How do I handle touch-ups on floors that will receive a screen and recoat?
The marker must chemically bond with the existing finish and accept the new topcoat without bleeding. After the marker dries (30 minutes for alcohol-based), lightly abrade with a maroon Scotch-Brite pad to degloss and create mechanical adhesion. Vacuum thoroughly, then wipe with a microfiber cloth dampened with mineral spirits. Apply your topcoat within the marker’s recoat window (usually 2-4 hours). Some pros add a crosslinker to their topcoat when covering marker repairs, ensuring a chemical bond that prevents the color from migrating into the new finish.
9. What’s the most reliable way to test a marker’s color match before committing to the repair?
Always test on scrap of the same species, prepared identically to the piece (same sandpaper grit, same finish schedule). But when that’s not available, use the “hidden area method”: find the least visible spot—inside a drawer rail, behind a door, under a foot. Apply a small feathered stroke, let it dry completely, then evaluate at multiple angles and light conditions. For critical matches, apply a piece of low-tack painter’s tape adjacent to the test area; the stark white border helps your eye detect color shifts. Take a photo with your phone’s flash on—this reveals undertone mismatches that ambient light hides.
10. Should I be concerned about marker colors shifting as they age on the wood?
All stains shift slightly over time due to light exposure and oxidation. Professional markers minimize this with stabilizers, but some shift is inevitable. Dark stains tend to lighten (especially walnut tones), while light stains may yellow. The 2026 solution is “color anticipators”—markers formulated 10% darker or more neutral than the target color, accounting for anticipated shift. For exterior work, expect to revisit the site in 6-12 months for a “sun-check” and potential refresh. Always inform clients that touch-ups, like the original finish, are subject to normal weathering and may require periodic maintenance—a conversation that builds long-term relationships and recurring revenue.
See Also
- 10 Must-Have Wood Stain Markers for Antique Dealers in 2026
- 10 Best Budget Wood Stain Markers Under $15 for Quick Touch-Ups in 2026
- 10 Game-Changing Wood Stain Markers for Quick Touch-Ups in 2026
- 10 Must-Have Wood Stain Pens for Detailed Woodworking Projects in 2026
- 10 Must-Have Wood Stain Applicators for Flawless DIY Results in 2026