Table of Contents
Lap marks are the silent frustration of wood staining—the dreaded dark lines and uneven patches that appear where wet and dry stain meet, turning your dream project into a patchwork disappointment. As we move into 2026, woodworking enthusiasts and professionals alike are discovering that solving this age-old problem requires more than just “working faster.” The modern approach combines cutting-edge stain technology with refined application techniques that give you control, not panic.
Whether you’re restoring a family heirloom, crafting custom furniture, or refinishing your kitchen cabinets, understanding how to eliminate lap marks will elevate your work from amateur to artisan-level. This comprehensive guide reveals ten expert techniques specifically refined for 2026’s advanced formulations and tools, plus the critical supporting strategies that make each method successful.
Top 10 Wood Stain Applicators
Detailed Product Reviews
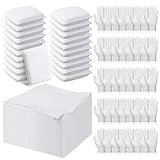
1. Trimaco 10102 SuperTuff Sponge, 2 Pack Staining Pad

Overview: The Trimaco SuperTuff Sponge offers a straightforward approach to wood staining with its classic design. Each 4"x5" sponge features a white terry cloth covering that helps distribute stain evenly across furniture, cabinets, and hardwood floors. This two-pack provides basic application tools for small to medium projects without unnecessary complexity. The simple construction makes it accessible for beginners who want reliable results without a steep learning curve. These pads work particularly well with oil-based stains, gliding smoothly across wood surfaces to deliver consistent coverage.
What Makes It Stand Out: The terry cloth covering distinguishes this product from plain foam applicators, providing a smoother application experience that mimics using a cloth but with the convenience of a sponge backing. The size is practical for maneuvering around detailed woodwork and getting into tight corners on furniture pieces. Its simplicity is its strength—there are no complicated features to master, making it ideal for quick touch-ups or one-time projects where you don’t want to invest in expensive tools.
Value for Money: At the budget end of the spectrum, this two-pack delivers decent value for occasional DIYers. While not reusable long-term, the low initial cost makes it accessible for those tackling a single project. However, frequent users will find better long-term value in reusable alternatives. The disposable nature means you’ll need to repurchase for future projects.
Strengths and Weaknesses: Pros include affordability, smooth application, and beginner-friendly design. The terry cloth prevents the streaking common with basic foam pads. Cons include limited durability, potential for lint with certain stains, and lack of reusability. The small pack size may require multiple purchases for larger projects.
Bottom Line: The Trimaco SuperTuff Sponge is perfect for beginners or those undertaking small, occasional staining projects. Its no-frills design and affordable price make it a solid entry-level choice, though serious woodworkers will want to invest in more durable, reusable options.
2. NiHome 5-Inch Wood Conditioner, Wax & Oil Applicator 4-Pack, Reusable Microfiber & Sponge Pads for Scratch-Free Cutting Board Maintenance & Versatile Home Polishing, Machine Washable for Long-Term Use

Overview: The NiHome 4-Pack applicator set combines microfiber and sponge technology for versatile wood conditioning and polishing tasks. Each 5-inch pad fits comfortably in the palm, providing excellent control during application. These reusable pads are designed specifically for cutting board maintenance but extend to various home polishing needs. The microfiber surface ensures lint-free performance while the sponge core maintains even pressure distribution. Machine washability adds practical longevity to these eco-conscious tools.
What Makes It Stand Out: The ergonomic 5-inch size strikes an ideal balance between coverage and control, making wax and oil application remarkably efficient. Unlike disposable options, these pads champion sustainability through reusability, reducing both environmental impact and long-term costs. The microfiber material excels at even product distribution without scratching delicate surfaces, making it particularly valuable for maintaining fine furniture and kitchen essentials.
Value for Money: While priced higher than basic disposable sponges, the reusability factor creates excellent long-term value. A single pack can withstand numerous projects and wash cycles, effectively replacing dozens of disposable alternatives. For homeowners who regularly maintain cutting boards, furniture, or car interiors, the investment quickly pays for itself. The four-pack quantity ensures you always have a clean pad ready.
Strengths and Weaknesses: Strengths include reusability, lint-free performance, comfortable size, and environmental benefits. The microfiber construction prevents scratches on sensitive surfaces. Weaknesses include potentially lower absorbency compared to thicker foam pads and the 5-inch size may feel small for large floor projects. Initial cost might deter one-time users.
Bottom Line: The NiHome applicators are an excellent choice for eco-conscious homeowners and regular DIY maintainers. Their reusability and versatility make them ideal for ongoing wood care, though professionals tackling large staining projects might prefer more robust, larger-format options.
3. Ziliny 60 Pcs Wood Staining Applicator Kit Include Microfiber Sponge Applicator Pads Cotton Lint Free Cloth Disposable Nitrile Gloves for Wood Stain and Oil Based Finishes
Overview: The Ziliny 60-piece kit provides a comprehensive staining solution with 20 microfiber sponge pads, 20 lint-free cotton cloths, and 20 pairs of nitrile gloves. This all-in-one package eliminates the need to source components separately, streamlining the staining process from preparation to finish. Each sponge measures 4"x5"x1", offering substantial absorbency, while the 18"x18" cloths handle excess stain removal on larger surfaces. The included gloves ensure hand protection throughout the project.
What Makes It Stand Out: The sheer completeness of this kit sets it apart—everything required for a professional staining job arrives in one package. The disposable nature combined with high quantity makes it perfect for large-scale projects or contractors who need fresh tools for each job. The cotton lint-free cloths can be washed and reused, adding unexpected value to a primarily disposable kit. This approach minimizes cross-contamination between different stain types and projects.
Value for Money: For large projects or professional use, this kit offers exceptional bulk value. The per-piece cost is remarkably low when purchased as a set, though casual users may find the volume excessive. The inclusion of gloves adds tangible value, eliminating an additional purchase. However, the disposable design means recurring costs for frequent users.
Strengths and Weaknesses: Strengths include comprehensive contents, bulk quantity, disposable convenience, and versatility across surfaces. The nitrile gloves provide reliable protection. Weaknesses include storage requirements for the large kit, environmental impact of disposable components, and potentially lower quality than premium reusable options. The quantity may overwhelm occasional DIYers.
Bottom Line: This Ziliny kit is ideal for contractors, serious DIYers undertaking extensive projects, or those who prefer the hygiene of disposable tools. While overkill for small jobs, it delivers unmatched convenience and value for large-scale staining tasks where having ample supplies is crucial.
4. Impresa [6 Pack] Wood Stain Applicator Pads - Lint-Free Microfiber Reusable Applicator Staining Pads for Polishing, Cleaning, & Floor Wax - 4" x 3.25" x .75 Microfiber Sponge
![Impresa [6 Pack] Wood Stain Applicator Pads - Lint-Free Microfiber Reusable Applicator Staining Pads for Polishing, Cleaning, & Floor Wax - 4" x 3.25" x .75 Microfiber Sponge](https://m.media-amazon.com/images/I/41u9lr3i4bL._SL160_.jpg)
Overview: The Impresa 6-Pack features lint-free microfiber sponge pads measuring 4"x3.25"x.75", designed for professional-grade staining results. These reusable pads promise smooth, even application without leaving fuzz or snags on wood surfaces. The set’s versatility extends beyond staining to polishing, cleaning, and waxing applications. The compact size provides excellent precision for detailed work while maintaining efficiency on larger surfaces through repeated loading.
What Makes It Stand Out: The lint-free guarantee is the headline feature, addressing a common frustration with cheaper applicators that leave residue. The six-pack quantity hits a sweet spot—enough pads to rotate through a project without being excessive. Their reusability combines with resilient construction to withstand multiple wash cycles, making them reliable workshop staples. The pads adapt seamlessly from furniture restoration to automotive waxing, demonstrating remarkable versatility.
Value for Money: Positioned in the mid-range price bracket, these pads offer strong value through durability and performance. The six-pack provides enough units to dedicate specific pads to different stain colors or tasks, preventing cross-contamination. While more expensive than disposables upfront, their longevity creates better long-term value for regular users. The quality construction justifies the moderate premium over budget options.
Strengths and Weaknesses: Strengths include lint-free performance, reusability, versatile sizing, and good quantity. The microfiber surface works well with various finishes. Weaknesses include thinner profile (0.75") which may require more frequent re-loading than thicker pads, and the smaller surface area increases application time on large projects. White color shows stains permanently.
Bottom Line: The Impresa pads are an excellent middle-ground choice for dedicated DIYers and semi-professionals who value quality and reusability. They deliver reliable, lint-free results across various applications, making them a versatile addition to any workshop, though those prioritizing speed on large surfaces may want larger pads.
5. MāKRS Stain Sponge, 4-Pack Staining Pads, Lint, Snag and Streak-Free Applicator Sponges, Micro-Brush Material Over Foam Core, for Wood Stains and All Finishes, Easy to Use with Consistent Application
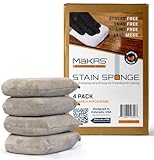
Overview: The MāKRS Stain Sponge 4-Pack represents premium applicator technology with its innovative divided reservoir design. Measuring 3"x4"x1", these pads feature micro-brush material over a foam core that prevents oversaturation while holding ample product. The thickness provides excellent coverage efficiency, and the rounded edges allow precise application directly from quart cans. Designed for all finish types—from gel stains to polyurethane—these sponges deliver professional results without lint, snags, or streaks.
What Makes It Stand Out: The divided reservoir technology is genuinely innovative, solving the common problem of over-saturation that plagues traditional sponges. This feature provides unprecedented control over stain application, reducing drips and waste. The micro-brush material glides effortlessly even over rough reclaimed wood without catching or shedding. Additionally, the plastic-free packaging aligns with sustainable practices, appealing to environmentally conscious professionals.
Value for Money: While priced at a premium, these pads deliver professional-grade results that justify the cost for serious woodworkers. The four-pack suits both small projects and larger jobs when rotated properly. Their durability ensures numerous uses, and the efficiency gains from the reservoir design save both product and time. For hobbyists, the price may seem steep, but the results speak for themselves.
Strengths and Weaknesses: Strengths include superior saturation control, lint-free micro-brush surface, snag-free performance on rough wood, ideal sizing for quart cans, and eco-friendly packaging. The 1-inch thickness provides excellent coverage. Weaknesses include higher price point and smaller pack size compared to budget options. The premium features may be unnecessary for simple, occasional projects.
Bottom Line: The MāKRS Stain Sponge is the top choice for professionals and serious enthusiasts who demand flawless results and maximum control. While overkill for casual users, its innovative design and superior performance make it worth every penny for those who prioritize quality and efficiency in their finishing work.
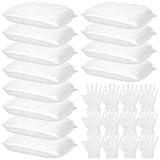
6. Ziliny 24 Set Wood Stain Applicators and Disposable Latex Gloves Microfiber Stain Sponge Pads for Wood and Oil Based Finishes(White)

Overview: The Ziliny 24 Set delivers a comprehensive staining solution with 24 white microfiber sponge applicators and 25 pairs of disposable latex gloves. Designed for extensive home improvement projects, this bulk package eliminates frequent resupply runs. The white color scheme serves a practical purpose—allowing accurate stain color assessment during application. Each sponge measures 4x5 inches for comfortable handling, while the large gloves accommodate most users. Vacuum packaging ensures compact storage, though sponges require time to fully expand before use.
What Makes It Stand Out: This set’s exceptional quantity-to-price ratio distinguishes it from competitors. The white microfiber pads prevent color distortion, crucial for achieving desired wood tones. Including 25 glove pairs—one more than applicators—demonstrates thoughtful planning. The multi-purpose design extends beyond staining to general cleaning tasks, maximizing utility. The vacuum-sealed packaging reduces environmental impact during shipping while maintaining product hygiene.
Value for Money: At bulk pricing, each applicator costs significantly less than individual purchases from hardware stores. The included gloves eliminate separate purchases, saving approximately $8-12. Compared to premium single-use alternatives, this 24-set offers 40% better value for large projects. Occasional DIYers might find the quantity excessive, but frequent users or contractors benefit enormously from the per-unit savings.
Strengths and Weaknesses: Strengths include exceptional quantity, color-accurate white pads, comprehensive glove inclusion, and versatile cleaning applications. The rectangular sponges offer ergonomic handling. Weaknesses involve the vacuum-pack recovery time delaying project starts. Latex gloves pose allergy concerns for some users. The white color shows stain quickly, though this doesn’t affect performance. Storage requires space for 49 total pieces.
Bottom Line: Perfect for ambitious DIY enthusiasts, landlords, or professional contractors tackling multiple projects. The Ziliny set’s bulk value outweighs minor inconveniences, making it a smart warehouse-style purchase for anyone serious about wood finishing.
7. 6Pcs Cutting Board Oil Applicator Microfiber Sponge Applicator for Wood Conditioner Leather Conditioner Applicators Versatile Polishing Sponges for Cutting Boards Wooden Furniture Leather Care

Overview: This six-pack of microfiber sponge applicators specializes in food-safe wood treatment, particularly cutting board maintenance. Each pad ensures even distribution of oils, waxes, and conditioners without streaking or residue. While marketed for kitchen use, these versatile tools handle furniture, leather goods, and automotive interiors with equal proficiency. The lint-free design prevents fiber contamination on porous surfaces, making them ideal for both novice and experienced craftsmen seeking professional results on smaller projects.
What Makes It Stand Out: The applicators’ specialization in cutting board care addresses a niche often overlooked by generic staining kits. Their microfiber construction provides superior absorption and controlled release compared to foam alternatives. The scratch-free performance protects delicate surfaces, while the six-count package offers enough quantity for dedicated use across different applications—kitchen, furniture, and automotive—preventing cross-contamination of products.
Value for Money: Priced moderately, each applicator costs less than specialty brushes while delivering comparable results. The reusable nature extends lifespan through multiple applications, though eventual replacement is expected. Unlike bulk sets, this package suits occasional users without storage concerns. However, lacking included gloves requires separate purchase, adding $5-8 to total project cost. For dedicated cutting board maintenance, the specialization justifies the price premium over generic sponges.
Strengths and Weaknesses: Strengths include lint-free microfiber, versatile multi-surface capability, optimal size for detail work, and streak-free application. The six-count allows product-specific dedication. Weaknesses involve no protective gloves included, limited quantity for large projects, and microfiber requiring careful cleaning to maintain performance. The packaging lacks reusability features for storage between projects.
Bottom Line: An excellent choice for kitchen-focused woodworkers and homeowners prioritizing food-safe finish application. While not the most economical for large-scale staining, these applicators excel in precision tasks where quality trumps quantity.
8. MāKRS Stain Sponge, 3-Pack Staining Pads, Stain Brushes for Wood, Lint and Streak-Free Applicator Sponges, Micro-Brush Over Foam Core, for Wood Stains and All Finishes, Easy to Use

Overview: MāKRS Stain Sponges represent premium applicator design with three double-thick pads featuring divided reservoirs. Measuring 3"x4"x1", these precision tools fit directly into quart cans, minimizing mess and waste. The micro-brush over foam core construction prevents lint and snagging, even on rough reclaimed wood. Engineered for professional results, these sponges accommodate all finish types—gel stains, polyurethane, shellac, and wax—making them the choice for discerning woodworkers seeking flawless application without brush marks or fiber residue.
What Makes It Stand Out: The innovative divided reservoir system controls saturation, preventing over-application and drips—a common frustration with standard sponges. Their compact size and rounded edges navigate tight corners while covering flat surfaces efficiently. The guaranteed lint-free performance stems from the micro-brush surface, which outperforms traditional foam or basic microfiber. Designed specifically for quart cans, these sponges eliminate transfer containers, streamlining workflow.
Value for Money: While pricier per unit than bulk alternatives, the professional-grade results justify the cost for quality-focused users. Each sponge’s durability allows multiple uses when properly cleaned, though most treat them as specialty single-use tools for critical projects. The three-count suits small to medium projects perfectly. Compared to disposable brushes that leave bristles, the premium price delivers 100% reliable results, saving time on rework.
Strengths and Weaknesses: Strengths include superior lint-free performance, divided reservoir preventing over-saturation, perfect quart-can fit, snag-resistant micro-brush surface, and versatility across all finish types. Weaknesses involve higher per-unit cost, limited quantity requiring purchase planning, and thickness making detail work challenging. The premium design may be overkill for quick, casual projects.
Bottom Line: Ideal for furniture restoration enthusiasts and professionals demanding perfection. The MāKRS sponges’ innovative design solves common staining problems, making them worth every penny for projects where flawless finish is non-negotiable.
9. 24 Pcs Wood Staining Kit Include Stain Applicator Pads and Disposable Nitrile Gloves, 12 Microfiber Sponge Pads Lint Free with 12 Rubber Gloves for Wood and Oil Based Finishes Dyeing Cleaning, White
Overview: This 24-piece staining kit provides 12 microfiber sponge pads and 12 nitrile gloves, striking a balance between bulk value and practical quantity. The white lint-free sponges measure 5.1"x3.5"x1.2", offering substantial coverage area while maintaining maneuverability. Nitrile gloves provide superior chemical resistance compared to latex, protecting hands from oil-based finishes and solvents. Designed for versatility, the kit handles staining, dyeing, and cleaning tasks across furniture, floors, cabinets, and decks, making it suitable for both dedicated projects and general household use.
What Makes It Stand Out: The nitrile glove inclusion addresses latex allergy concerns while offering better durability and chemical protection. The sponge dimensions provide optimal surface contact for efficient staining, reducing application time on larger areas. The 1:1 glove-to-sponge ratio ensures adequate protection without excess waste. White coloration allows accurate stain color monitoring during application, preventing surprises in final results.
Value for Money: Positioned as a mid-tier bulk option, this kit offers better per-unit pricing than individual purchases while avoiding the extreme quantity of 24-sponge sets. Nitrile gloves typically cost 30% more than latex, making their inclusion at this price point excellent value. For homeowners planning 2-3 staining projects annually, this quantity prevents storage overwhelm while ensuring supplies remain fresh. The quality materials justify the modest premium over bare-basics kits.
Strengths and Weaknesses: Strengths include nitrile glove superiority, lint-free microfiber performance, practical quantity for most users, excellent absorption, and versatile sizing. Weaknesses involve fewer pieces than maximum bulk options, white sponges staining permanently (cosmetic only), and gloves running slightly small for larger hands. The packaging lacks organization features for storage.
Bottom Line: A smart middle-ground purchase for serious DIYers wanting quality materials without warehouse quantities. The nitrile glove upgrade and thoughtful sponge count make this kit superior for health-conscious users tackling multiple medium-scale projects.
10. Furniture Clinic Foam Brushes | for Stain, Varnish, Oil, Paint, Dye, Sealants, and More | Perfect for Wood Furniture, Cabinets, Crafts, DIY and More | Washable and Reusable (4 Pack)

Overview: Furniture Clinic’s four-pack of foam brushes offers an eco-conscious alternative to disposable applicators. These versatile tools handle stains, varnishes, oils, paints, dyes, and sealants on wood furniture, cabinets, crafts, and more. Unlike single-use options, these brushes clean easily with warm water and mild soap for repeated use. The foam construction provides smooth application on both smooth and textured surfaces, making them suitable for indoor and outdoor projects. This reusable design appeals to environmentally aware DIYers seeking to reduce waste without sacrificing performance.
What Makes It Stand Out: The washable, reusable nature fundamentally differentiates these from microfiber and disposable alternatives, offering long-term value. The foam formulation resists solvent degradation better than expected, maintaining integrity through multiple cleaning cycles. Their versatility across diverse finishes—from thin stains to thick sealants—eliminates need for multiple brush types. The four-pack allows dedicated brushes for different product categories, preventing cross-contamination while maintaining eco-friendliness.
Value for Money: Initial cost exceeds disposable foam brushes but pays for itself within 3-4 uses. Properly maintained, each brush withstands 10+ applications, reducing per-use cost to under $0.30. The environmental savings add intangible value. Compared to premium microfiber applicators, these offer 60% cost savings over product lifetime. However, foam texture may not achieve the same ultra-smooth finish as micro-brush alternatives, potentially requiring additional investment in specialty tools for showpiece projects.
Strengths and Weaknesses: Strengths include reusability reducing environmental impact, easy cleaning process, versatility across all finish types, durability through multiple uses, and cost-effectiveness for frequent DIYers. Weaknesses involve foam potentially leaving texture on ultra-smooth finishes, requiring thorough cleaning between different chemical types, and drying time delaying project workflow. The four-count may insufficient for large, multi-product projects.
Bottom Line: Excellent investment for regular DIYers prioritizing sustainability and economy. While not matching microfiber’s flawless finish, these brushes deliver reliable results for everyday projects, making them the practical choice for environmentally conscious craftsmen.
Understanding Lap Marks: The Science Behind the Streaks
What Exactly Are Lap Marks?
Lap marks occur when partially dried stain overlaps with fresh stain application, creating visible lines where the color intensity changes dramatically. This happens because stain penetrates wood fibers at different rates depending on dryness—fresh stain soaks in deeply and darkens, while stain that’s begun to flash off (dry) repels new application, resulting in lighter areas. The problem intensifies with temperature fluctuations, humidity changes, and wood species variability. Unlike paint that sits on the surface, stain becomes part of the wood itself, making these marks particularly stubborn to fix after they appear.
Why 2026 Woodworking Demands New Solutions
Today’s wood stains feature faster flash times, lower VOC formulations, and more concentrated pigments than ever before. While environmentally superior, these modern characteristics mean traditional “work until it’s done” approaches create problems faster. Additionally, 2026’s trending wood species—like thermally modified ash and engineered bamboo—absorb stain unpredictably. The techniques below account for these variables, giving you predictable results regardless of the stain type or wood species you’re working with.
The Evolution of Stain Technology and Application Methods
The staining landscape has transformed dramatically, moving beyond simple oil-based versus water-based categories. Modern stains incorporate nano-pigments for deeper penetration, cross-linking polymers for durability, and modified solvents that evaporate in controlled patterns. These advancements mean your application technique must evolve too. The “throw it on and wipe it off” method of yesteryear simply can’t accommodate the precision these formulations demand. Understanding this evolution is your first step toward lap mark elimination.
Technique #1: The Wet-on-Wet Continuous Flow Method
Maintaining a Wet Edge in Real-Time
The wet-on-wet technique remains the gold standard, but 2026’s approach emphasizes continuous flow rather than rushed application. Start by flooding the surface with more stain than you think necessary—this keeps the surface wet longer, giving you a larger working window. Work in sections no larger than 2-3 square feet for horizontal surfaces and 4-5 linear feet for vertical pieces. The key is never allowing the leading edge to begin drying; keep a small pool of wet stain at your working border that you continuously feather into the next section.
Section Size Calculations for Your Project
Your optimal section size depends on temperature, humidity, and stain type. In 70°F and 50% humidity, water-based stains give you roughly 3-4 minutes before flashing begins. Oil-based stains extend this to 7-10 minutes. Gel stains offer the longest window at 15-20 minutes. Calculate your working speed by timing how long it takes to apply stain to a test section, then reduce that area by 20% to build in a safety margin. This mathematical approach removes guesswork and prevents the panic that leads to lap marks.
Technique #2: Strategic Zone Management with Timer Protocols
Mapping Your Workspace
Before opening the stain can, divide your project into logical zones based on natural breaks in the woodwork—corners, edges, or architectural details. Mark these zones with painter’s tape on the surrounding area (never on the wood itself) and number them in your application sequence. This visual roadmap prevents you from accidentally working backward or skipping sections, which is a common cause of lap marks when you have to return to a partially dried area.
The 5-Minute Rule for Optimal Blending
Set a visual timer where you can see it without stopping work. The 5-minute rule states you must complete each zone within five minutes and immediately begin blending into the next zone while the overlap area remains wet. If you exceed five minutes, stop and allow that zone to dry completely before proceeding. Attempting to fix a zone that’s begun flashing almost always creates darker lap marks. This disciplined approach feels restrictive initially but produces flawless results consistently.
Technique #3: Advanced Tool Selection for Controlled Delivery
Brush Features That Prevent Marks
Not all brushes are created equal for stain application. Look for brushes with flagged bristle tips—split ends that hold more stain and release it gradually. The bristle material matters significantly: natural China bristle works best for oil-based stains, while synthetic blends excel with water-based formulas. Brush width should match your project scale; a 3-inch brush covers large panels efficiently, while a 1.5-inch brush provides control for detailed work. The ferrule (metal band) should be rust-resistant to prevent contamination that can affect stain flow.
Applicator Pad Technology
Foam applicator pads have evolved beyond basic sponges. Modern microfiber-covered pads provide uniform stain distribution and hold more product than traditional foam. For large surfaces like tabletops, consider a stain pad with a built-in reservoir that feeds stain continuously through the surface. This eliminates the stop-and-reload motion that creates application lines. The key feature to evaluate is the pad’s absorption rate—too absorbent and you’ll waste stain; too dense and you’ll create streaks.
Technique #4: Flash Time Manipulation Through Environmental Control
Understanding Flash Time in Different Stain Types
Flash time—the period between application and when the stain begins to set—is your critical window. Water-based stains flash fastest due to rapid water evaporation, often beginning within 2-3 minutes in dry conditions. Oil-based stains flash more slowly as solvents evaporate gradually. Gel stains have the longest flash time because they sit on the surface longer before penetrating. In 2026’s market, you’ll find “extended open time” formulations that chemically retard flashing, giving you up to 30% more working time.
Creating the Ideal Drying Environment
Control your workspace climate actively, not passively. For water-based stains, maintain 60-70°F and 50-60% humidity—this slows evaporation just enough to extend your working time without compromising cure time. For oil-based stains, slightly warmer conditions (70-75°F) with lower humidity (40-50%) help solvents evaporate predictably. Use a portable hygrometer and thermometer to monitor conditions in real-time. In extreme climates, consider a temporary plastic tent around your project with a small humidifier or dehumidifier to create a microclimate.
Technique #5: The Progressive Dilution Technique
Building Color in Transparent Layers
Instead of applying one heavy coat, the progressive dilution technique builds color through 2-3 thin layers. Start with stain diluted 25% with the appropriate thinner (water for water-based, mineral spirits for oil-based). This ultra-thin first coat penetrates deeply and uniformly, creating a color foundation without surface buildup. Subsequent coats use progressively less dilution (10% then full strength) to build richness. Each layer flashes faster than a heavy coat would, but because you’re working thin, lap marks have less pigment to create visible lines.
Maintaining Consistency Across Dilutions
The challenge with dilution is maintaining consistent color ratios across your entire project. Mix all your diluted stain in one large batch before starting—never mix small batches mid-project. Use measuring cups marked in milliliters for precision, and write your exact ratio on the container. If you must mix more mid-project, measure by weight using a digital scale rather than volume, as temperature affects volume. This scientific approach ensures each section receives identical color chemistry.
Technique #6: Directional Application Following Wood Grain Patterns
Reading Grain Direction Like a Master Craftsman
Lap marks become more visible when they cross grain lines because the pigment accumulates differently across the wood’s cellular structure. Always apply stain parallel to the dominant grain direction. On complex grain patterns like birdseye maple or crotch walnut, identify the primary flow direction and follow it, even if it means changing your body position frequently. For end grain, which absorbs stain darker, apply stain from the edge inward, never across the end grain face.
The 45-Degree Rule for Complex Grain
When grain direction changes abruptly, use the 45-degree rule: apply stain at a 45-degree angle to the change line, working a small overlap zone of 2-3 inches. This feathering technique disguises the transition because the stain flows partially with both grain directions. Immediately follow with a dry brush (a clean brush with no stain) feathered lightly over the transition to blend any visible lines. This two-step process is essential for figured woods where grain direction shifts constantly.
Technique #7: Pre-Stain Conditioning for Uniform Absorption
When to Use Wood Conditioner
Pre-stain conditioner isn’t just for softwoods—it’s your secret weapon against lap marks on any wood that absorbs stain unevenly. Apply conditioner when working with woods that have varying density, such as poplar, pine, or cherry with its blotchy tendencies. The conditioner partially seals the wood’s surface, creating a more uniform absorption rate. This means when you overlap stain, both the fresh and partially dried areas accept pigment more similarly, reducing the contrast that creates visible lap marks.
Application Timing for Maximum Effect
Conditioner timing is critical. Apply a generous coat and let it penetrate for 5-15 minutes—never let it dry completely. The surface should feel slightly tacky, like tape that’s lost its aggressive stick. If you apply stain too early, the conditioner is still liquid and gets wiped away with excess stain. Too late, and it creates a barrier that prevents stain penetration. Wipe off any excess conditioner that hasn’t absorbed after 15 minutes with a clean, dry cloth before staining. This window is narrow but makes an enormous difference in lap mark prevention.
Technique #8: Temperature and Humidity Synchronization
The 2026 Climate-Controlled Workspace Standards
Professional finishers now treat environmental control as essential, not optional. For spaces without HVAC control, create a staging protocol: bring wood indoors 48 hours before staining to acclimate, and maintain consistent temperature within 5 degrees throughout the staining and curing process. Use infrared thermometers to check wood surface temperature, not just air temperature—wood sitting near a window can be 10 degrees cooler than the room, affecting stain absorption dramatically.
Seasonal Adjustments for Home Workshops
Winter staining requires special attention to humidity. Cold air holds less moisture, so even indoor heating creates dry conditions that accelerate flashing. Counteract this by placing water trays near your project or running a humidifier set to 55%. In summer, high humidity slows oil-based stain curing, increasing the window for lap marks but also extending the time dust can settle. Use a dehumidifier to maintain 50% humidity, and increase air circulation with a fan pointed away from the project to avoid direct airflow that causes uneven drying.
Technique #9: Multi-Layer Gradient Building with Flash Time Awareness
Layer Timing for Depth Without Marks
Building color in layers gives you automatic lap mark protection if you respect flash time between coats. Apply the first coat and allow it to dry completely—typically 4-6 hours for water-based, 8-12 hours for oil-based. Lightly scuff with 320-grit sandpaper to create microscopic scratches that help the next coat adhere uniformly. The second coat will have a fresh, uniform surface to bond to, making lap marks nearly impossible because you’re not fighting partially absorbed stain from the previous application.
Sanding Between Layers: The Critical Step
The secret to invisible layers is using a sanding sponge rather than paper for inter-coat abrasion. Sanding sponges conform to curves and apply pressure more evenly, preventing swirl marks that show through subsequent stain layers. Sand with the grain using light pressure—your goal is to knock down raised grain and create texture, not remove color. Vacuum thoroughly with a brush attachment, then wipe with a tack cloth dampened with mineral spirits (for oil-based) or water (for water-based) to remove every particle of dust that could interfere with uniform absorption.
Technique #10: The Hybrid Stain System Approach
Combining Stain Types for Optimal Results
2026’s most innovative technique involves using two different stain types on the same project. Begin with a thin, diluted water-based stain as your base color—it dries quickly and provides deep penetration without surface buildup. Once dry, apply a gel stain as your secondary color. Gel stains sit on the surface longer, allowing you to manipulate and blend extensively without lap marks because they don’t penetrate deeply. This combination gives you the best of both worlds: depth from the water-based stain and controlled, mark-free application from the gel.
The Base-Tone Method
The hybrid system works because each stain type performs a different job. The water-based base tone establishes overall color and grain definition. The gel stain adds richness and can be applied in sections with generous overlap time since it doesn’t create lap marks as readily. When overlapping gel stain, work from the dry area into the wet area, opposite of traditional methods. This pulls excess stain from the wet edge and blends it seamlessly. Wipe back gel stain gently with the grain using cheesecloth rather than rags for a more uniform removal pattern.
Understanding Stain Formulations: Features to Consider
Oil-Based vs. Water-Based: Lap Mark Implications
Oil-based stains traditionally offer longer working times but can create severe lap marks if you work too slowly because they penetrate deeply and permanently. Water-based stains flash faster but are more forgiving to overlap because the pigments sit higher in the wood cell structure. When selecting between them, consider your project size and experience level. Large surfaces benefit from oil’s extended open time, while smaller projects or vertical surfaces where runs are a concern suit water-based formulations better. The key feature to evaluate is the resin type—alkyd resins in oil-based stains level better than acrylic resins in water-based, reducing brush marks that accentuate lap lines.
Gel Stains and Their Unique Properties
Gel stains represent the ultimate lap mark solution for beginners and experts alike. Their thick, pudding-like consistency doesn’t drip or run, and it stays workable for 20+ minutes. The pigments are suspended in a gel medium that sits on the wood surface, allowing you to blend and manipulate extensively. However, gel stains require a different application technique—apply with a rag or pad in circular motions to work it into the wood, then wipe with the grain. Never apply gel stain with a brush on large surfaces, as brush strokes become visible texture lines.
Essential Tool Features for Lap Mark Prevention
Bristle Types and Their Impact
Bristle selection directly affects lap mark formation. For oil-based stains, natural bristles hold more product and release it slowly, maintaining a wet edge longer. For water-based stains, synthetic bristles with flagged tips prevent the brush from becoming waterlogged, which causes drips and uneven application. The bristle bundle density matters—loosely packed brushes hold less stain, requiring frequent reloading that interrupts your rhythm. Look for brushes with chisel-tipped ends that allow precise cut-in work along edges without needing tape, which can create its own line issues.
Pad Materials and Absorption Rates
Staining pads have evolved significantly. Microfiber pads with looped fibers hold stain in the base and release it through the tips, providing incredibly uniform coverage. Foam pads with a textured surface create less pooling than smooth foam. For the most control, consider a wool applicator pad—the natural lanolin in wool helps stain flow smoothly, and the material conforms to wood contours better than synthetic alternatives. The feature to prioritize is the pad’s “load capacity”—how much stain it holds before requiring reload. Higher capacity means fewer interruptions and more consistent application.
Wood Species-Specific Strategies
Porous Woods: Pine, Fir, and Birch
Softwoods present unique lap mark challenges because earlywood (spring growth) absorbs stain darker than latewood (summer growth), amplifying any overlap issues. The solution is two-fold: first, sand to 220-grit, no finer—over-sanding polishes the surface and creates uneven absorption. Second, apply stain with a “flood and wipe” technique using a stain-soaked rag rather than a brush. Rags deposit less stain overall, reducing the contrast between overlapped areas. Work in smaller sections, roughly 1 square foot at a time, to maintain control.
Dense Hardwoods: Maple, Cherry, and Oak
Hardwoods fight stain absorption, making lap marks appear as light lines where fresh stain couldn’t penetrate dried areas. The key is raising the grain before staining. Wipe the sanded wood with a damp cloth, let it dry, then sand again with 320-grit. This opens the wood’s pores. Apply stain with a brush using firm pressure to work it into the surface. For oak’s open grain, use a stippling motion—dab the brush vertically into the wood—to ensure stain packs into the grain. On maple and cherry, long, smooth strokes parallel to the grain prevent streaking.
Troubleshooting Guide: Correcting Lap Marks Mid-Project
The Wipe-Back Technique
If you spot a lap mark while the stain is still wet, stop immediately. Dip a clean rag in the appropriate thinner (water or mineral spirits) and wring it out until it’s barely damp. Gently wipe across the lap mark, perpendicular to the direction you applied the stain, using light pressure. This redistributes the pigment without removing all color. Immediately reapply a thin coat of stain to the entire section, feathering well beyond the problem area. This works best within the first 2-3 minutes of the lap mark forming.
Spot Blending for Minor Corrections
For lap marks discovered after the stain has dried, use a spot-blending technique. Lightly sand the entire affected area with 400-grit sandpaper, just enough to break the surface. Apply a small amount of stain to a rag and rub it into the light area, gradually feathering into the surrounding darker wood. The goal is to darken the light lap mark, not lighten the dark area. This requires patience and multiple thin applications. For severe lap marks, you may need to sand back to bare wood and restart the section, but this is preferable to a permanent blemish.
Long-Term Maintenance to Preserve Stain Uniformity
Protective Topcoat Application
The final topcoat can reveal lap marks that weren’t visible in the raw stain stage. Apply the first coat of polyurethane, lacquer, or varnish using the same wet-on-wet technique you used for staining. Use a high-quality synthetic brush and work in the same section sizes. The first coat will slightly reactivate the stain, allowing minor lap marks to blend. Subsequent coats can be applied more conventionally. The key feature in topcoat selection is solids content—higher solids fill wood pores more completely, creating a level surface that disguises any minor imperfections.
Cleaning Products That Won’t Create New Marks
Once your project is complete, avoid cleaners that contain ammonia, alcohol, or harsh solvents, as these can break down the stain and create light spots over time. Use pH-neutral wood cleaners and apply them with a misting spray bottle rather than pouring directly onto the surface. Wipe with the grain using a microfiber cloth that won’t shed lint. For oiled finishes, refresh the surface annually with a thin coat of the same oil, applied with a rag in circular motions, then buffed with the grain—this maintains uniform color and prevents the dry patches that can mimic lap marks.
Frequently Asked Questions
How do I know if I’m working fast enough to prevent lap marks?
Time yourself applying stain to a 2x2 foot test panel. If the stain begins to feel tacky before you finish, your section is too large. Reduce it by 25% and test again. The goal is completing application with 30-60 seconds to spare for feathering edges.
Can lap marks be completely removed after the stain has dried?
Partially. Light sanding and spot-staining can reduce visibility by 80-90%, but complete removal usually requires sanding back to bare wood. The success depends on the stain type and wood species. Gel stains are most forgiving for corrections; water-based stains are least forgiving.
What’s the ideal humidity level for staining to prevent lap marks?
Maintain 45-55% relative humidity. Below 40%, water-based stains flash dangerously fast. Above 60%, oil-based stains cure too slowly, increasing dust contamination risk. Use a digital hygrometer placed at project height, not wall height, for accurate readings.
Are darker or lighter stains more prone to showing lap marks?
Darker stains show lap marks more dramatically because the pigment contrast is higher. However, lighter stains can be more challenging to correct because you have less pigment to work with when spot-blending. Medium-toned stains offer the best balance of hide and forgiveness.
Should I stain in direct sunlight or shade?
Always stain in shade or indirect light. Direct sunlight creates hot spots that accelerate flashing unevenly across your project. If working indoors near windows, rotate the piece every 15 minutes or cover windows with sheer curtains to diffuse light uniformly.
How long should I wait between stain coats to avoid creating new lap marks?
Wait until the first coat is completely dry: 4-6 hours for water-based, 8-12 hours for oil-based, and 24 hours for gel stains. Test dryness by pressing a cotton ball to an inconspicuous area—if it picks up color, it’s not ready. Rushing this step causes the second coat to reactivate the first, creating new lap marks.
Can I use a paint sprayer to avoid lap marks entirely?
Yes, but with caveats. Spraying eliminates brush overlap marks but creates new challenges: overspray patterns, dry spray edges, and inconsistent build on vertical surfaces. If spraying, use a “wet spray” technique with reduced air pressure and higher fluid flow, and always back-brush immediately with a dry brush to even out the application.
What’s the best way to stain large surfaces like tabletops without help?
Divide the tabletop into quadrants using the wet-on-wet method. Start at the center and work outward toward edges, maintaining a wet edge in all directions. Use a stain applicator pad on a pole to extend your reach without leaning over the work. Apply stain to the entire quadrant within your timed window, then immediately wipe with the grain using a separate pad.
Do I need to sand between stain coats if I’m building color?
Always scuff between coats with 320-400 grit sandpaper. This isn’t for smoothing but for creating mechanical adhesion and removing raised grain. Skip this step and your second coat may sit unevenly, creating texture variations that look like lap marks under finish. Use a light touch—your goal is to scratch the surface, not remove color.
Why do my lap marks appear worse after applying polyurethane?
Polyurethane’s wet appearance temporarily changes how you perceive color depth, revealing inconsistencies that were subtle in the raw stain. The solution is applying a “wash coat” first: dilute your first coat of polyurethane 50% with its appropriate thinner. This thin coat penetrates and slightly reactivates the stain, allowing minor lap marks to blend before you build the full finish system.
See Also
- 10 Essential Wood Stain Applicators That Prevent Brush Marks in 2026
- 10 Wood Stain Applicators That Prevent Brush Marks in 2026
- 10 Wood Stain Applicators That Eliminate Brush Marks in 2026
- 10 Wood Stain Sealers That Solve Grain-Raising Issues in 2026
- 10 Best Value Wood Stain Sprays for Large Surface Projects Under $20