Table of Contents
There’s nothing quite like the sinking feeling of peeling back your veneer press to find a constellation of bubbles marring what should be a flawless surface. You’ve selected the perfect grain, matched your sequences, and mixed your adhesive with surgical precision—yet those persistent air pockets threaten to undo hours of meticulous work. The difference between amateur results and professional-grade veneer work rarely comes down to skill alone; it hinges on having the right clamping strategy that delivers consistent, even pressure across every square inch of your workpiece.
As we move through 2026, edge clamp technology has evolved dramatically, incorporating smart pressure monitoring, advanced composite materials, and ergonomic designs that transform veneer work from a stressful guessing game into a repeatable, reliable process. This comprehensive guide walks you through the essential features and considerations for building a clamping arsenal that virtually guarantees bubble-free results, whether you’re applying delicate crotch walnut to a jewelry box or laying up large sequenced panels for statement furniture.
Top 10 Edge Clamps


Detailed Product Reviews
1. Semble Edge Band Spring Clamp Set, 10 Piece Pack, 3" Opening, Non-Marring + Anti-Slip, Durable Plastic Construction for Edge Banding, Molding, and Trim BANDCLAMP-10P

Overview: The Semble 10-piece spring clamp set delivers a comprehensive solution for woodworkers tackling edge banding and trim projects. These 3-inch capacity clamps feature durable plastic construction with integrated rubber bands that provide consistent pressure without marring delicate surfaces. Engineered for one-handed operation, they excel at holding veneers, moldings, and edge banding securely while adhesive cures, making them accessible for both professionals and hobbyists tackling cabinetry and furniture work.
What Makes It Stand Out: The generous ten-clamp quantity distinguishes this set, enabling work on longer sections or multiple projects simultaneously. The 3-inch jaw opening accommodates most cabinetry thicknesses, while the anti-slip rubber band design distributes pressure evenly across the entire clamping surface. This eliminates pressure points that traditional metal clamps create, making them ideal for finished surfaces and delicate veneers where protection is paramount.
Value for Money: Priced around $2-3 per clamp, this set offers exceptional value for occasional users. While professional-grade metal clamps cost $15-25 each, these plastic alternatives provide adequate clamping force for most edge banding tasks. Bulk packaging reduces per-unit cost significantly compared to individual purchases, though plastic construction means trade-offs in longevity versus metal counterparts.
Strengths and Weaknesses: Pros include the non-marring design, lightweight construction, rapid one-handed deployment, and cost-effective quantity. Cons involve plastic durability limitations under heavy stress and moderate clamping force insufficient for thick hardwood edging. The rubber bands may wear over time with heavy use, requiring replacement.
Bottom Line: Ideal for DIY enthusiasts and weekend woodworkers, this 10-pack delivers the quantity and convenience needed for most edge banding tasks. Professionals should consider these as supplementary clamps for delicate work while relying on metal clamps for heavy-duty applications requiring maximum pressure and durability.
2. Olympia Tools 3-Way Edging Clamp, 38-192,Black

Overview: The Olympia Tools 38-192 offers professional-grade precision for installing moldings and trim. This single heavy-duty clamp features a malleable iron reinforced frame with black oxide spindle, delivering three-way clamping pressure for complex edge banding applications. With a 2.75-inch throat depth and swivel saddles, it provides targeted, even pressure distribution for high-quality cabinetry and furniture work where alignment is critical.
What Makes It Stand Out: Unlike spring-loaded alternatives, this clamp applies controlled, adjustable pressure from three directions simultaneously. The heavy-duty iron construction ensures durability under maximum torque, while the swivel saddles adapt to irregular surfaces. This precision control makes it invaluable for solid wood edging, thick laminates, and critical alignment tasks where uniform pressure prevents glue line failure and ensures professional results.
Value for Money: At $20-25 for a single clamp, this represents a professional investment rather than bulk convenience. While significantly more expensive than plastic spring clamps, the superior clamping force and durability justify the cost for tradespeople. Hobbyists may find the price steep for occasional use, but the lifetime warranty and rebuildable design offset initial expense over years of service.
Strengths and Weaknesses: Pros include exceptional clamping power, precision control, durable metal construction, and versatility for complex applications. Cons involve higher cost per unit, slower setup than spring clamps, and weight that may fatigue users during extended sessions. The single-unit purchase requires multiple buys for longer workpieces, increasing total investment.
Bottom Line: Essential for professional cabinetmakers and serious woodworkers demanding precision and durability. The three-way pressure system solves alignment challenges that spring clamps cannot address. DIYers should invest only if regularly tackling complex edge banding; otherwise, economical spring clamp sets better serve intermittent needs and smaller budgets.
3. Semble Edge Band Spring Clamp Set, 2 Piece (Pair), 3" Opening, Non-Marring + Anti-Slip, Durable Plastic Construction for Edge Banding, Molding, and Trim BANDCLAMP-2P

Overview: The Semble 2-piece clamp set delivers the same functional design as its larger sibling in a minimal package. These 3-inch spring clamps feature identical non-marring rubber bands and one-handed operation, making them suitable for small-scale edge banding projects. The pair serves as an affordable entry point for beginners or a supplemental addition for woodworkers needing a few extra clamps for quick repairs.
What Makes It Stand Out: This set provides the same protective clamping technology as the 10-pack without requiring bulk purchase. The 3-inch jaw capacity handles standard cabinetry thicknesses, while the anti-slip rubber design ensures even pressure distribution. It’s essentially a trial-sized version of the popular larger set, allowing users to evaluate performance before committing to a full kit or adding to existing collections.
Value for Money: Priced at $6-8 for two clamps, the per-unit cost runs higher than the 10-pack but remains affordable for limited budgets. This represents sensible value for those testing the waters or completing single small projects. However, frequent users will quickly outgrow this quantity and spend more overall than if they’d purchased the larger set initially, making it economically inefficient for regular use.
Strengths and Weaknesses: Pros include low entry cost, identical features to the larger set, lightweight handling, and non-marring protection. Cons center on insufficient quantity for most projects, higher per-clamp pricing, and the same plastic durability limitations as the full set. Two clamps rarely suffice for even modest edge banding tasks, limiting practical utility.
Bottom Line: Best suited for absolute beginners with minimal projects or as emergency backup clamps. Serious hobbyists should skip directly to the 10-pack for better value and workflow efficiency. Consider this a sampler, not a solution, for edge banding work, and plan to upgrade quickly as skills develop.
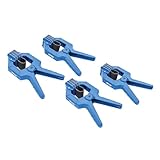
4. BUILDSOMETHING Edge Band Spring Clamp - Home Improvement Hand Tools - Adjustable Band Clamps for Woodworking, Carpentry & More - Set of 4

Overview: The BUILDSOMETHING 4-pack occupies a middle ground between plastic and professional metal clamps. These spring clamps feature special-grade spring steel construction with movable jaws and rubber pads, offering enhanced durability over all-plastic designs. The set targets serious DIYers and semi-professionals seeking reliable performance without premium pricing, bridging a key market gap.
What Makes It Stand Out: The spring steel internal mechanism provides superior clamping force compared to plastic alternatives while maintaining the convenience of spring-loaded operation. Movable jaws with rubber pads adapt to various workpiece shapes and protect surfaces effectively. This hybrid approach bridges the gap between disposable plastic clamps and heavy-duty professional tools, offering a compelling compromise.
Value for Money: At $15-20 for four clamps, this set costs more than plastic alternatives but significantly less than professional-grade tools. The steel components justify the price premium through extended lifespan and stronger clamping pressure. For woodworkers regularly tackling edge banding, this represents a smart mid-tier investment that pays dividends in durability and performance.
Strengths and Weaknesses: Pros include stronger clamping force than plastic, adaptable jaw design, improved durability, and better long-term value. Cons involve unknown brand reputation, limited quantity for large projects, and potential quality control inconsistencies. The steel springs may rust if not maintained properly in humid environments, requiring occasional oiling.
Bottom Line: An excellent choice for serious hobbyists and semi-professionals seeking durability beyond plastic without professional pricing. The enhanced clamping force handles most edge banding tasks competently. Buy with confidence for regular use, but professionals should still consider the precision of three-way clamps for critical, high-stakes work requiring flawless alignment.
5. VMTW Band Clamp 12 pack for edge clamping, banding on shelving, cabinet edges, plywood edging, laminations

Overview: The VMTW 12-pack offers the highest quantity among plastic spring clamp options, making it ideal for production-style edge banding. These clamps feature rugged engineered plastic construction with robust springs, providing 2-1/8 inch opening capacity. Designed specifically for high-volume applications like shelving and cabinet production, they deliver consistent performance across numerous workpieces without breaking the bank.
What Makes It Stand Out: The 12-clamp quantity enables continuous workflow on extensive projects without interruption. The engineered plastic resists glue adhesion, simplifying cleanup remarkably. Strong springs generate impressive clamping pressure for plastic clamps, while the 2-1/2 inch depth accommodates standard plywood edging. This set prioritizes quantity and functionality for repetitive tasks in busy workshops.
Value for Money: Priced around $1.50-2 per clamp, this represents the best bulk value in the plastic clamp category. The per-unit cost undercuts most competitors while delivering comparable performance. For shops producing multiple pieces simultaneously, the quantity alone justifies the investment, reducing project timelines significantly and improving overall efficiency.
Strengths and Weaknesses: Pros include exceptional quantity value, strong spring pressure, glue-resistant plastic, and suitability for production work. Cons involve slightly smaller jaw opening than some competitors, plastic construction limitations, and potential inconsistency across twelve units. The bulk packaging may include occasional defective clamps, requiring inspection upon arrival.
Bottom Line: Outstanding value for high-volume edge banding operations and serious hobbyists tackling large projects. The quantity advantage streamlines workflow dramatically. While not professional-grade metal, these clamps outperform expectations for plastic construction. Purchase for quantity needs, but verify each clamp’s function upon arrival to ensure consistent performance.
Understanding the Veneer Bubbling Challenge
Veneer bubbling isn’t just an aesthetic problem—it’s a structural failure waiting to happen. Those trapped air pockets create weak points where moisture can infiltrate, glue can degrade, and your masterpiece can delaminate months after completion. The root cause almost always traces back to uneven pressure distribution during the critical adhesive curing window.
The Science Behind Veneer Adhesion
When you spread adhesive onto a substrate, you’re creating a microscopic landscape of peaks and valleys. Your veneer lays across this terrain, and proper clamping force collapses those peaks, forcing adhesive into every fiber while expelling trapped air. Too much pressure in one area squeezes out glue, creating dry spots. Too little pressure leaves high points where air remains trapped. The sweet spot requires uniform pressure between 15-25 PSI across the entire surface—a range that feels intuitive only after years of experience or with the right tools.
Why Traditional Clamping Methods Fail
The classic bar clamps and C-clamps that serve you well in solid wood joinery become liabilities in veneer work. Their concentrated pressure points create starburst patterns of compression, leaving surrounding areas under-clamped. Spring clamps offer laughably inconsistent force. Even traditional vacuum bags, while better, struggle with edge details and can collapse on themselves before full pressure reaches the perimeter. This is where purpose-designed edge clamping systems separate themselves from general-purpose hardware.
How Edge Clamps Have Evolved for 2026 Veneer Applications
The edge clamps of 2026 bear little resemblance to their predecessors. Manufacturers have responded to the precision demands of modern veneer work with innovations that would have seemed futuristic just five years ago. Today’s clamps integrate pressure sensors that connect to smartphone apps, jaws machined from self-lubricating polymers, and adjustment mechanisms that move in increments of hundredths of an inch.
Smart Pressure Monitoring Technology
The most significant breakthrough has been the integration of micro-load cells within clamp jaws. These sensors provide real-time pressure feedback, often displayed on embedded OLED screens or transmitted via Bluetooth to your device. For veneer work, this means you can dial in exactly 18 PSI across every clamp in your setup, ensuring uniform curing conditions. Some systems even alert you if pressure drops due to adhesive squeeze-out or temperature changes during overnight cures.
Advanced Composite Materials
Modern clamps utilize carbon fiber reinforced throats and aircraft-grade aluminum bodies that maintain rigidity while shedding weight. The jaw faces now feature replaceable pads made from closed-cell foam densities specifically engineered for veneer work—soft enough to conform to subtle surface variations but firm enough to maintain consistent pressure. These materials won’t mar even the most delicate figured maple or oxidize and stain light-colored veneers.
Key Pressure Distribution Mechanics in Modern Edge Clamps
Understanding how pressure flows from your clamp to your veneer is fundamental to selecting the right tools. The physics of clamping has been studied extensively, and 2026’s best designs apply these principles with surgical precision.
Understanding PSI Requirements for Veneer
Different veneer species and thicknesses demand specific pressure ranges. Paper-backed veneers require gentler 12-18 PSI to avoid crushing the fiber layer. Raw wood veneers need 18-25 PSI for proper adhesive penetration. Exotic burls and crotch figures, with their wildly irregular grain, benefit from variable pressure zones that some advanced clamps can create through segmented jaw designs. Your clamp collection should accommodate this spectrum without forcing compromises.
The Role of Jaw Conformity
The most overlooked specification is jaw parallelism under load. When you tighten a clamp, the jaws should remain perfectly parallel or, in some advanced designs, develop a calculated micro-bow that compensates for natural adhesive squeeze-out patterns. Clamps with poor jaw conformity create pressure gradients that are invisible to the eye but glaringly obvious once the veneer dries. Look for models that specify jaw deflection under maximum load—anything more than 0.002 inches over a 24-inch span will cause problems in critical work.
Essential Clamp Jaw Features for Delicate Veneer Work
The business end of your clamp makes or breaks your veneer project. Jaw design has become increasingly sophisticated, addressing the unique challenges of working with materials that can be damaged by a single over-tightening.
Non-Marring Surface Technologies
Beyond basic plastic pads, 2026’s premium clamps feature multi-layer jaw faces. The inner layer provides rigid support, while the outer layer uses viscoelastic polymers that conform to surface irregularities without leaving impressions. Some designs incorporate micro-perforations that allow air to escape laterally, preventing trapped pockets at the jaw-veneer interface. For ultra-delicate work, look for clamps offering interchangeable pads ranging from Shore A 30 durometer (soft) to 70 durometer (firm).
Optimal Jaw Width for Different Veneer Types
Jaw width directly affects pressure distribution patterns. For edge banding and narrow strips, 1-inch jaws provide concentrated force right where you need it. For panel work, 3-4 inch jaws spread pressure more evenly and reduce the total number of clamps required. The latest modular systems allow you to swap jaw widths on the same clamp body, letting you configure tools for the task rather than maintaining separate collections.
The Critical Role of Throat Depth in Veneer Projects
Throat depth determines how far you can reach into a panel from the edge—crucial for large tabletops and cabinet sides where interior pressure is just as important as perimeter clamping.
Calculating Required Throat Depth
Measure your typical project sizes and add 2 inches for comfortable positioning. A 12-inch throat depth handles most cabinet work, while 18-24 inches becomes necessary for dining tables and architectural panels. The mistake many woodworkers make is choosing clamps based on their largest project, resulting in oversized tools for daily tasks. The 2026 solution is investment in a few deep-throat models for occasional use while standardizing on 8-10 inch throats for routine work.
Deep Reach vs. Standard Depth Applications
Deep-throat clamps present unique challenges—they’re prone to flexing, which creates pressure falloff toward the jaw tips. Modern designs counter this with truss-style reinforcement and dual-threaded spindles that apply force at two points along the jaw. For standard-depth work, these features become unnecessary weight and expense. Understanding this tradeoff helps you allocate your budget toward clamps you’ll actually use rather than impressive specs that rarely matter.
Material Compatibility: What Your Clamp Pads Should Be Made Of
The interface between clamp and veneer deserves as much consideration as your adhesive choice. Pad material affects not just protection but also the quality of pressure transfer.
Cork vs. Rubber vs. Silicone
Cork pads, the traditional choice, offer excellent conformity and moisture absorption but compress permanently over time, requiring frequent replacement. Modern silicone-impregnated cork composites solve this, maintaining resilience through hundreds of cycles. Solid silicone pads provide unmatched durability and temperature resistance, crucial when using hot hide glue or working in unheated shops. Rubber pads, particularly neoprene, strike a balance but can interact chemically with certain adhesives—always verify compatibility with your preferred glue system.
Custom Pad Solutions for Exotic Veneers
For highly figured or end-grain veneers, consider creating custom pads from medium-density fiberboard (MDF) faced with wax paper. The MDF distributes pressure perfectly while the wax paper prevents adhesion and allows lateral air movement. Some 2026 clamp systems offer magnetic pad holders that let you attach custom surfaces in seconds, expanding your options without permanent modifications.
Adjustability and Fine-Tuning Capabilities
Veneer work demands incremental adjustments that feel intuitive under your fingers. The difference between a good clamp and a great one often lies in how precisely you can modulate pressure.
Micro-Adjustment Mechanisms
Look for clamps featuring dual-pitch threads—coarse for rapid positioning, fine for pressure refinement. The finest examples offer 24 threads per inch on the adjustment screw, translating a quarter-turn into barely perceptible pressure changes. Some premium models incorporate planetary gear systems that provide 10:1 reduction ratios, letting you make sub-pound adjustments even under full load.
Pressure Control Precision
The tactile feedback from a quality clamp tells you as much as any gauge. Premium models use preloaded ball bearings in the adjustment mechanism, eliminating backlash and giving you immediate response to input. This direct connection between hand and jaw prevents the over-tightening that crushes veneer fibers and the under-tightening that invites bubbles.
Parallel Clamping vs. Edge Clamping: Making the Right Choice
The terminology confuses many woodworkers, but understanding the distinction is crucial for building an effective clamping arsenal.
When to Use Each Type
Parallel clamps maintain jaw parallelism through their entire range—ideal for flat panel work where uniform pressure across the width is critical. Edge clamps apply pressure at a right angle to the jaw face, perfect for applying edge banding and solid wood edges to panels. For veneer work, the choice depends on your substrate: use parallel clamps for flat press situations and edge clamps when wrapping edges or working on curved forms.
Hybrid Approaches for Complex Projects
The most sophisticated 2026 workflows often combine both types. You might use parallel clamps across the main field of a tabletop while edge clamps secure the perimeter, creating a hybrid pressure system that addresses the different stress patterns at edges versus centers. Some manufacturers now offer conversion kits that transform parallel clamps into edge clamps with a simple jaw swap, giving you maximum versatility with fewer tools.
Lightweight vs. Heavy-Duty: Matching Clamp Weight to Project Scale
The weight of your clamps affects not just shipping costs but also your work quality and physical stamina during long sessions.
Portable Options for On-Site Work
For architectural millwork or repair jobs, carbon fiber clamps weighing under 2 pounds provide adequate pressure without the fatigue of hauling traditional steel clamps. These models typically top out at 500 PSI clamping force—plenty for most veneer work but insufficient for bent laminations or hardwood edge banding. Their real advantage lies in the ability to position and adjust with one hand while holding veneer in place with the other.
Stationary Heavy-Duty Systems
Shop-based veneer presses benefit from clamps that stay put. Cast iron and steel models weighing 8-12 pounds each provide the mass and stability needed for large panels and the high pressures required for vacuum-assist clamping systems. The weight becomes an asset, holding the clamp steady during adjustment and preventing walking under vibration from nearby machinery. For 2026’s large-format veneer work, these heavyweights remain irreplaceable.
Automation and Smart Features in 2026 Clamping Systems
Digital integration has transformed clamping from a manual art into a data-driven process. These features aren’t gimmicks—they provide reproducibility that separates consistent professionals from hit-or-miss hobbyists.
Digital Pressure Gauges and Alerts
Integrated load cells now offer accuracy within ±0.5 PSI, displayed on sunlight-readable screens. More importantly, they can be programmed with pressure profiles that ramp up gradually, hold for a set duration, then release—perfect for adhesives that require staged curing. The best systems log data for quality control, letting you verify every clamp in a large panel reached target pressure and maintained it throughout the cure cycle.
Bluetooth Connectivity and App Integration
Companion apps allow you to monitor dozens of clamps simultaneously from your tablet. You can name each clamp by position, set individual pressure targets for different zones of a complex panel, and receive push notifications if any clamp needs attention. For production shops, this data integrates with project management software, creating digital paper trails for client work and warranty purposes.
The Importance of Quick-Release Mechanisms for Efficiency
Time is adhesive’s enemy. The longer your glue sits open before pressure is applied, the more it skins over and loses strength. Quick-release mechanisms slash setup time from minutes to seconds.
One-Handed Operation Benefits
The latest trigger-style releases let you position, tighten, and lock a clamp with one hand while your other hand holds veneer alignment. This is particularly crucial when working with large sheets that shift easily or when using fast-curing urea-formaldehyde adhesives that demand rapid assembly. Look for mechanisms that release under load without requiring you to back off the adjustment screw—this feature alone can cut your setup time by 60%.
Safety Considerations
Quick-release becomes a safety feature when something goes wrong. If you notice a misalignment or adhesive contamination, being able to instantly release pressure prevents ruining expensive veneer. Traditional clamps force you to spend precious minutes backing off screws while glue continues curing under incorrect pressure. The best modern systems include safety interlocks that prevent accidental release while maintaining one-button emergency pressure dumping.
Corrosion Resistance and Longevity Considerations
Veneer work is messy. Glue squeeze-out, moisture from water-based adhesives, and shop humidity attack unprotected metal, compromising both function and appearance.
Best Materials for Workshop Environments
Stainless steel hardware has become the baseline for quality clamps, but 2026’s premium models use titanium-coated adjustment screws and anodized aluminum bodies that resist both corrosion and adhesive buildup. The internal mechanisms feature sealed bearings and self-lubricating bushings that never need maintenance. Consider your adhesive chemistry: acidic hide glues accelerate corrosion in non-stainless components, while epoxy residue can seize lesser mechanisms permanently.
Maintenance Schedules
Even the best clamps require care. Establish a cleaning protocol that involves wiping down jaws with mineral spirits after each use and monthly inspection of pad adhesion. Clamps with digital features need firmware updates quarterly—manufacturers often release pressure calibration improvements and new adhesive profiles. Store clamps hanging rather than stacked to prevent jaw misalignment and keep them in a climate-controlled area if your shop experiences wide humidity swings.
Ergonomic Design Features for Extended Veneer Sessions
A full day of veneer work might involve setting and adjusting hundreds of clamps. Ergonomic design isn’t a luxury—it’s injury prevention and quality assurance rolled into one.
Handle Designs That Reduce Fatigue
Modern handles feature multi-density grips with vibration-damping cores. The shape matters as much as the material: offset handles that keep your wrist in neutral position during tightening reduce strain significantly. Some premium models offer interchangeable handles—short levers for tight spaces, long torque-multiplying handles for heavy pressure applications. The best designs position the handle at a 15-degree angle to the clamp body, aligning natural hand rotation with the adjustment axis.
Balanced Weight Distribution
A well-balanced clamp feels lighter than it actually is. Engineers achieve this by positioning mass near the center of gravity and using tapered throat designs that reduce material where it’s not needed. When evaluating clamps, hold them in the tightening position for 30 seconds. If your hand fatigues, imagine that sensation multiplied across 50 clamps during a complex layup. The difference between balanced and unbalanced designs becomes painfully apparent by lunchtime.
Budget vs. Performance: Finding Your Sweet Spot
The clamp market spans from $15 bargain-bin specials to $400 precision instruments. Smart purchasing focuses on performance per dollar for your specific workflow.
Entry-Level Features Worth Considering
Budget clamps under $50 can serve admirably if you prioritize the right features. Look for solid aluminum construction (avoid pot metal), stainless steel hardware, and replaceable pads. Skip digital features and complex adjustment mechanisms—simple screw-action clamps with good jaw conformity will outperform fancy features poorly implemented. The best values often come from manufacturers who offer a single mechanical design scaled across several sizes, letting you build a matched set without paying for unnecessary complexity.
Professional-Grade Investments
When your reputation depends on flawless results, professional clamps deliver capabilities that justify their cost. The ability to document pressure data for clients, achieve perfect consistency across large production runs, and work faster with less fatigue pays for itself within months. The breakpoint typically occurs around $75-100 per clamp—below this, you’re compromising on precision or durability; above it, you’re paying for specialized features or brand prestige. Focus your premium spending on the 4-6 clamps you’ll use daily, and fill out your collection with simpler models for occasional needs.
Building a Versatile Edge Clamp Collection for 2026
A well-curated clamp collection grows with your skills and projects. Random accumulation leads to duplicates and gaps that compromise your capabilities.
The Core Four Clamp Sizes
Start with these essentials: 12-inch throat edge clamps (2), 24-inch deep-throat models (2), 6-inch precision edge clamps for detail work (4), and 36-inch monsters for large panels (1). This quartet handles 90% of veneer scenarios. Choose models from the same product family to ensure consistent pressure characteristics and pad compatibility. Your 12-inch clamps will see daily use; invest in premium features here. The 36-inch model can be a simpler design since you’ll use it infrequently.
Expansion Strategy for Growing Shops
Add specialty clamps as projects demand them. Radius-edge clamps for curved work, magnetic-backed clamps for metal substrate applications, and low-profile clamps for tight clearances each solve specific problems. Avoid the temptation to buy complete sets—manufacturers often bundle sizes you’ll never use. Instead, purchase individually based on project requirements, and within two years you’ll have a purpose-built collection that perfectly matches your workflow.
Frequently Asked Questions
What’s the ideal number of edge clamps for a typical 24x36 inch panel?
For a panel this size, plan on six clamps—one every 6-8 inches along each long edge, with two additional clamps on the short edges if they’re unsupported. The key is consistent spacing rather than total count. With modern pressure-distributing jaws, you can achieve uniform results with fewer clamps than older designs required.
Can I use F-style bar clamps for veneer work in a pinch?
You can, but you’ll need to modify them. Add 3-inch wide plywood cauls faced with cork to distribute pressure, and never exceed hand-tight force. The risk is concentrated pressure points that show through as dimples or crushed grain. For single small repairs, this works. For quality work, purpose-designed edge clamps are non-negotiable.
How do I clean adhesive residue from clamp pads without damaging them?
For water-based glues, a damp cloth with mild soap works perfectly. For cured polyurethane or epoxy, use a plastic scraper followed by mineral spirits on a rag. Never use metal scrapers or acetone, which degrades pad materials. Replace pads that have become impregnated with glue—they’ll transfer residue to your next project.
What’s the lifespan of a quality edge clamp with daily use?
With proper care, premium clamps last 10-15 years in professional use. The first components to wear are typically the pads (replaceable every 2-3 years) and the adjustment screw threads (5-7 years). Digital sensors have shorter 3-5 year lifespans but are usually replaceable modules. Budget models often show significant play in the mechanisms within 18-24 months.
Do I need different clamps for hot press vs. cold press veneer work?
Yes. Hot press applications (above 150°F) require clamps with high-temperature seals and pads rated for continuous heat exposure. Standard clamps can lose structural integrity or off-gas chemicals at these temperatures. Cold press clamps prioritize moisture resistance and often feature drainage channels for water-based glue squeeze-out. Using the wrong type voids warranties and risks project failure.
How accurate are the pressure readings on digital clamps?
Quality digital clamps using calibrated load cells are accurate to ±0.5 PSI and maintain calibration for 6-12 months. However, the reading reflects force at the sensor location, not necessarily across the entire jaw face. For critical work, verify pressure distribution with pressure-sensitive film annually. Budget digital clamps using strain gauges can be off by 3-5 PSI and drift more quickly.
What maintenance do quick-release mechanisms require?
Clean the release trigger quarterly with compressed air to remove dust and adhesive particles. Apply a single drop of dry-film lubricant to pivot points every six months. Avoid oil-based lubricants that attract dust and contaminate veneer. Test the safety interlock monthly by attempting release under load—it should require deliberate two-button activation.
Can edge clamps be used for bent lamination veneer work?
Standard edge clamps are too rigid for curved forms. However, 2026’s flexible track systems allow edge clamps to mount on curved rails, maintaining perpendicular pressure on radiused edges. For tight curves under 6-inch radius, switch to specialized band clamps or vacuum bagging. The key is maintaining consistent pressure direction relative to the surface normal, which only flexible mounting systems provide.
Are magnetic edge clamps worth the premium for steel substrate work?
For architectural panels or metal furniture, absolutely. Magnetic clamps eliminate the need to drill attachment points and can be repositioned infinitely. Look for models with switchable magnets that release instantly—permanent magnets require prying tools that damage veneers. The best systems offer adjustable magnetic force from 50-300 PSI equivalent, giving you the same control as mechanical clamps.
How do I store edge clamps to prevent jaw misalignment?
Hang clamps individually on pegboard hooks through the throat opening, never by the handle. Store them fully closed but not under tension. For long-term storage, place a 1/8-inch spacer between jaws to prevent pad compression set. If clamps must be stored horizontally, alternate directions to prevent weight from bending the bars. Check jaw parallelism every six months using a straightedge and feeler gauges.
See Also
- 10 Edge Clamps for Veneer Work That Prevent Bubbles in 2026
- 10 Ultimate Edge Clamps for Veneer Pressing Without Bubbles in 2026
- 10 Best Edge Clamps for Seamless Edge-Banding Without Jigs in 2026
- 10 Essential Edge Clamps for Perfectly Aligned Glue-Ups in 2026
- 10 Essential Edge Clamps Every Furniture Maker Needs in 2026